1.
Put in the material palette the foreground on #c0c0c0 and the background
on black.
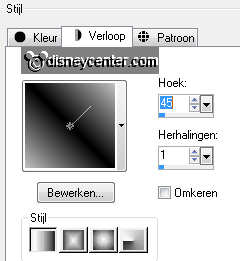
Make from the foreground a gradient linear – with this setting.
2.
File – open – new transparent image 700x500.
Activate flood fill tool – and fill the layer with the gradient.
3.
Layers – duplicate.
Image – mirror.
4.
Put in the layer palette the opacity of this layer on 50.
Layers – merge – merge down
5.
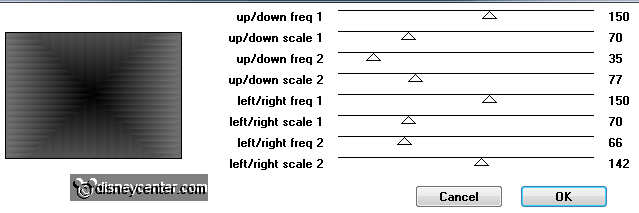
Effects – plug-ins – Ecosse – Flutter – with this setting – click OK.
Effects – Edge effects – enhance more.
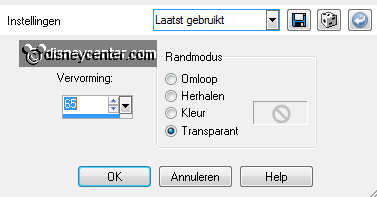
Effects – geometrics effects – perspective horizontal – with this setting.
6.
Activate the magic wand – setting below – select the light color.

Click on the delete key.
Selections – select none.
7.
Image – resize 65% - all layers not checked.
Activate move tool and put this layer against the left side.
8.
Layers – duplicate.
Image – mirror.
9.
Layers – duplicate.
Image – free rotate - 90˚ left.
Put this in the middle at the top.
10.
Layers – duplicate.
Image – flip.
11.
Go to freehand selection tool – from point to point – and make a selection as
below.
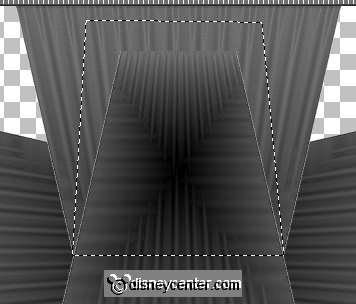
Click on the delete key.
Selections - select none.
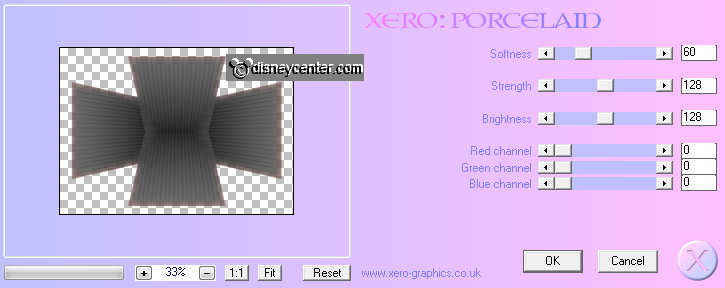
12.
Layers – merge – merge all visible.
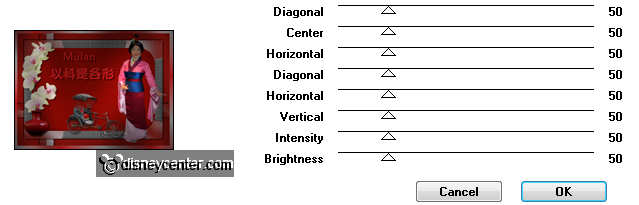
Effects – plug-ins – Xero – Porcelain – with this setting – click OK.
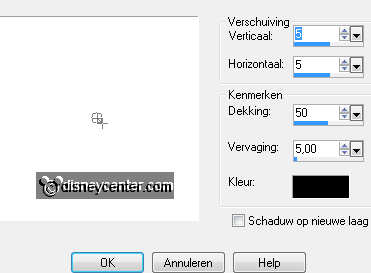
Effects – 3D Effects – drop shadow – with this setting.
13.
Layers – new raster layer.
Layers – arrange – merge down.
14.
Put in the material palette the background on #850903.
Make from the foreground a gradient linear – with this setting.
Fill with the flood fill the layer with the gradient.
15.
Adjust – blur – Gaussian blur – radius on 30.
Effects – Distortion Effects – Pixelate – with this setting.

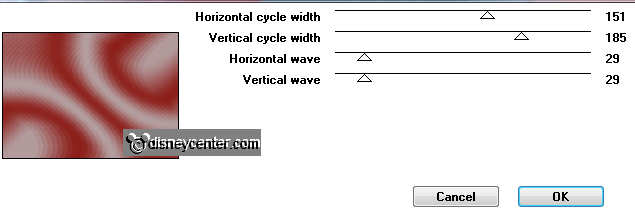
16.
Effects – plug-ins – Freeware Filters – Sinus-waves – with this setting - click OK.
Effects – Image effects – seamless tiling – default setting.
17.
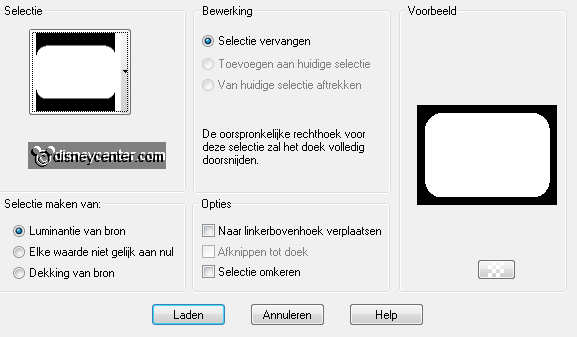
Activate the top layer.
Selections – load/saver selection – load selection from disk – look
Emmymulan1 – with this setting.
18.
Layers – new raster layer.
Fill the selection with the background color (#850903).
Selections – select none.
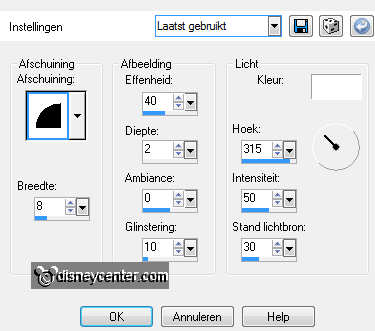
Effects – 3D Effects – Inner Bevel – with this setting.
19.
Make raster1 active.
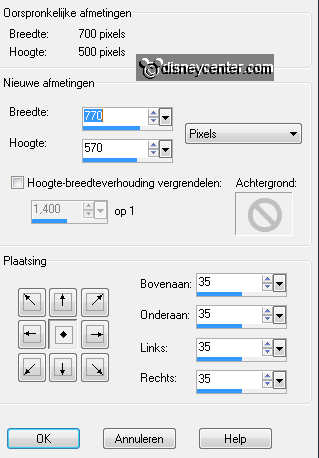
Image – canvas size – with this setting.
Activate the magic wand – setting is right – select the transparent border.
20.
Layers – new raster layer.
Fill the selection with gradient linear – setting is right.
Selections – select none.
21.
Effects – plug-ins - Teph’s Tricks (tephrasooffwrap)- Offset Wrap – with
this setting - click OK.
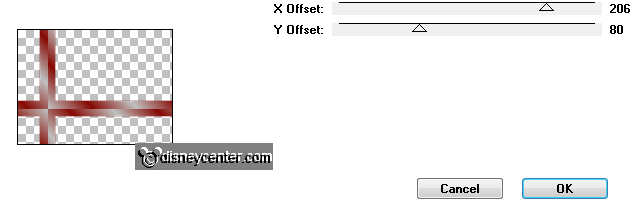
Effects – 3D Effects – drop shadow – setting is right.
Repeat the drop shadow now with vert. and horz. at -5.
Layers – arrange – move down.
22.
Make raster 1 active.
Effects – 3D Effects – drop shadow – setting is right
Repeat the drop shadow now with vert. and horz. at 5.
23.
Activate the bottom layer.
Layers – new raster layer.
Fill with the flood fill the layer with the background color (850903).
Effects – plyg-ins – Penta.com – Dot and Cross – with this setting -
click OK.
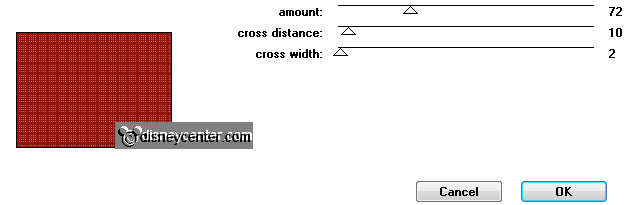
Layers – arrange – move down.
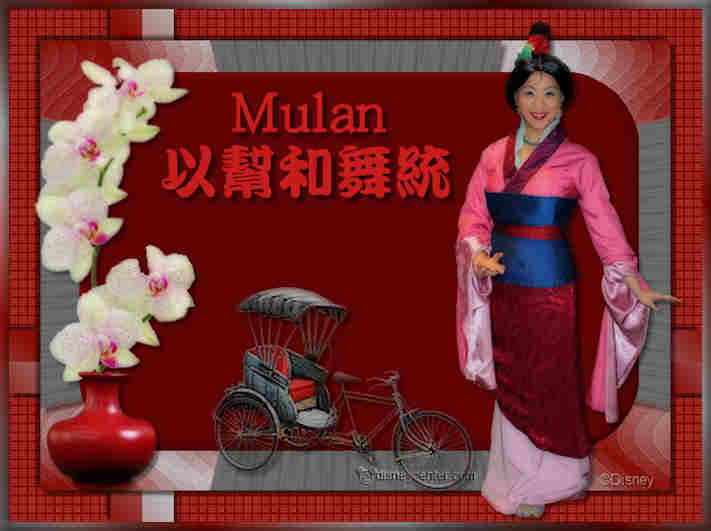
24.
Make the top layer active.
Activate the tube emmy-orchid – edit – copy.
Edit - paste as a new layer on the image.
Activate move tool – and put the tube to the left side at the bottom –
see example.
Effects – 3D Effects – drop shadow – setting is right
25.
Activate the tube rickshaw – edit – copy.
Edit - paste as a new layer on the image.
Put this with the move tool in the middle at the bottom - see example.
Effects – 3D Effects – drop shadow – setting is right.
26.
Activate the tube mulan2 – edit – copy.
Edit - paste as a new layer on the image.
Move this with the move tool to the right side.
Effects – 3D Effects – drop shadow – setting is right.
27.
Activate text tool – with this setting.

Put in the material palette the background color on #c51c1c and lock the
foreground.
Write MULAN – convert to raster layer.
Effects – 3D Effects – drop shadow – setting is right.
Place this in the middle of the image – see example.
28.
Change de font in text tool – furthers everything stays good.
Write Mulan – convert to raster layer.
Effects – 3D Effects – drop shadow – setting is right.
Place this above the other text- see example.
29.
Layers – new raster layer – put your watermark into the image.
Image – add border – symmetric – 10 pixels – color white.
30.
Activate the magic wand – setting is right – select the white border.
Open in the material palette the foreground.
Fill with the flood fill the selection with the gradient linear – setting
is right. You may keep this background or use this #850903.
Effects – plug-ins – Graphics Plus – Cross Shadow – with this setting -
click OK.
Effects – 3D Effects – Inner Bevel – setting is right.
31.
Image – resize 90% - all layers checked.
File – export – JPEG Optimizer.