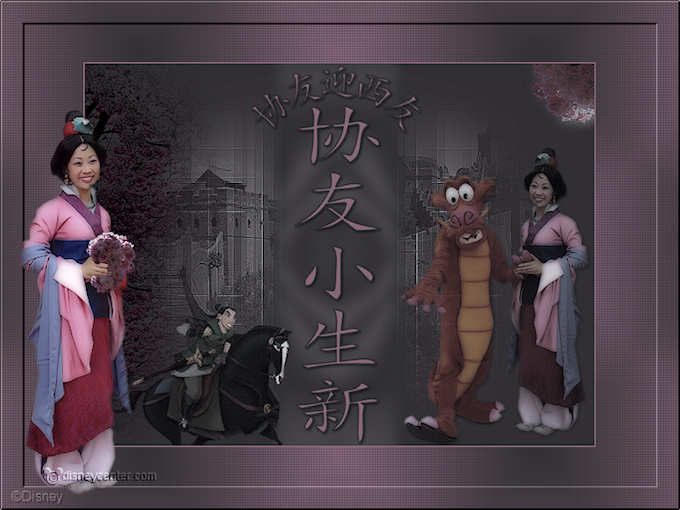
Mulan and Mushu
Foreground color #312f34 and background color #77767a
1.
Open new transparent image 800x600.
Fill this with the foreground color.
Selections - select all.
2.
New raster layer.
Copy mulanmuur and paste into selection
Selections - select none.
3.
Layers - new mask layer - look masklinette1 - with this setting.
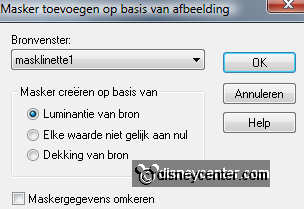
Layers - merge- merge group.
Effects - Edge Effects - enhance.
Set the Blend mode of this layer at luminance (Legacy)
4.
Duplicate this layer - Set the Blend mode back to normal.
Set the opacity of this layer at 75.
Layers - merge - merge down.
5.
Copy mistedprunus and paste as a new layer on the image.
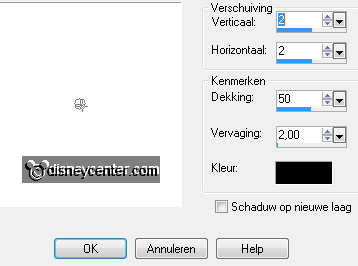
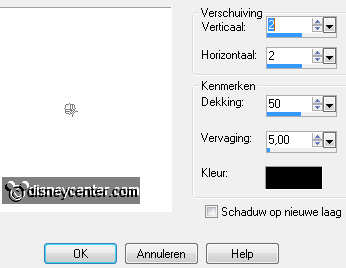
Effects - Image Effects - offset - with this setting.
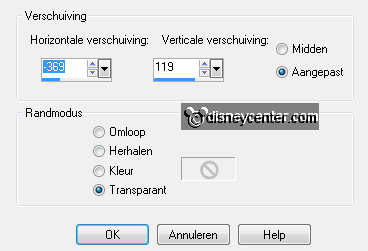
Set the Blend mode of this layer at burn.
Set the opacity of this layer at 24.
Effects - Edge Effects - enhance.
Duplicate this layer - move this at the bottom.
6.
Copy mulan and paste as a new layer on the image.
Effects - Image Effects - offset - with this setting.
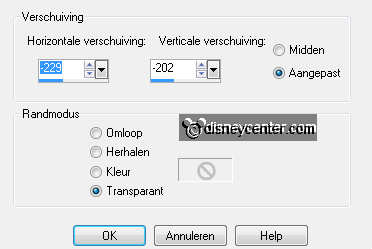
Set the Blend mode of this layer at luminance (Legacy) and Set
the opacity of this layer at 75.
7.
Duplicate this layer - Set the Blend mode back to normal.
Set the opacity of this layer at 15.
Effects - 3D Effects - drop shadow - with this setting.
8.
New raster layer.
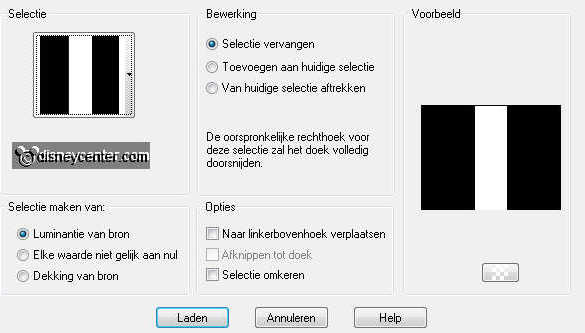
Selectiobs - Loas/Save selection - load selection from disk -
look emmymulan- with this setting.
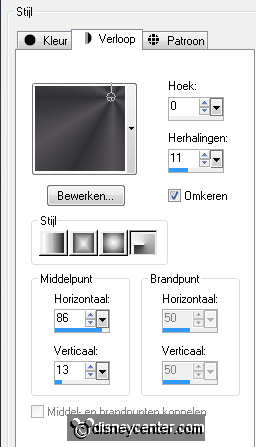
Fill this with gradient radial - with this setting.
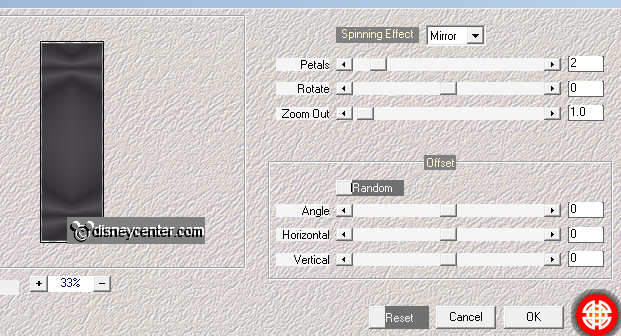
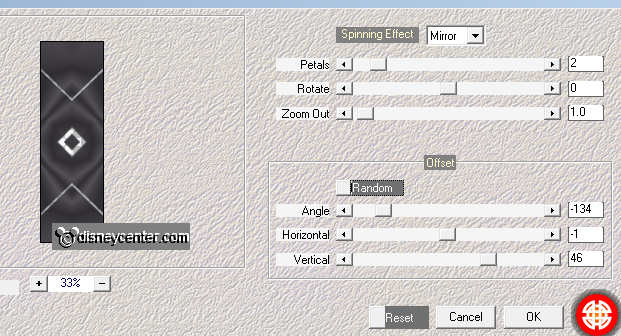
Effects - Mehdi - Kaleidoscope 2.1 - with this setting.
9.
Repeat Mehdi - Kaleidoscope 2.1 maar nu with this setting.
Layers - arrange - move 2 times down.
Adjust - blur - Gaussians blur at 10.
10.
Make the top layer active.
Copy mushuenmulan and paste as a new layer on the image.
Place this at the bottom right.
Set the Blend mode of this layer at luminance (Legacy) and Set
the opacity of this layer at
75.
11.
Duplicate this layer.
Set the Blend mode at multiply - and Set the opacity of this
layer at 44.
Effects - 3D Effects - drop shadow - with this setting.
12.
Copy word-art-mulan and paste as a new layer on the image.
Place this at the rectangle.
Copy word-art-mushu and paste as a new layer on the image.
Place this above the word-art-mulan.
13.
Copy prunes and paste as a new layer on the image.
Image - free rotate - with this setting.
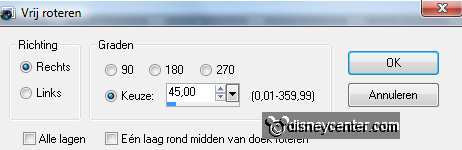
Image - resize 75% - all layers not checked.
Slide it to the upper right corner- see example.
14.
Set the Blend mode of this layer at luminance (Legacy)
Duplicate this layer - Set the Blend mode back to normal.
Set the opacity of this layer at
15.
Make the original tube layer active.
Adjust - blur - Gaussians blur at 10.
Effects - Edge Effects - enhance.
16.
Image - add border 2 pixels - symmetric - color
#856778.
Image - resize 75% - all layers checked.
Put this image away for this moment.
17.
Open new transparent image 800x600.
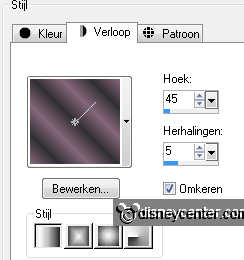
Fill this with gradient linear - with this setting.
Adjust - blur - Gaussians blur at 10.
Duplicate this layer - image - mirror.
Layers - merge - merge down.
18.
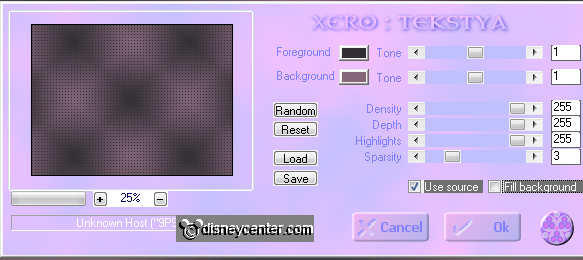
Effects - Xero - Tekstya - with this setting.
Copy the image that you have put away and paste as a new
layer on the image.
Effects - BorderMania - Frame #2 - with this setting.

19
Copy mulan1 and paste as a new layer on the image.
Set the Blend mode of this layer at luminance (Legacy)
Duplicate this layer - Set the Blend mode back to normal - Set the
opacity of this layer at 50.
20.
New raster layer - put your watermark into the image.
Layers - merge - merge all visible.
Image - resize 85% - all layers checked.
File - export - JPEG optimizer.

