1.
File – open new transparent image 700x550.
Put in the material palette the foreground on #000000 and the background on #5c5c5c.
2.
Make from the foreground a gradient sunburst – with this setting.

Activate flood fill tool.
Fill the layer with the gradient.
3.
Layers – duplicate.
Image – flip.
Put in the layer palette the opacity of this layer on 50.
Layers - merge – merge down.
4.
Layers – new raster layer.
Put in the material palette the foreground back on color.
Fill the layer with the foreground color.
5.
Layers – load/save mask – load mask from disk – look Emmymask5 – with this
setting.

Layers – merge – merge group.
6.
Go to selection tool – selection – rectangle - and make a rectangle as below .

Layers – new raster layer.
7.
Activate the image paper3 – edit - copy.
Paste - as a new layer on the image.
8.
Edit – paste into selection.
Selections – select none.
Put in the layer palette the blend mode on Luminance (Legancy).
9.
Activate the tube wolken – edit - copy.
Paste - as a new layer on the image.
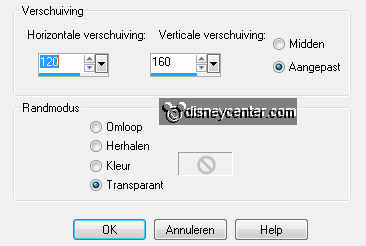
10.
Effects– Image effects – Offset – with this setting.
Go to move tool – click on the triangle – click on selection -
see below.
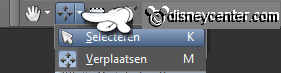
And pull the clouds all the way to the left side.
Layers – duplicate.
11.
Activate the tube maan – edit - copy.
Paste - as a new layer on the image.
Activate move tool – move the tube left at the top – see example.
12.
Activate the tube hwboom – edit - copy.
Paste - as a new layer on the image.
Move the tube to the left side – see example.
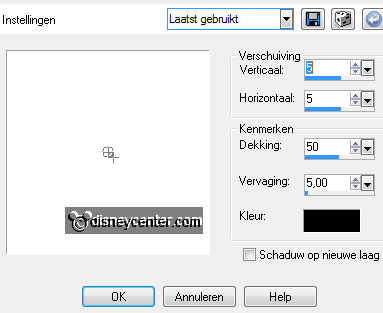
Effects – 3D Effects – drop shadow – with this setting.
13.
Activate the tube paalmetkraai – edit - copy.
Paste - as a new layer on the image.
Move the tube to the right side – see example.
Effects – 3D Effects – drop shadow – setting is right.
14.
Activate the tube michalloween3 – edit - copy.
Paste - as a new layer on the image.
Move the tube about near to the second pole left – see example.
Effects – 3D Effects – drop shadow – setting is right.
15.
Activate the tube kraai – edit - copy.
Paste - as a new layer on the image.
Move the tube somewhere in the tree.
16.
Activate the word-art come in…- edit - copy.
Paste - as a new layer on the image.
Move the word-art left at the bottom – see example
17.
Layers – new raster layer – put your watermark into the image.
Make raster 3 active.
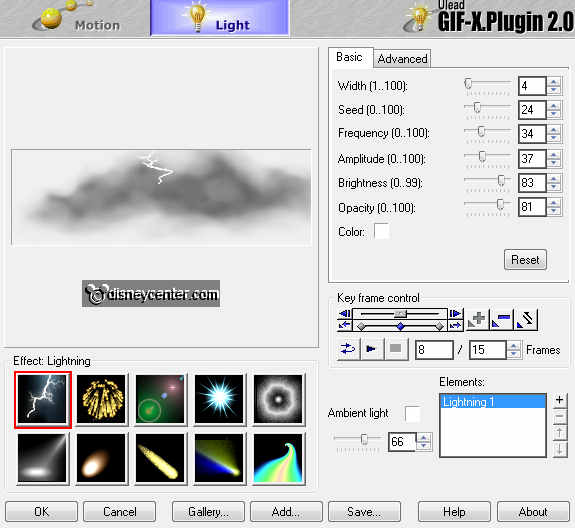
18.
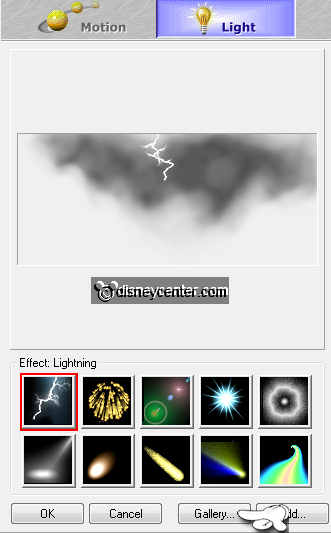
Effects – plug-ins –Ulead Effect Gif-X 2.0 – click on Light – click OK - with
this setting.
Lock raster 3 - Make copy of raster 3 active.
19.
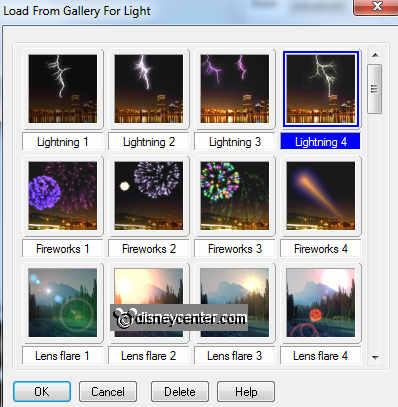
Effects – plug-ins –Ulead Effect Gif-X 2.0 – click on Light – click on
Gallery – see belowr.
Click in Gallery on lightning 4 –click OK – click OK.
20.
Make the bottom layer active.
Selections – select all.
Selections – modify – selections – contract 5 pixels.
21.
Layers – new raster layer.
Fill the selection with the background color.
Selections – invert.
22.
Effects – 3D Effects – drop shadow – setting is right.
Repeat the drop shadow – now with vert. and horz. on -5.
Selections – select none.
23.
Make the bottom layer active.
Lock in the layer palette copy of raster 3.
Edit - copy merged.
24.
Open animation shop – edit – paste as a new animation.
Back in PSP – lock raster 3 and open copy of raster 3.
Edit - copy merged.
25.
In AS – edit – paste after active frame.
Edit - select all.
Animation – Frame Properties – put this on 20.
26.
Animation – resize format of animation 85% - with this setting.
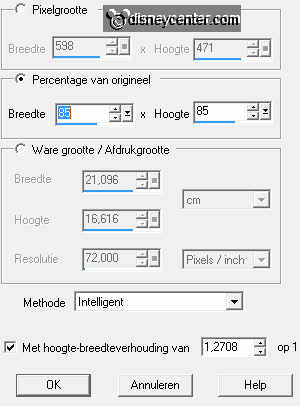
File – save as – give name – click 3 times at next and than at finish.


