1.
File - Open - new transparent image 750x550
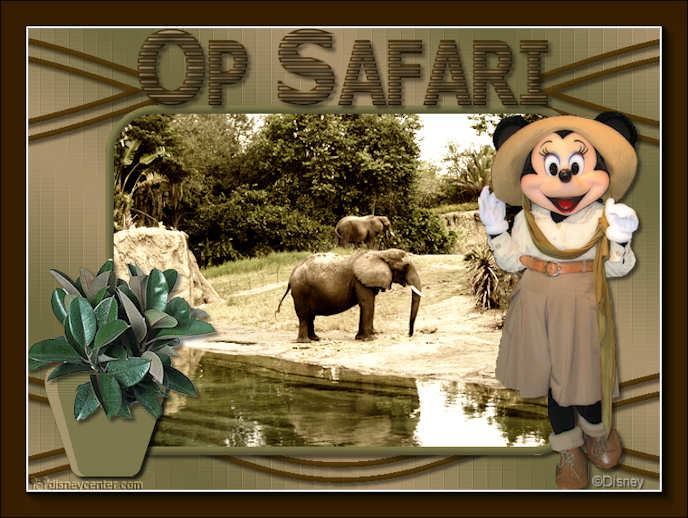
Put in the material palette the foreground on #6d6a40 and the background on #bea37c.
Make from the foreground a gradient linear – with these setting.
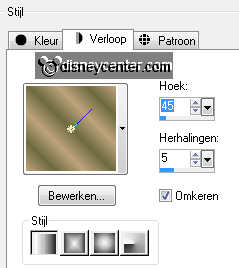
Activate flood fill tool and fill the layer with the gradient.
2.
Adjust – blur – Gaussian Blur – radius on 30.
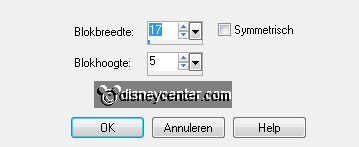
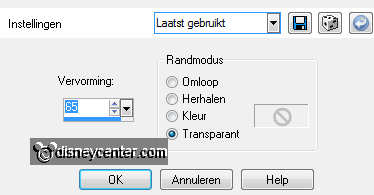
Effects – Distortion Effects – Pixelate – with these setting.
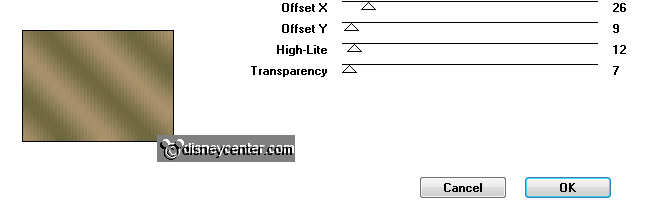
Effects – plug-ins – Graphic Plus – Emboss – with these setting.
3.
Put in the material palette the foreground back to color and put this on
#4f360b.
Layers – new raster layer.
4.
Selections – load/save selection – load selection from disk – look Emmyopsafari
– with these setting.

Fill with the flood fill the selection with the foreground color.
Selections – select none.
5.
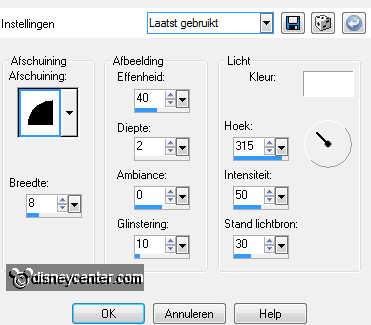
Effects – 3D Effects – Inner Bevel – with these setting.
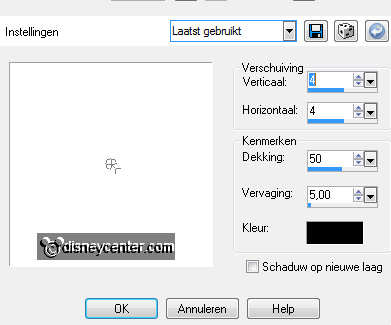
Effects – 3D Effects – drop shadow – with these setting.
6.
Layers – new raster layer.
Put in the material palette the foreground back to #6d6a40
Activate the flood fill and fill the layer with the foreground color.
7.
Effects – plug-ins – Penta.com – Rounded Corner – with these setting.
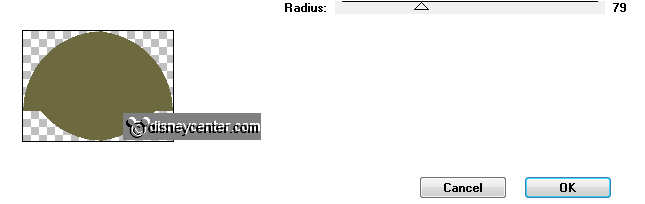
Image – resize 75% - all not checked.
Layers – duplicate.
Selections – select all.
8.
Selections – float – selections – defloat.
Activate the image safariEmmy – edit – copy.
Edit - paste into selection.
Selections – select none.
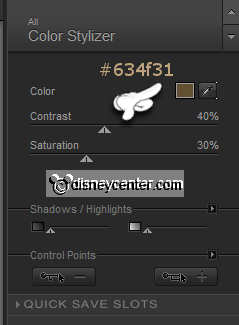
9.
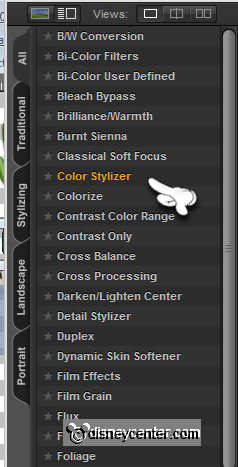
Effects – plug-ins – Color Efex Pro 3.0 Complete – Color Stylizer – with these
setting.
Layers – arrange – move down.
10.
Selections – select all.
Selections – float – selections – defloat.
11.
Layers – new raster layer.
Fill with the flood fill the layer with the foreground color.
Selections – modify – contract 10 pixels.
Click on the delete key.
12.
Activate the magic wand – with these setting below – and select the border.

Effects – 3D Effects – Inner Bevel –setting is right.
Layers– merge – merge down.
Effects – 3D Effects – drop shadow – setting is right.
13.
Activate raster 3.
Effects – plug-ins – Penta.com – VTR2 – with these setting.
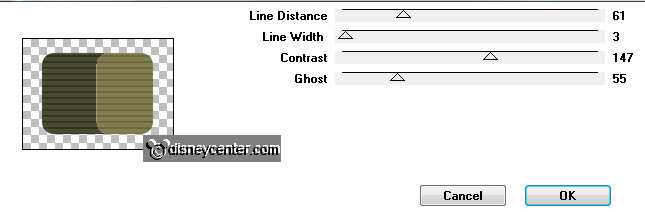
Image – resize 60% - all layers not checked.
14.
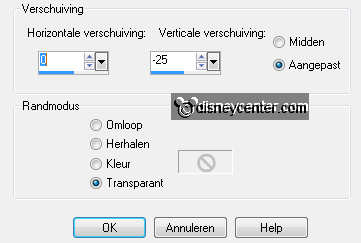
Effects – Geometrics effects – Perspective - vertical – with these setting.
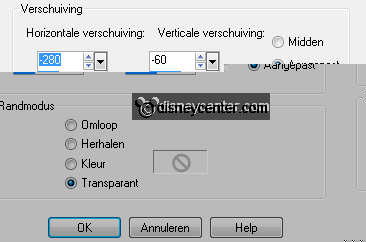
Effects – Image effects – offset – with these setting.
Effects – 3D Effects – drop shadow – setting is right.
15.
Activate the tube plant1 – edit – copy.
Edit - paste as a new layer on the image.
16.
Move this with the move tool on the flower pot – see example.
Effects – 3D Effects – drop shadow – setting is right.
Layers – merge – merge down.
17.
Activate in the layer palette – copy of raster3.
Effects – Image effects – offset – with these setting.
18.
Make the top layer active.
Activate word-art-Emmyopsafari – edit - copy.
19.
Edit - paste as a new layer on the image.
Move this with the move tool – in the middle at the top – see example.
20.
Make raster 2 active.
Go to selection tool – selection – rectangle – and make a selection as below.
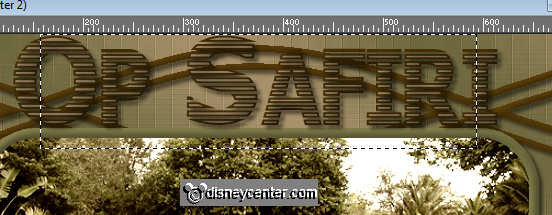
Click on the delete key.
Selections – select none.
21.
Make the top layer active.
Activate the tube minsafari – edit - copy.
Edit - paste as a new layer on the image.
22.
Image – mirror.
Move this with the move tool to the right side – see example.
Effects – 3D Effects – drop shadow – setting is right.
23.
Layers – new raster layer – put your watermark into the image.
Layers – merge – merge all.
24.
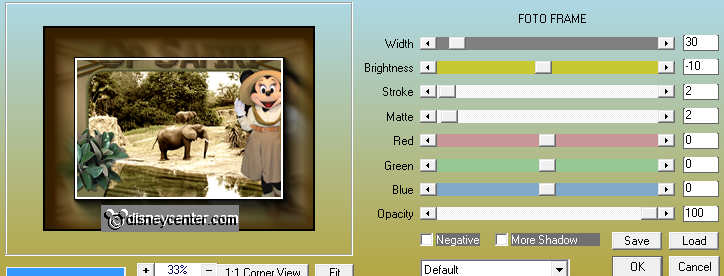
Image – add border – symmetric – 30 pixels – color #4f360b.
Effects – plug-ins – AAA Frames – Foto Frame – with these setting.
25.
Image – resize – 85% - all layers checked.
File – export – JPEG Optimizer.