1.
File - open new transparent image 900x700.
Set in the material palette the foreground color at
#939395
and the background color at #cf3d17.
Make from the foreground a gradient
radial - with this setting.

2.
Activate flood fill tool - fill the layer with
the gradient..
Layers - duplicate.
Image - mirror.
Set in the layers palette the opacity to 50.
Layers - merge - merge down.
3.
Effects - plug-ins - Simple - Blintz.
Effects - plug-ins - Simple - Pizza Slice Mirror
Effects - plug-ins - Simple - 4Way Average.
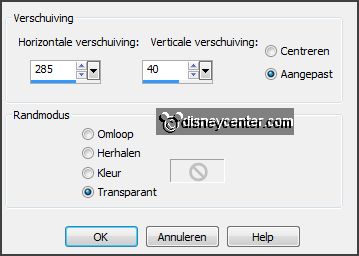
4.
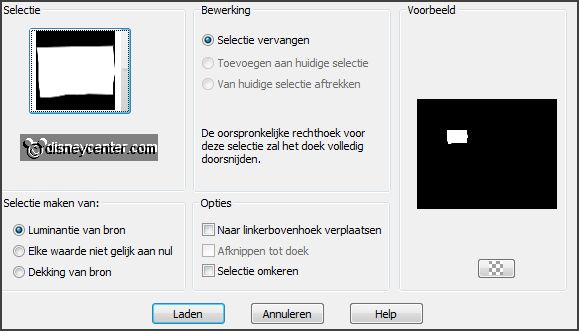
Selections - load/save selection - load selection from disk - look Emmyoranje -
with this setting.
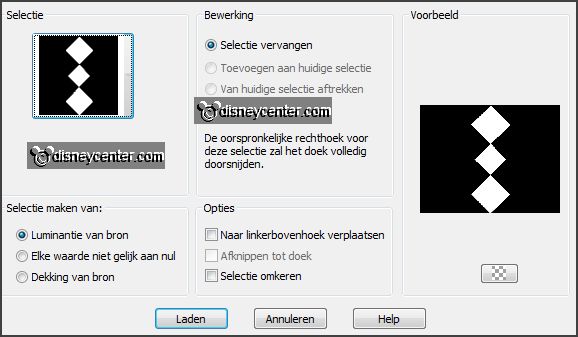
Set the foreground back to color.
Layers - new raster layer.
Fill the selection with the foreground color.
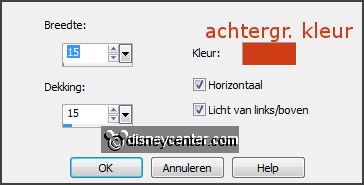
Effects - Texture effects - Blinds -
with this setting.
Selections - select none.
5.
Activate the bottom layer.
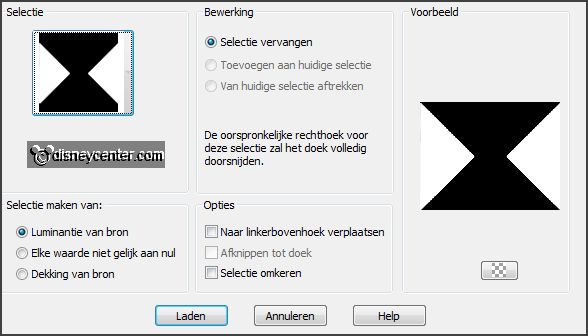
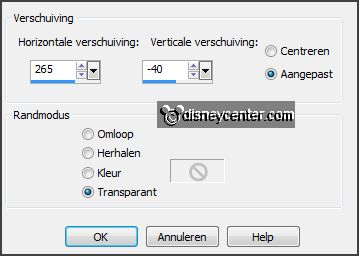
Selections - load/save selection - load selection from
disk - look Emmyoranje1 -
with this setting
Effects - Distortion effects - pixelate -
with this setting
Effects - Edge effects - enhance.
Selections - select none.
Activate the top layer.
6.
Layers - merge - merge down.
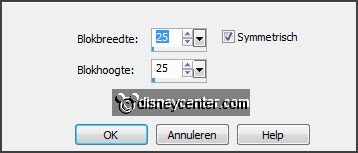
Image - add border 2 pixels - symmetric -
foreground color.
Image - add border 25 pixels - symmetric -
background color.
Image - add border 2 pixels - symmetric -
foreground color.
7.
Activate the magic wand -
with this setting -
and select the width border.

Change the gradient in radial -
with this setting.

Fill the selection with the gradient.
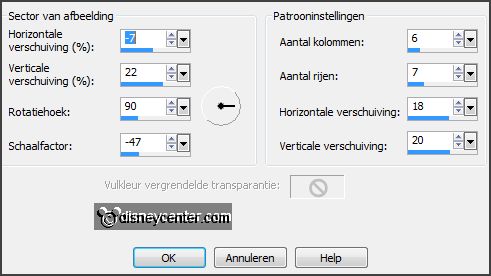
Effects - Reflection-effects - pattern -
with this setting.
Effects - Edge effects -
enhance more.
Promote selection to Layer.
Selections - select none.
8.
Layers - duplicate.
Image - mirror.
Set in the layers palette the opacity to 50.
Layers - merge - merge down.
Effects -3D Effects - Inner Bevel -
with this setting.

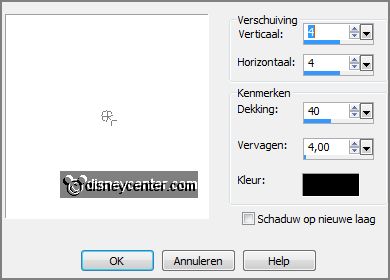
Effects - 3D Effects - drop shadow -
with this setting.
9.
Selections - select all.
Selections - modify - contract 29 pixels.
Activate the bottom layer.
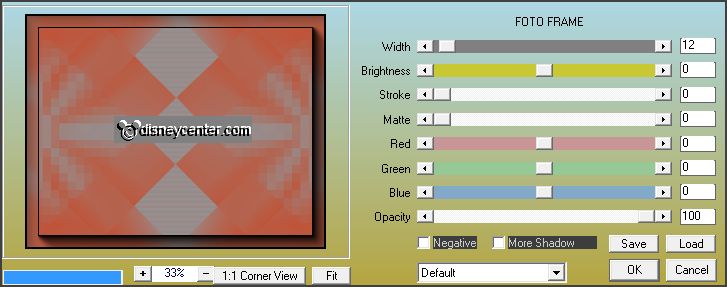
Effects - plug-ins -
AAA Frames - Foto Frame -
with this setting
- click
OK.
Selections - select none
10.
Activate the tube olympicrings - edit - copy.
Edit - paste as a new layer on the image.
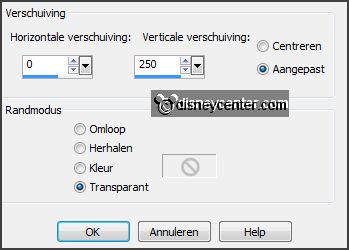
Effects - Image effects - offset -
with this setting.
11.
Activate text tool -
with this setting.

Change the foreground color in #c3d0d6 and the background
color in #2a70ce.
Write in capital letters S - convert to raster layer.
Write in capital
letters O -
convert to raster layer.
Write in capital
letters C -
convert to raster layer.
Write in capital
letters H -
convert to raster layer.
Write in capital
letters I -
convert to raster layer.
12.
Activate move tool and place the letters in the Olympicrings - see example.
Lock the 3 bottom layers.
Layers - merge - merge all
visible layers.
Effects - 3D Effects - drop shadow -
setting is right.
Open the 3 bottom layers.
13.
Activate the tube sochi -
edit - copy.
Edit - paste as a new layer on the image.
Effects - Image effects - offset
-
with this setting.

Effects - 3D Effects -
drop shadow -
setting is right.
14.
Activate the tube micoranje3 -
edit - copy.
Edit - paste as a new layer on the image.
Image - resize 75% - all layers not checked.
Effects - Image effects - offset
-
with this setting.
Effects - 3D Effects -
drop shadow -
setting is right.
15.
Activate the tube micoranje2 -
edit - copy.
Edit - paste as a new layer on the image.
Image - resize
75% - all layers not checked.
Effects - Image effects - offset
-
with this setting.
Effects - 3D Effects -
drop shadow -
setting is right.
16.
Activate the tube micoranje1 -
edit - copy.
Edit - paste as a new layer on the image.
Image - resize
75% - all layers not checked.
Effects - Image effects - offset
-
with this setting.
Effects - 3D Effects -
drop shadow -
setting is right.
Layers - merge - merge down
- and 1 more time.
17.
Activate the tube medaille3 -
edit - copy.
Edit - paste as a new layer on the image.
Place this on the right mickey. Make sure that it is a good match.
Effects - 3D Effects -
drop shadow -
setting is right.
18.
Activate the tube medaille2 -
edit - copy.
Edit - paste as a new layer on the image.
Place this on the left mickey.
Make sure that it is a good match.
Effects - 3D Effects -
drop shadow -
setting is right.
19.
Activate the tube medaille1 -
edit - copy.
Edit - paste as a new layer on the image.
Place this on the
mickey in the middle.
Make sure that it is a good match.
Effects - 3D Effects -
drop shadow -
setting is right.
Layers - merge - merge down
- and 2 more times.
20.
Activate the tube vlag -
edit - copy.
Edit - paste as a new layer on the image.
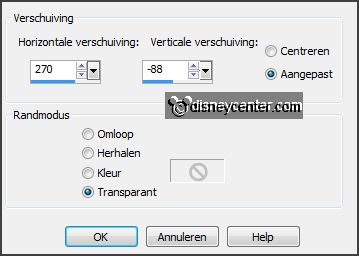
Effects - Image effects - offset
-
with this setting.

Layers - duplicate.
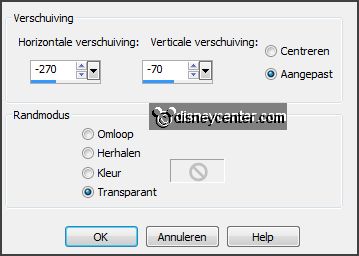
Effects - Image effects - offset
-
with this setting.
Layers - duplicate.
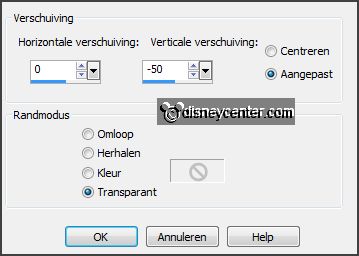
Effects - Image effects - offset
-
with this setting.
Layers - merge - merge down
- and one more time.
Layers - arrange - move down.
21.
Selections - load/save selection - load selection from
disk - look Emmyoranje2 -
with this setting.
Edit - cut.
Layers - new raster layer.
Edit - paste in selection.
22.
.Selections -
load/save selection - load selection from disk - look
Emmyoranje3 -
setting is right.
Activate raster 4.
Edit - cut.
Activate raster5.
Edit - paste in selection.
23.
.Selections -
load/save selection - load selection from disk - look
Emmyoranje4 -
setting is right.
Activate raster 4.
Edit - cut.
Activate raster5.
Edit - paste in selection.
Selections - select none.
24.
Layers - duplicate.
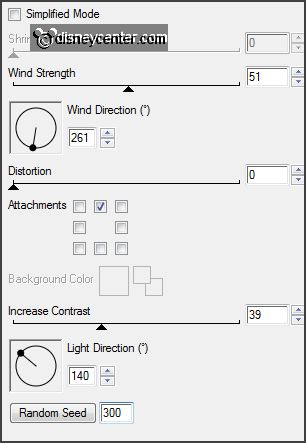
Effects - plug-ins-
Xenoflex 2.0 - Flag -
with this setting
- click OK.
Activate copy of raster 5.
Repeat the plug-in Xenoflex - Flag - setting is right - click at Random Seed
- click OK.
Lock this layer.
25.
Activate the top layer.
Layers - new raster layer - put your watermark into the image.
Image - resize 85% - all layers checked
26.
Activate the bottom layer.
Edit - copy merged.
Open Animatie Shop - paste as a new animation.
27.
Back in PSP.
Lock raster 5 and open copy of raster 5.
Edit - copy merged.
In AS - paste after active frame.
28.
File- save as - give name - click 3 times at next and than at finish.