
This
Tutorial is copyrighted to the Tutorial Writer, © Emmy Kruyswijk October 2011.
This Tutorial
may
not be forwarded, shared or otherwise placed on any Web Site or group without written
permission from
Emmy Kruyswijk
Do you want to link my lessons?
Please send
me a mail.
Materials:

1 misted tube, 3
tubes, 1 word-art all made by me, 2 tubes unknown,
filter: FM Tile Tools - Blend Emboss, Download
here
Put the plug-ins in the folder plug-ins.
Open the
tubes and word-art in PSP
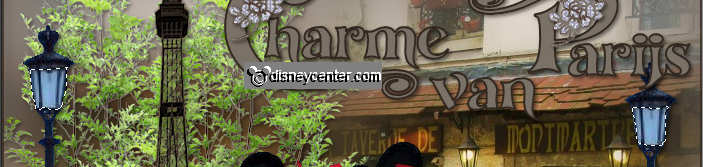
Charm of Paris
Foreground color #847972 and background color #332921
1.
Open new transparent image 700x600.
Fill this with the foreground color.
Copy montmatre and paste as a new layer on the image.
Place this right at the top.
Duplicate this layer - image - mirror.
2.
Layers - merge - merge down.
Adjust - Blur - Gaussian blur - radius 15.
Duplicate this layer - image - flip.
Copy montmatre and paste as a new layer on the image.
Place this right - move it up a little.
3.
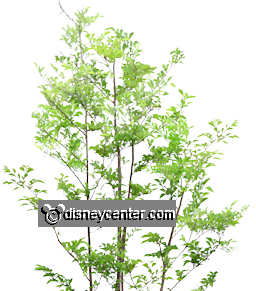
Copy tree and paste as a new layer on the image.
Place this about 200 pixels of the left side.
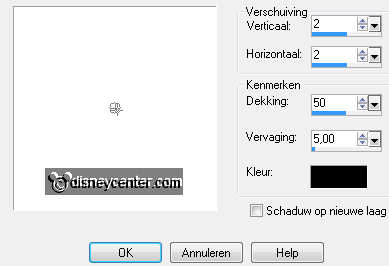
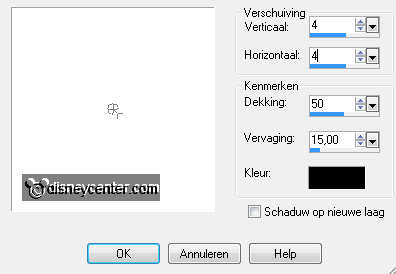
Effects - 3D Effects - drop shadow - with this setting.
Duplicate this layer.
Place this left of the other tree.
4.
Copy fr.lantaarn and paste as a new layer on the image.
Place this 50 pixels of the left side.
Give the same drop shadow as in point 3.
Duplicate this layer - place this at the right side.
Layers - merge - merge down.
5.
Copy EifelTower and paste as a new layer on the image.
Image - resize 80% - all layers not checked.
Place this for the trees - 50 pixels of the bottom.
Give the same drop shadow as in point 3.
Effects - FM Tile Tools - Blend Emboss - default setting .
Go to eraser tool - and erase the trees below the Eifel Tower - by
standing at the tree layers.

6.
Activate the top layer.
Go to the tree tube - go to crop tool - and make the tree 300 pixels high. see
below.
Copy this part and paste as a new layer on the image.
Place the bottom tree - equal to the bow of the Eifel Tower.
Layers - arrange - move down.
Give the same drop shadow as in point 3.
7.
Copt mmparijs and paste as a new layer on the image.
Layers - arrange - bring to top.
Place this in the middle at the bottom.
Give the same drop shadow as in point 3.
8.
Copy 3vsPlant and paste as a new layer on the image.
Image - resize 75% - 1 time 65% - all layers not checked.
Adjust - sharpness - sharpen.
Place this for the lantern at the left side.
Give the same drop shadow as in point 3.
9.
Copy fransemand and paste as a new layer on the image.
Image - resize 65% - all layers not checked.
Place this for the plat at the left side.
Give the same drop shadow as in point 3.
Layers - merge - merge down.
10.
Copy word-art Parijs and paste as a new layer on the image.
New raster layer - put your watermark into the image.
Selections - select all - selections - modify - contract 2 - selections - invert.
Fill this with the background color.
Selections - select none.
Image - resize 85% - all layers checked.
If you do not want to make animation - save your image as a jpg.
11.
Now we make the animation.
Go to the layer with the merged lantern. (by me raster5)
Go to selection tool - Freehand selection - free hand or point to point.
Select the parts in the 2 lanterns.
Duplicate this layer.
12.
Lock the copy of raster 5 - make raster 5 active.
Adjust - Brightness and contrast - brightness/contrast - with this setting.
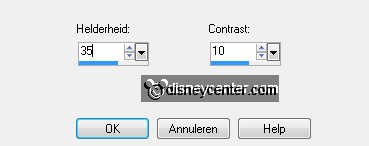
Open copy of raster 5 and lock raster5. Make copy layer active.
Adjust - Brightness and contrast - brightness/contrast - brightness 70 -
contrast is the same.
Selections - select none.
13.
Make the layer montmatre (raster3) active.
Go to selection tool - Freehand selection - free hand or point to point.
Select the parts in the 2 lanterns at the wall. see below.
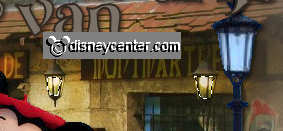
Duplicate this layer.
14.
Lock copy of raster3 - make raster 3 active
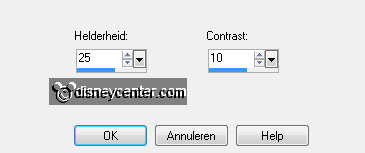
Adjust - Brightness and contrast - brightness/contrast - with this setting.
Open copy of raster3 and lock raster3. Make copy layer active.
Adjust - Brightness and contrast - brightness/contrast - brightness 50 -
contrast is the same.
Selections - select none.
15.
Open animation shop.
Lock the 2 copy layers and open raster 3 and raster 5.
Edit - copy merged.
In AS - paste as a new animation.
Back in PSP - Lock raster 3 and raster 5 and open the 2 copy layers.
Edit - copy merged.
In AS - paste after active frame.
Edit - select all.
16.
Open in AS - animation glitter - edit - select all.
copy - paste into selected frame - place this in the middle of the rose from
word-art at the letter C
paste into selected frame - place this in the middle of the rose from
word-art at the letter P
I would just have a frame around - if you do not want, do the following -
otherwise skip to step 17.
File - save as - give name - click 3 times at next and than at finish.
17.
File - export frames - to Paint Shop Pro.
Back in PSP - new raster layer - arrange - send to bottom.
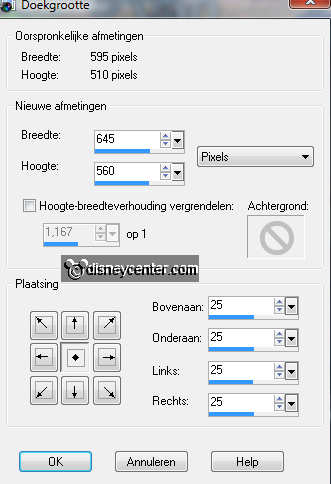
Image - canvas size - with this setting.
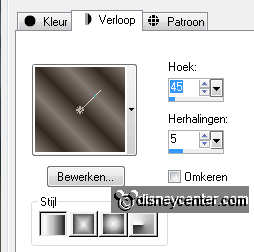
Fill this with gradient linear - with this setting.
18.
Selections - select all - selections - modify - contract 25.
Effects - 3D Effects - drop shadow - with this setting.
Repeat the drop shadow, but now with -4.
19.
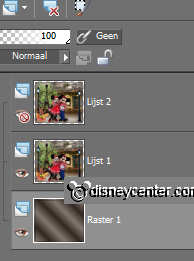
Lock now frame 2 - see below.
Edit - copy merged.
Back in AS - paste as a new animation.
Back in PSP - lock frame 1 and open frame 2
Edit - copy merged.
Back in AS - paste after active frame.
File - save as - give name - click 3 times at next and than at finish.
Ready is the tag
I hope you like this tutorial.
greetings Emmy,
Tested by Bep
Tutorial written
12-10-2011
