Foreground color #e3bd72 and background color black.
1.
Open new transparent image 650x500.
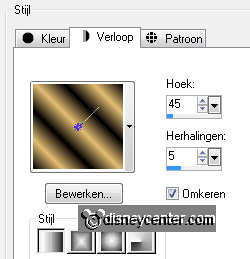
Fill this with the gradient linear - with this setting.
Duplicate this layer - Image - mirror.
Put the opacity of this layer at 50.
Layers - merge - merge down.
2.
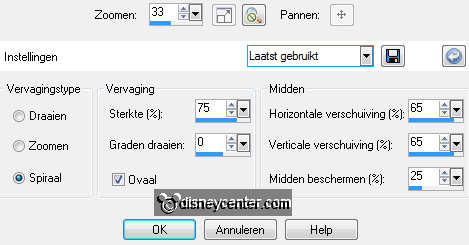
Adjust - blur - radial blur - with this setting.
Duplicate this layer - Image - mirror.
Put the opacity of this layer at 50.
Layers - merge - merge down.
3.
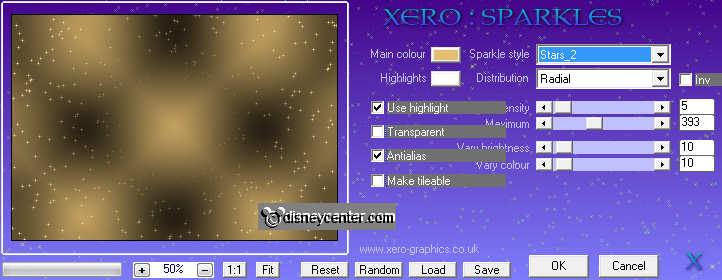
Effects - Xero - Sparkles - with this setting.
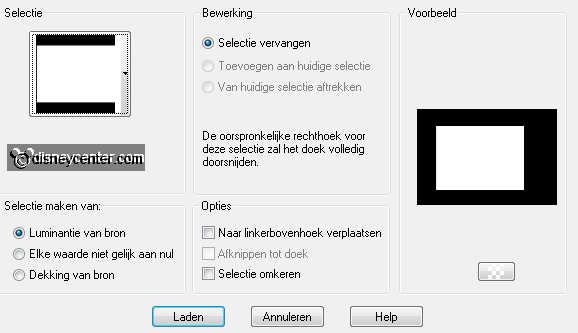
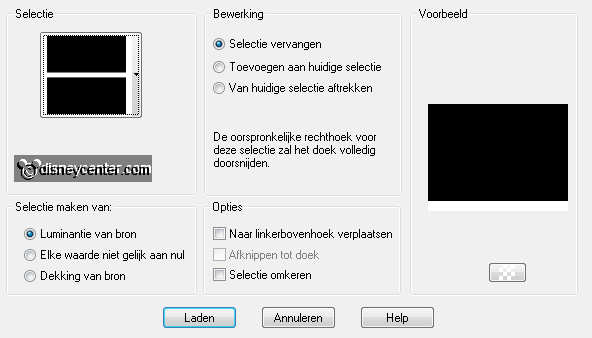
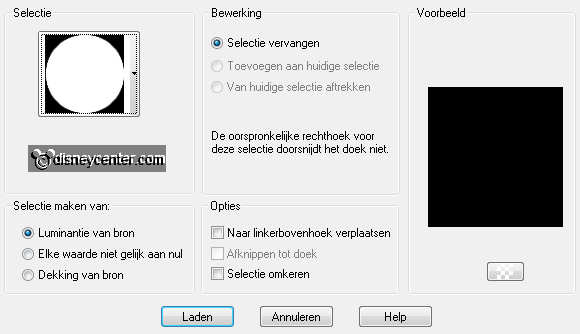
Selections - load/save selections - load selections from disk -
look emmynewyear4 - with this setting.
New raster layer - fill this with the foreground color.
Set the Blend mode of this layer at Soft Light.
4.
Selections - contract 3 - fill this with the foreground color.
Set the Blend mode of this layer at Difference.
Selections - select none.
Make raster 2 active.
Effects - 3D Effects - drop shadow - with this setting.
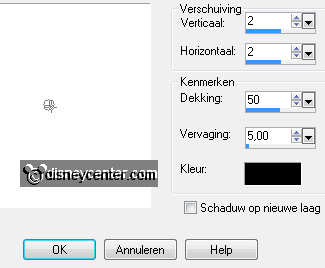
Repeat the drop shadow with -2.
5.
Make the bottom layer active.
Selections - load/save selections - load selections from disk -
look emmynewyear5 - with this setting.
New raster layer - fill this with the color black.
Selections - select none.
6.
Copy word-art-newyearsparty and paste as a new layer on the
image.
Place this left against the side on the black bar.
Make the top layer active.
Copy champagneset and paste as a new layer on the image.
Image - resize 75% - al layers not checked.
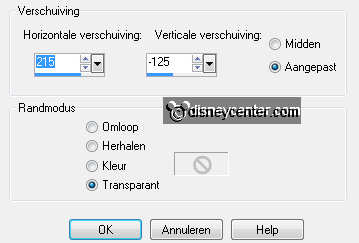
Effects - Image Effects - Offset - with this setting.
7.
Make raster 3 active.
Selections - select all - selections - float - selections - defloat.
Copy vuurwerk and paste as a new layer on the image.
Look is it stays right - selections - invert - click at the delete
key.
Selections - select none.
8.
Set the Blend mode of this layer at luminance (Legacy) and the
opacity at
75.
Activate the top layer.
Copy witmm and paste as a new layer on the image.
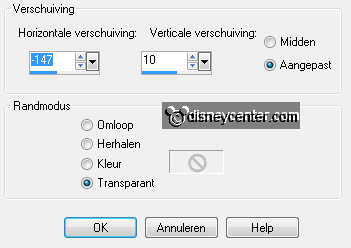
Effects - Image Effects - Offset - with this setting.
Give the same drop shadow as in point 4 - without repeat.
Selections - load/save selections - load selections from disk -
look emmynewyear3 - with this setting.
New raster layer - fill this with the foreground color.
Set the Blend mode of this layer at Soft Light.
Selections - contract 3.
New raster layer - fill this with the color black.
10.
New raster layer - put your watermark into the image.
Image- add border 2pixels - symmetric - color black.
11.
Open animation shop.
Copy your image - paste in AS - as a new animation.
Edit - duplicate selected - until you have 12 frames.
Edit - select all.
12.
Open animation klok - Edit - select all.
Copy - place in the black circle - paste into selected
frames.
Animatie - Frame properties at 75.


