1.
File - open new transparent image 750x600.
Set in the material palette the foreground color at #008cb4
and the background color at #9f462f.
Convert to raster layer.
2.
Selections – select all.
Activate the image pinokkio – edit - copy.
Edit – paste in selection.
Selections – select none.
3.
Adjust – blur – Gaussian blur – radius 17.
Effects – plug-ins – Filter Factory GalleryC – Emission Mirror –
with this setting – click OK.
4.
Layers – new raster layer.
Selections – select all.
Edit – paste in selection –(is still in memory).
Selections – select none.
5.
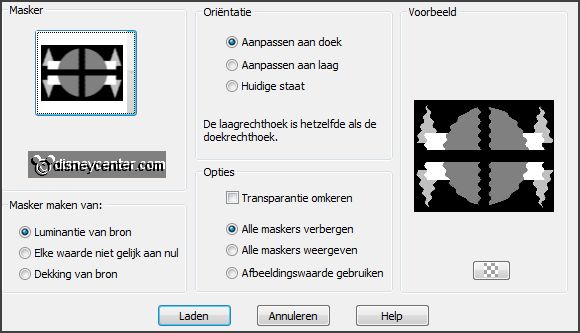
Layer – load/save mask – load mask from disk – look Emmymask15 –
with this setting.
Layers – merge – merge group.
Effects – 3D Effects – drop shadow – with this
setting.
Set in the layer palette the opacity to 55 and the blend mode to Screen.
Effects – Edge effects – enhance.
6.
Image – add border 3 pixels – foreground color.
Image – canvas size – with this setting.
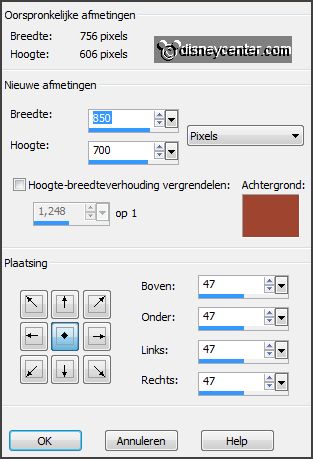
Image – add border 3 pixels – foreground color.
Activate the magic wand – with setting below
- and select the width border.

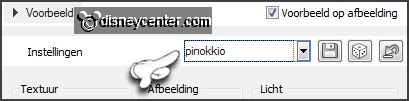
Effects – Texture effects – Texture – click to load preset.
Click at pinokkio.
7.
Selections – selection all.
Selections – modify – contract 50 pixels.
Promote selection to layer.
Selections – select none.
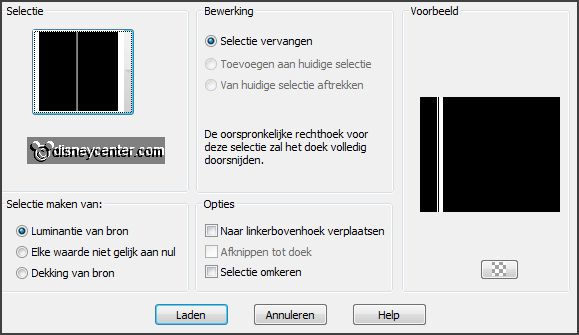
8.
Selections – load/save selection – load selection from disk – look Emmypinokkio
– with this setting.
Layers – new raster layer.
Fill the selection with the foreground color.
Selections – select none.
Effects – 3D Effects – drop shadow – setting
is right.
Layers – arrange – move down.
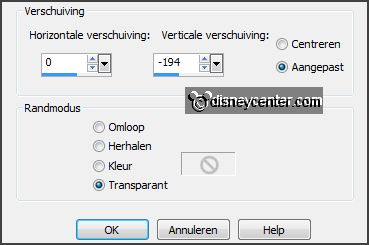
9.
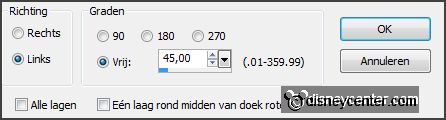
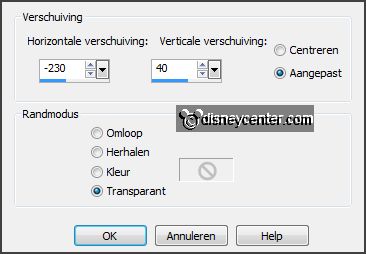
Image – free rotate – with this setting.
Effects – Image effects – offset – with this
setting.
Layers – duplicate.
Image – flip.
Layers – merge – merge down.
10.
Layers – duplicate,
Image – mirror.
Layers – merge – merge down.
11.
Image – add borders 30 pixels – background color.
Effects – plug-ins – AAA Frames – Foto Frames –
with this setting –
click OK.
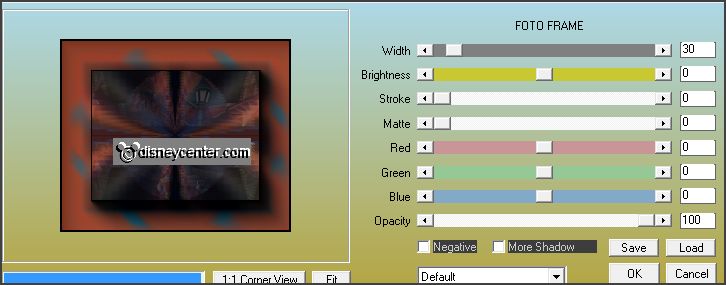
Image – add borders 3 pixels –
foreground color.
12.
Image – add borders 20 pixels – background
color.
Effects – plug-ins – AAA Frames – Foto Frames
– with this setting –
click OK.
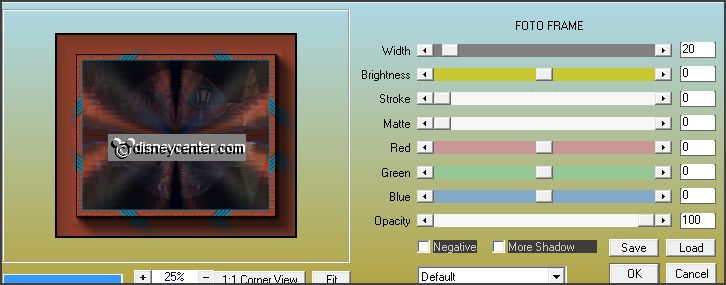
Image – add borders 3 pixels –
foreground color.
13.
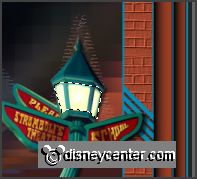
Activate the tube pinokkiolantaarn.
Image – resize 115% - all layers checked.
Edit – copy.
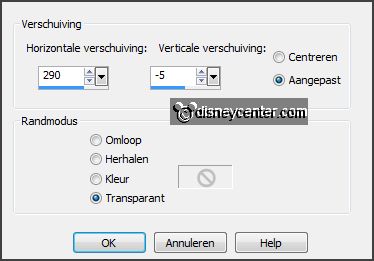
Edit – paste as a new layer on the image
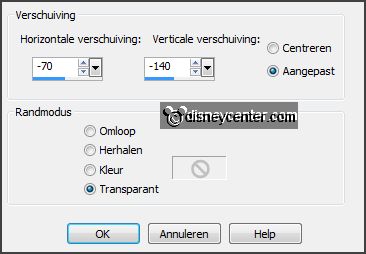
Effects – Image effects – offset – with this
setting.
Effects – 3D Effects – drop shadow – setting
is right.
14.
Activate freehand selection tool – from point to point – select as below.
Layers – duplicate.
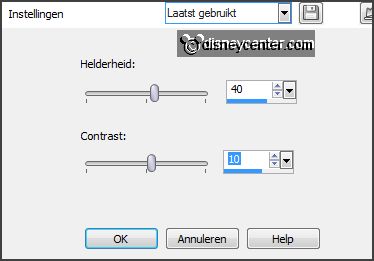
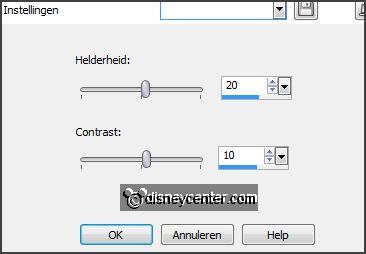
Activate raster1.
Adjust – brightness and contrast –
brightness/contrast – with this setting.
15.
Activate copy of raster 1.
Adjust – brightness and contrast –
brightness/contrast – now with brightness to 80 – contrast is the same.
Lock this layer.
Selections – select none.
16.
Activate the tube pinokkio1 – edit – copy.
Edit – paste as a new layer on the image.
Effects – Image effects – offset – with this
setting.
Effects – 3D Effects – drop shadow – setting
is right.
17.
Activate freehand selection tool – from point
to point – select as below.
Layers – duplicate.
Activate raster2.
Adjust – brightness and contrast –
brightness/contrast – with this setting.
18.
Activate copy of raster 2.
Adjust – brightness and contrast – brightness/contrast – now with brightness to
40 – contrast is the same.
Lock this layer.
Selections – select none.
19.
Activate the tube pinokkio – edit – copy.
Edit – paste as a new layer on the image.
Effects – Image effects – offset – with this
setting.

Effects – 3D Effects – drop shadow – setting
is right.
20.
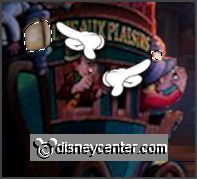
Activate the tube japiekrekel1– edit – copy.
Edit – paste as a new layer on the image.
Effects – Image effects – offset – with this
setting.
Effects – 3D Effects – drop shadow – setting
is right.
21.
Activate word-art-EmmyTheTrip – edit – copy.
Edit – paste as a new layer on the image.
Effects – Image effects – offset – with this
setting.

22.
Layers – new raster layer – put your watermark into the image.
Image – resize 75% - all layers checked.
Edit - copy merged.
23.
Open Animation Shop – edit – paste as a new
animation.
Back in PSP.
Lock raster 1 and 2 and open copy of raster 1 and copy of raster 2.
Edit - copy merged.
24.
In AS – paste after active frame.