6. Layers - Merge - Merge group.
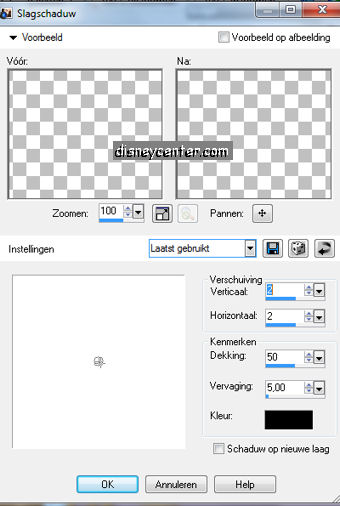
7. Effects - 3D Effects - Drop shadow.
8. Layers -
Merge - Merge all.
9. Image - Resize 65% - All layers checked.
10.
Minimize this image, we use that later
11. Open new image 700x700.
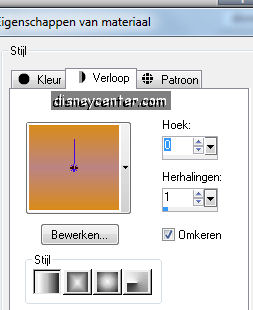
12.
Flood fill with this gradient linear.
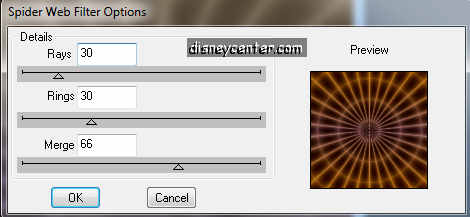
13. Go to Effects - Dsbflux - Spiderweb.
14. Copy the other image and paste as a new layer at the image.
15. Duplicate this layer and place this 50 pixels of the left- and top side of
the image.
16. Stay at the first image.
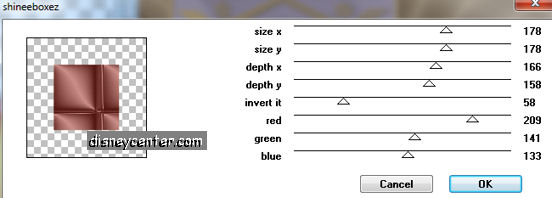
17. Effects - Kang2 - Shineeboxez with these settings.
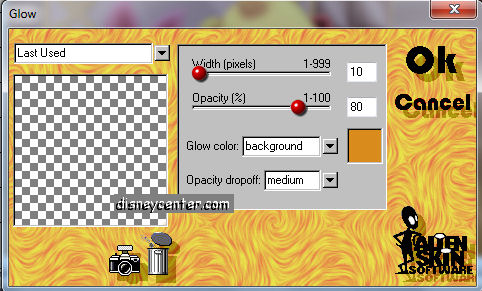
18. Effects - Alien Skin - Glow 2.1 with these settings.
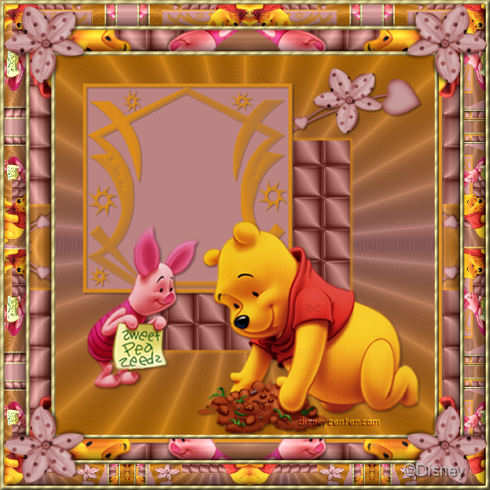
19. Copy the pooh tube and paste as a new layer.
20. Place this right at the bottom.
21. Give the same drop shadow as in point 7.
22. Copy the piglet tube and paste as a new layer.
23. Place this left at the square of raster 2.
24.
Give the same drop shadow as in point 7.
25. Copy the bloemen tube and paste as a new layer.
26. Place this in the right upper corner.
27. Layers - Arrange - Move down. Place this above raster 1.
28.
Give the same drop shadow as in point 7.
29. Layers - Merge - Merge all.
30. Image - Resize 60 %.
31. Put your watermark into the image.
32. Image - Add border 5 - color white.
33. Select the white border and flood fill with the gold pattern.
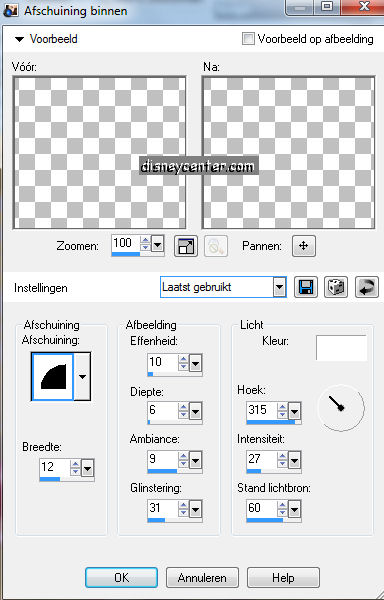
34. Effects - 3D Effects - Inner Bevel.
35. Selections - select none.
36. Image - Add border 25 - color white.
37. Select the white border and flood fill with the foreground color.
38. Let selection stay.
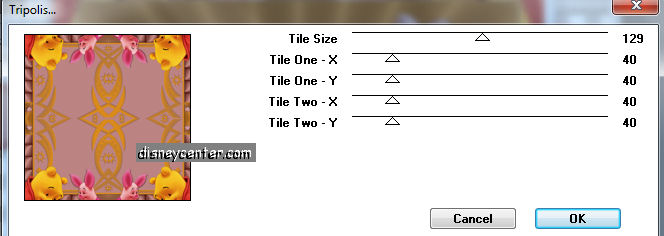
39. Effects - Freeware Filters - Tripolis with this settings.
40. Effects - 3D Effects - Inner Bevels same as in point 34.
41. Image - Add border 5 - color white.
42. Select the white border and flood fill with the gold pattern.
43. Effects - 3D Effects - Inner Bevels same as in point 34.
44. Selections - select none.
45. Image - Add border 25 - color white.
46. Select the border
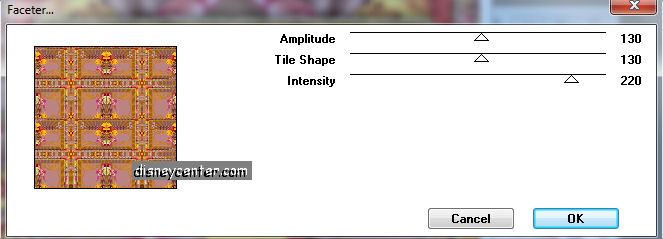
47. Effects - Freeware Filters - Faceter with this settings.
48. Selections - select none.
49. Image - Add border 5 - color white.
50. Select the white border and flood fill with the gold pattern.
51. Effects - 3D Effects - Inner Bevels same as in point 34.
52. Selections - select none.
53. Copy the tube bloem 1 and paste as a new layer.
54. Place this in the left upper corner.
55. Give the same drop shadow as in point 7.
56. Effects - Simpel - Top Left Mirror click at OK.
57. Image - Resize 85%.
58. Save as jpg.