|

This
Tutorial is copyrighted to the Tutorial Writer, © Emmy Kruyswijk 2011.
This Tutorial
may
not be forwarded, shared or otherwise placed on any Web Site or group without written
permission from
Emmy Kruyswijk
Do you want to link my lessons?
Please send
me a mail.
Materials:
download
here
1
Disney tube, 1 scrap
kit van
Weefarie
download here, 1,
masker, 1 silver pattern.
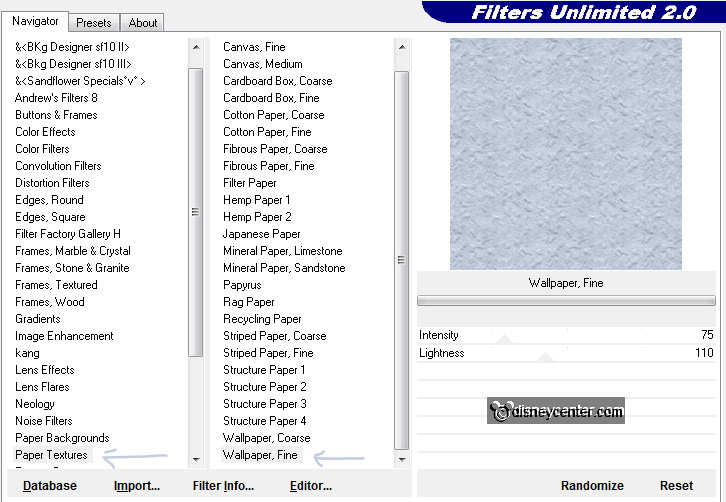
filter: Filters Unlimited - Papers Textures - Wallpaper
Fine.
Download
herePut the filter in de folder plug-ins and the mask
in the folder masks.
This lesson is translated in
 by
Xena by
Xena
Pooh
Bunny

Foreground
color #c4cddd and background color #d3dea9.
1. Open new image 700x700.
2. Fill this with the foreground color.
3. New raster layer - fill this with the background layer.
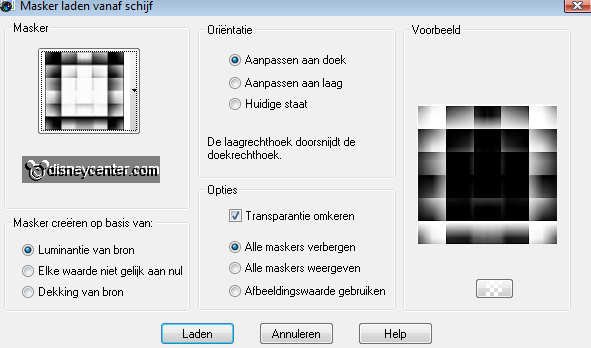
4. Layers - Load/save Mask - Load Mask from Disk - with this setting.
5. Layers - merge - merge group.
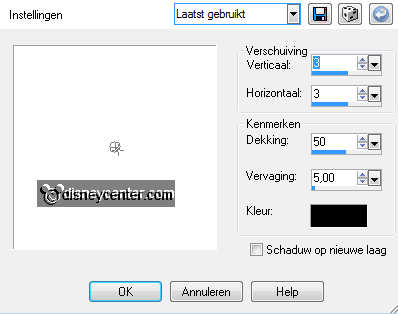
6. Effects - 3D Effects - drop shadow with this setting.
7. Stay at raster 1 - Effects - Filters Unlimited - Papers Textures
- Wallpaper Fine with this setting.
7. Copy the tube pooheaster and paste as a new layer.
8. Place this on the mask at the left side.
9. Give the same drop shadow as in point 6.
10. Copy the tube pooheaster1 and paste as a new layer.
11. Place this at the right site below.
12. Give the same drop shadow as in point 6.
13. Copy the tube cluster5 and paste as a new layer.
14. Place this at the left side.
15. Give the same drop shadow as in point 6.
16. Copy the letters E A S T E R and paste all as a new layer.
17. Lock all layers, except the top 5. Keep them all in a straight
line.
18. Stay at one of the other layers - Layers - merge - merge all
visible layers.
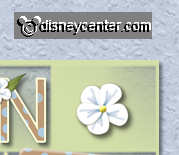
19. Place on top of the mask in the middle. see example
20. Give the same drop shadow as in point 6.
21. Unlock the other layers.
22. Copy the tube cluster2 and paste as a new layer.
23. Place it on the right on the mask.
24. Select inside the frames.
25. Selections - modify - expand 3.
26. New raster layer - fill this with the foreground color.
27. Layers - arrange - move down.
28. Stay at the frame layer - Give the same drop shadow as in point 6.
.
29. Copy the tube basket and paste as a new layer.
30. Place it in the top frame.
31. Give the same drop shadow as in point 6.
32. Copy the tube bunny sh and paste as a new layer.
33. Place it in the bottom frame.
34 Give the same drop shadow as in point 6.
35. Copy the tube white flower and paste as a new layer.
36. Place it on the top right corner of the mask.
37. Give the same drop shadow as in point 6.
38. Layers - merge - merge all
39. Image - Resize 75% - Resize all layers checked.
40. Put your watermark into the image.
41. Image - add border 3 - color black.
42. Select the border - fill this with the silver pattern.
43. Effects - 3D Effects - Inner Bevel with this setting.
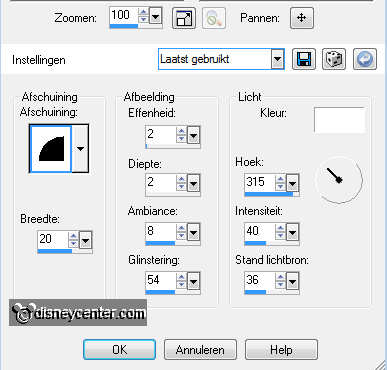
44. Selections - select none.
45. Image - add border 15 - color black.
46. Select the border - fill this with the foreground color.
47. Effects - Texture effects - Blinds with this setting.
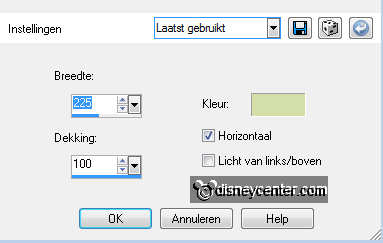
48. Effects - Edge Effects - enhance - Repeat the Edge Effects one
more time.
49. Selections - select none.
50. Image - add border 3 - color black.
51. Select the border - fill this with the silver pattern.
52. Give the same Inner Bevel as in point 43.
53. Selections - select none.
54. Image - add border 10 - foreground color.
55. Select the border - Effects - Texture effects - Blinds with this
setting. color #97adc5.
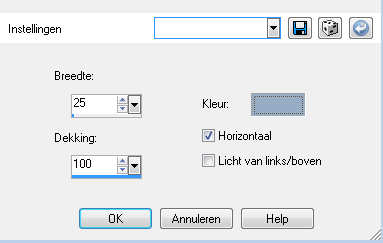
56. Effects - Edge Effects - enhance - Repeat the Edge Effects one
more time.
57. Selections - select none.
58. Image - add border 3 - color black.
59. Select the border - fill this with the silver pattern.
60. Give the same Inner Bevel as in point 43.
61. Selections - select none.
62. Image - Resize 500x500.
63. File - export - jpeg optimizer.
Ready is the tag.
I hope you like this tutorials
greetings Emmy
Tutorial written
22-03-2009
| 