1.
File - open new transparent image 700x700.
Activate the background-
edit - copy.
Edit - paste as a new layer on the image.
2.
Activate the tube DagSinterklaasje -
edit - copy.
Edit - paste as a new layer on the image.
Image – free rotate - with this setting.

Activate move tool – place it a little up.
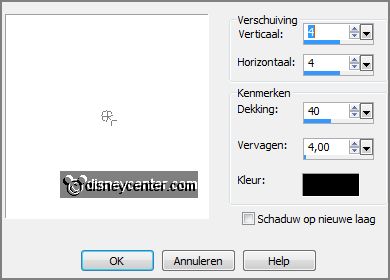
Effects - 3D Effects - drop shadow - with this setting.

Repeat the drop shadow – now with vert. and horz. -4.
3.
Activate the tube schoen 5 -
edit - copy.
Edit - paste as a new layer on the image.
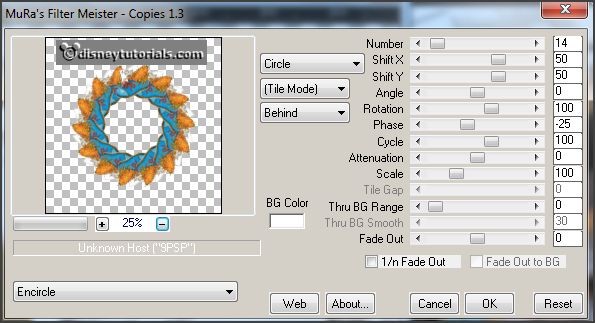
Effects – plug-ins – MuRa Meisters – Copies – with this setting – click
OK.

Place it a little to the left and to the bottom – see example.
Effects - 3D Effects - drop shadow - with this setting.

4.
Activate the image sintenpiet -
edit - copy.
Edit - paste as a new layer on the image .
Layers – arrange – down.
Place it in the border.
Activate the top layer.
5.
Activate the tube wortel -
edit - copy.
Edit - paste as a new layer on the image.
Place it left at the bottom.
6.
Activate the tube kadootjes1 -
edit - copy.
Edit - paste as a new layer on the image.
Place it left at the bottom –see example.
Effects - 3D Effects - drop shadow - setting is right.
7.
Activate the tube schoen6 -
edit - copy.
Edit - paste as a new layer on the image.
Place it left at the bottom – near the presents – see example.
Effects - 3D Effects - drop shadow - setting is right.
8.
Activate the tube kadootjes -
edit - copy.
Edit - paste as a new layer on the image.
Place it left at the bottom – near the presents – see example.
Effects - 3D Effects - drop shadow - setting is right.
9.
Activate the poser tube -
edit - copy.
Edit - paste as a new layer on the image.
Place it at the right side – near the presents – see example.
Effects - 3D Effects - drop shadow - setting is right.
10.
Layers - new raster layer - set your watermark into the image.
Layers - merge - merge all visible layers.
File - export - PNG Optimizer.
Ready is the tag
I hope you like this tutorial.
greetings Emmy
Thank you Nelly for testing.