1.
File - open new transparent image 700x700.
Activate the tube Element20 – edit - copy.
Edit - paste as a new layer on the image.
Activate move tool – place it left at the top.
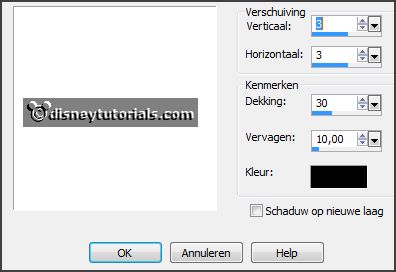
Effects - 3D Effects - drop shadow - with this setting.

Layers – duplicate.
Image – mirror.
Layers – merge – merge down.
2.
Activate the tube ASB_HolidayWishes_Elements (50) - edit - copy.
Edit - paste as a new layer on the image.
Effects - 3D Effects - drop shadow - setting is right.
3.
Activate the tube ASB_HolidayWishes_Elements (50) - edit - copy.
Edit - paste as a new layer on the image.
Effects - 3D Effects - drop shadow - setting is right.
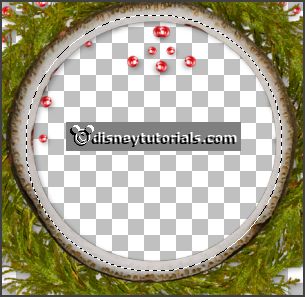
Activate selection tool – circle – and make a selection – as below.

Layers – new raster layer.
4.
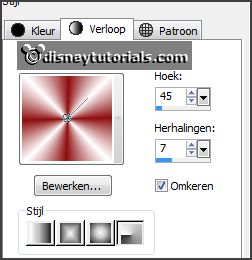
Set the foreground color at #8e0e0f and the background color at white.
Make from the foreground a gradient radial – with this setting.

Fill the selection with the gradient.
Selections – select none.
Layers – arrange - down.
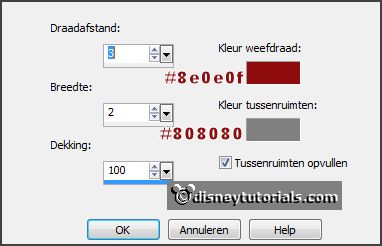
Effects – Texture effects – Weave – with this setting .

5.
Activate the poser tube – edit - copy.
Edit - paste as a new layer on the image.
Erase the part, what under the wreath comes.
Layers – duplicate.
Layers – arrange- up.
Effects - 3D Effects - drop shadow - setting is right.
6.
Activate the tube ASB_HolidayWishes_Elements (40) - edit - copy.
Edit - paste as a new layer on the image.
Place it left in the middle – see example.
Effects - 3D Effects - drop shadow - setting is right.
Layers – duplicate.
Place it below the other – see example.
Layers – merge – merge down.
Layers – arrange- down.
7.
Activate the top layer.
Activate the tube ASB_HolidayWishes_Elements (31) - edit - copy.
Edit - paste as a new layer on the image.
Place it left in the middle – on the leaves - see example.
Effects - 3D Effects - drop shadow - setting is right.
8.
Activate the tube ASB_HolidayWishes_Elements (36) - edit - copy.
Edit - paste as a new layer on the image.
Place it left in the middle – on the moss - see example.
Effects - 3D Effects - drop shadow - setting is right.
9.
Activate the tube 86 el - edit - copy.
Edit - paste as a new layer on the image.
Place it left at the bottom - see example.
Effects - 3D Effects - drop shadow - setting is right.
10.
Activate the tube ASB_HolidayWishes_Elements (15) - edit - copy.
Edit - paste as a new layer on the image.
Image – free rotate – with this setting.

Effects - 3D Effects - drop shadow - setting is right.
11.
Activate the tube ASB_HolidayWishes_Elements (7) - edit - copy.
Edit - paste as a new layer on the image.
Place it at the right side - see example.
Effects - 3D Effects - drop shadow - setting is right.
12.
Activate the tube ASB_HolidayWishes_Elements (17) - edit - copy.
Edit - paste as a new layer on the image.
Place it at the right side – for the other 2 packets - see example.
Effects - 3D Effects - drop shadow - setting is right.
13.
Layers - new raster layer - set your watermark into the image.
Layers - merge - merge all visible layers.
File - export - PNG Optimizer.
Ready is the tag
I hope you like this tutorial.
greetings Emmy
Thank you Nelly for testing.