|

This
Tutorial is copyrighted to the Tutorial Writer, © Emmy Kruyswijk.
This Tutorial may not be forwarded, shared or otherwise placed on any Web Site
or group without written
permission from
Emmy Kruyswijk.
Please respect my work and from others, don't change the file
names.
Do you want to link my lessons?
Please send
me a mail.
Needing:
The poser tube is from me. My site you can find
here.
If you use my tubes put than
the copyright render at the image.
I use parts of the scrapkit Romantic Illussion van
Molemina.
Before you begins.......
Open the tubes in PSP.
Material

Romactic Illussion

1.
File - open new transparent image 700x700.
Set the foreground color to #c56364 and the background color to white.
Make from the foreground a gradient sunburst - with this setting.
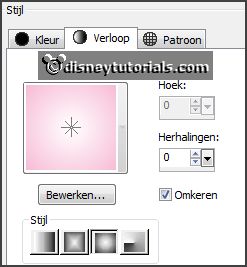
2.
Activate the tube mask -
edit - copy.
Edit - paste as a new layer on the image.
3.
Activate the tube romantic_illusion_molemina_el(95) -
edit - copy.
Edit - paste as a new layer on the image.
4.
Activate the tube romantic_illusion_molemina_el(103) -
edit - copy.
Edit - paste as a new layer on the image.
Activate move tool - place it right above in the heart.
Layers - arrange - down.
Layers - duplicate.
Image - mirror.
Place it near the other one.
Layers - merge - merge down.
5.
Activate freehand selection tool - from point to point - and make a
selection - as below -click on the delete key.
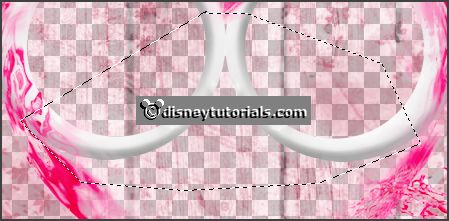
Selections - select none.
Activate the top layer.
Layers - merge - merge down.
Activate freehand selection tool - from point to point - and make a
selection - as below -click on the delete key.
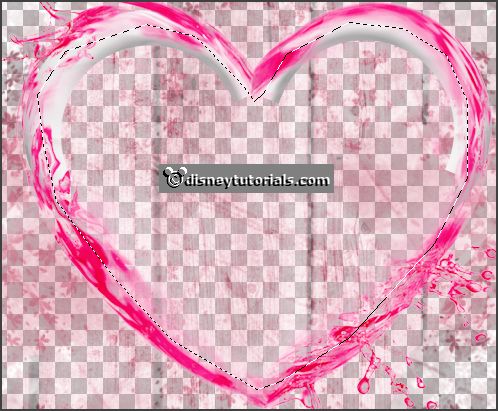
Layers - new raster layer.
Fill the selection with the gradient.
Let selection stay.
6.
Activate the tube wa5 -
edit - copy.
Edit - paste in selection.
Selections - select none.
Layers - arrange - down.
Activate the top layer.
Effects - 3D Effects - drop shadow - with this setting.
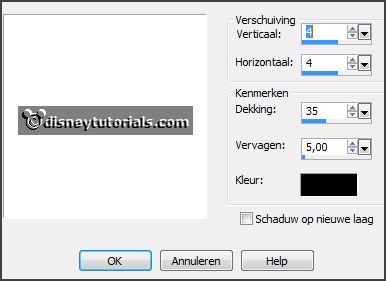
7.
Activate the tube romantic_illusion_molemina_el(104) -
edit - copy.
Edit - paste as a new layer on the image.
Place it right at the top.
Layers - arrange - down - under raster 2.
8.
Activate the tube romantic_illusion_molemina_el(78) -
edit - copy.
Edit - paste as a new layer on the image.
Place it at the left side.
Effects - 3D Effects - drop shadow - setting is right.
9.
Activate the tube romantic_illusion_molemina_el(76) -
edit - copy.
Edit - paste as a new layer on the image.
Place it left at the bottom.
Effects - 3D Effects - drop shadow - setting is right.
Layers - duplicate.
Place this right next to it.
10.
Activate the tube romantic_illusion_molemina_el(79) -
edit - copy.
Edit - paste as a new layer on the image.
Place it right at the bottom.
Effects - 3D Effects - drop shadow - setting is right.
Layers - duplicate.
Place this left next to it.
11.
Activate the tube romantic_illusion_molemina_el(21) -
edit - copy.
Edit - paste as a new layer on the image.
Place it left/middle at the bottom - see example.
Effects - 3D Effects - drop shadow - setting is right.
Layers - duplicate.
Place this next to it.
12.
Activate the tube romantic_illusion_molemina_el(80) -
edit - copy.
Edit - paste as a new layer on the image.
Place it right at the bottom - see example.
Effects - 3D Effects - drop shadow - setting is right.
13.
Activate the tube romantic_illusion_molemina_el(90) -
edit - copy.
Edit - paste as a new layer on the image.
Place it right at the bottom in the flower pot - see example.
Effects - 3D Effects - drop shadow - setting is right.
14.
Activate the tube romantic_illusion_molemina_el(67) -
edit - copy.
Edit - paste as a new layer on the image.
Place it left of the pot - see example.
Effects - 3D Effects - drop shadow - setting is right.
15.
Activate the poser tube -
edit - copy.
Edit - paste as a new layer on the image.
Place it at the left side - see example.
Effects - 3D Effects - drop shadow - setting is right.
16.
Activate the tube romantic_illusion_molemina_el(56) -
edit - copy.
Edit - paste as a new layer on the image.
Place it right above the heart - see example.
Effects - 3D Effects - drop shadow - setting is right.
17.
Layers - new raster layer - set your watermark into the image.
Layers - merge - merge all visible layers.
File - export - PNG Optimizer.
Ready is the tag
I hope you like this tutorial.
greetings Emmy
Thank you Nelly for testing.


tutorial
written 27-12-2015 |