|

This
Tutorial is copyrighted to the Tutorial Writer, © Emmy Kruyswijk.
This Tutorial may not be forwarded, shared or otherwise placed on any Web Site
or group without written
permission from
Emmy Kruyswijk.
Please respect my work and from others, don't change the file
names.
Do you want to link my lessons?
Please send
me a mail.
Needing:
The poser tube is from me. My site you can find
here.
If you use my tubes put than
the copyright render at the image.
I use parts of different scrapkits.
Before you begins.......
Open the tubes in PSP.
Material

Happy St.Patricksday

1.
File - open new transparent image 700x700.
Activate the tube sterretjes -
edit - copy.
Edit - paste as a new layer on the image.
2.
Activate the tube BNB-Icao29 -
edit - copy.
Edit - paste as a new layer on the image.
Select with the magic wand in the middle of the frame.
Selections - modify - expand 5 pixels.
3.
Layers - new raster layer.
Fill the selection with this color #c0cc8d.
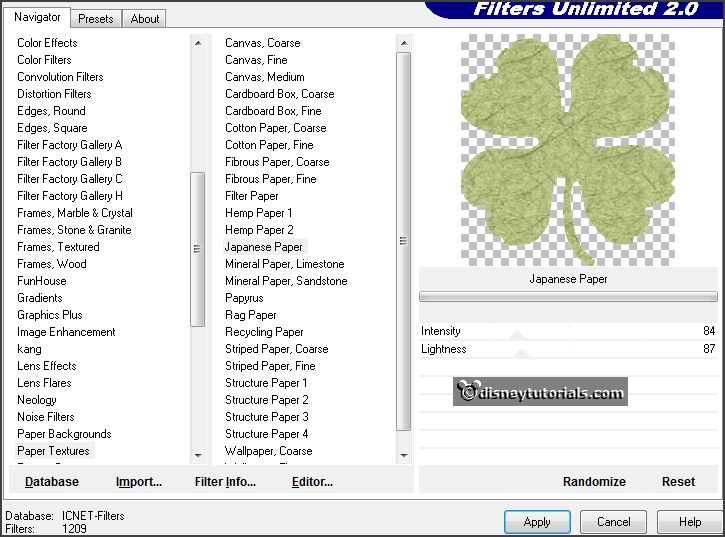
Effects - plug-ins - I.C.NET Software - Filters Unlimited 2.0 - Paper Textures -
Japanese Paper - with this setting - click on Apply.

Layers - arrange - down.
Selections - select none.
Activate the top layer.
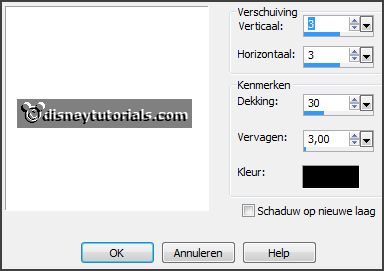
Effects - 3D Effects - drop shadow - setting is right.

4.
Activate the tube BNB-Icao4 -
edit - copy.
Edit - paste as a new layer on the image.
Activate move tool - place it a little up.
Effects - 3D Effects - drop shadow - setting is right.
5.
Activate the tube BNB-Icao28 -
edit - copy.
Edit - paste as a new layer on the image.
Place this right at the bottom of the cloverleaf.
6.
Activate the tube BNB-Icao16 -
edit - copy.
Edit - paste as a new layer on the image.
Place this right at the bottom in the cloverleaf.
Effects - 3D Effects - drop shadow - setting is right.
7.
Activate the poser tube -
edit - copy.
Edit - paste as a new layer on the image.
Place it in the middle - so that the line of the flags is gone.
Effects - 3D Effects - drop shadow - setting is right.
8.
Activate the tube BNB-Icao14 -
edit - copy.
Edit - paste as a new layer on the image.
Place it right at the bottom - under the cloverleaf.
Effects - 3D Effects - drop shadow - setting is right.
9.
Layers - new raster layer - set your watermark into the image.
Layers - merge - merge all visible layers.
File - export - PNG Optimizer.
Ready is the tag
I hope you like this tutorial.
greetings Emmy
Thank you Nelly for testing.


tutorial
written 27-12-2015
|