|

This
Tutorial is copyrighted to the Tutorial Writer, © Emmy Kruyswijk.
This Tutorial may not be forwarded, shared or otherwise placed on any Web Site
or group without written
permission from
Emmy Kruyswijk.
Please respect my work and from others, don't change the file
names.
Do you want to link my lessons?
Please send
me a mail.
Needing:
The poser tube is from me. My site you can find
here.
If you use my tubes put than
the copyright render at the image.
I use parts of the scrapkit 4th of July van
Kittz.
Before you begins.......
Open the tubes in PSP.
Material

4th July

1.
File - open new transparent image 700x700.
Activate the tube background -
edit - copy.
Edit - paste as a new layer on the image.
2.
Activate the tube J-44 -
edit - copy.
Edit - paste as a new layer on the image.
Activate move tool - place it right at the top.
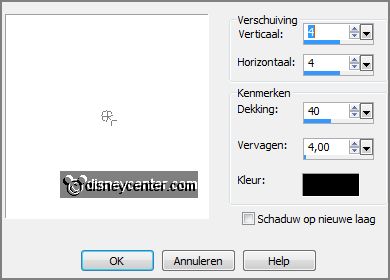
Effects - 3D Effects - drop shadow - with this setting.

3.
Activate the tube J-15 -
edit - copy.
Edit - paste as a new layer on the image.
Select with the magic wand in the middle of the frame.
Selections - modify - expand 10 pixels.
4.
Activate the J-P3 -
edit - copy.
Edit - paste as a new layer on the image.
Selections - modify - invert - click on the delete key.
Activate the top layer.
Effects - 3D Effects - drop shadow - setting is right.
5.
Activate the poser tube -
edit - copy.
Edit - paste as a new layer on the image.
Layers - arrange - down.
Erase the part, what comes under the frame. Not the hands.
Layers - duplicate.
Layers - arrange - up.
Effects - 3D Effects - drop shadow - setting is right.
Erase the part what on the frame stays ( only the cloths ).
6.
Activate the tube J-37 -
edit - copy.
Edit - paste as a new layer on the image.
Place it left at the bottom.
Effects - 3D Effects - drop shadow - setting is right.
7.
Activate the tube J-60 -
edit - copy.
Edit - paste as a new layer on the image.
Place it left at the bottom near the bottle.
Effects - 3D Effects - drop shadow - setting is right.
8.
Activate the tube J-47 -
edit - copy.
Edit - paste as a new layer on the image.
Place it left under on the glass.
Effects - 3D Effects - drop shadow - setting is right.
9.
Activate the tube J-46 -
edit - copy.
Edit - paste as a new layer on the image.
Place it in the middle at the bottom.
Effects - 3D Effects - drop shadow - setting is right.
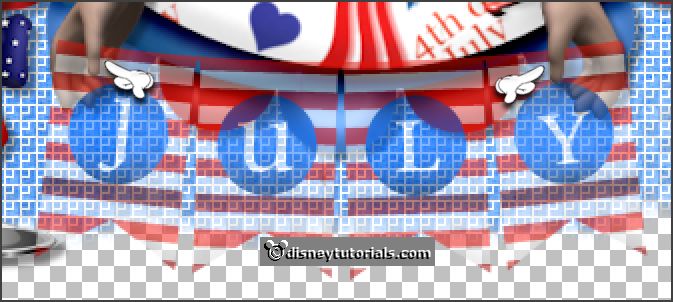
Set the opacity of this layer to 50 and resize more and more.
Erase the thumbs visible again - see below.

Set the opacity back to 100.
10.
Activate the tube J-57 -
edit - copy.
Edit - paste as a new layer on the image.
Place it right at the bottom.
Effects - 3D Effects - drop shadow - setting is right.
11.
Activate the tube J-42 -
edit - copy.
Edit - paste as a new layer on the image.
Place it at the right side.
Effects - 3D Effects - drop shadow - setting is right.
12.
Activate the tube J-53 -
edit - copy.
Edit - paste as a new layer on the image.
Place it left at the top.
Effects - 3D Effects - drop shadow - setting is right.
Layers - duplicate.
Place it diagonal under.
13.
Layers - new raster layer - set your watermark into the image.
Layers - merge - merge all visible layers.
File - export - PNG Optimizer.
Ready is the tag
I hope you like this tutorial.
greetings Emmy
Thank you Nelly for testing.


tutorial
written 31-01-2016
|