|

This
Tutorial is copyrighted to the Tutorial Writer, © Emmy Kruyswijk.
This Tutorial may not be forwarded, shared or otherwise placed on any Web Site
or group without written
permission from
Emmy Kruyswijk.
Please respect my work and don't change the file names.
Do you want to link my lessons?
Please send
me a mail.
Needing:
The beautiful poser tube is from Leilana.
The tube should I not share. Her tubes you
can find
here.
I have used parts of the
scrapkit of I believe in Santa from
Agnesingap Design.
Before you begins.......
Open the tubes in PSP.
Material

I believe in Santa

1.
File - open new transparent image 700x700.
Activate the tube agnesingap_I_believe_in_santa_el(12) -
edit - copy.
Edit - paste as a new layer on the image.
Image - free rotate - with this setting.

2.
Select with the magic wand in the middle of the stare ster.
Selections - modify - expand - 4 pixels.
Layers - new raster layer.
Set the foreground at #d0d0d0.
3.
Activate flood fill tool - fill the selection with the foreground color.
Selections - select none.
Layers - arrange - down.
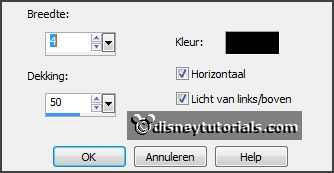
Effects - Texture effects - Blinds - with this setting.
4.
Activate the top layer.
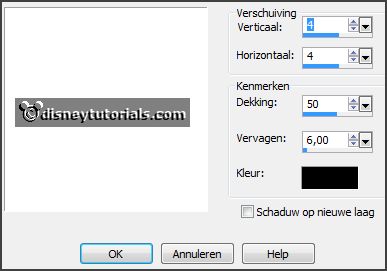
Effects - 3D Effects - drop shadow - with this setting.
Layers - merge - merge down.
Objects - Align - Center at Canvas.
5.
Activate the tube agnesingap_I_believe_in_santa_el(19) -
edit - copy.
Edit - paste as a new layer on the image.
Set the opacity to 42.
6.
Activate the tube agnesingap_I_believe_in_santa_el(29) -
edit - copy.
Edit - paste as a new layer on the image.
Place it right at the top - see example.
Layers - arrange - down - set this under raster 2.
7.
Activate the tube agnesingap_I_believe_in_santa_el(18) -
edit - copy.
Edit - paste as a new layer on the image.
Place it in the middle at the top - see example.
Effects - 3D Effects - drop shadow - setting is right.
8.
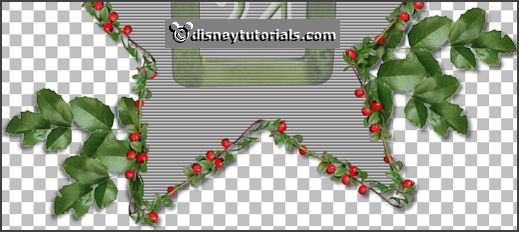
Activate the tube agnesingap_I_believe_in_santa_el(39) -
edit - copy.
Edit - paste as a new layer on the image.
Place it at the right side - see example.
Layers - duplicate.
Image - mirror.
Place it a little down.
9.
Activate the tube adventtubes30 -
edit - copy.
Edit - paste as a new layer on the image.
Place it at the left side - see example.
Effects - 3D Effects - drop shadow - setting is right
10.
Activate the top layer.
Activate the tube agnesingap_I_believe_in_santa_el(56) -
edit - copy.
Edit - paste as a new layer on the image.
Place it in the middle at the bottom - see example.
Effects - 3D Effects - drop shadow - setting is right.
11.
Activate the tube agnesingap_I_believe_in_santa_el(64) -
edit - copy.
Edit - paste as a new layer on the image.
Image - mirror.
Place it right at the bottom - see example.
Effects - 3D Effects - drop shadow - setting is right.
12.
Layers - new raster layer - set your watermark into the image.
Layers - merge - merge all visible layers.
File - export - PNG Optimizer.
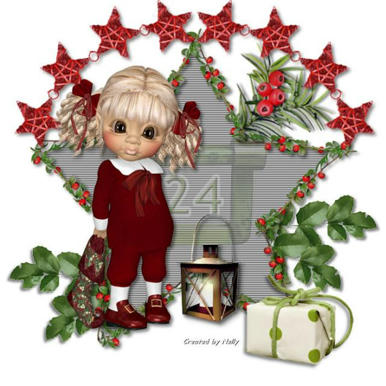
Ready is the tag
I hope you like this tutorial.
greetings Emmy
Thank you Nelly for testing.

tutorial written
11-11-2014 |