This
Tutorial is copyrighted to the Tutorial Writer, © Emmy Kruyswijk.
This Tutorial may not be forwarded, shared or otherwise placed on any Web Site
or group without written
permission from Emmy Kruyswijk.
Please respect my work and from others, don't change the file names.
Do you want to link my lessons?
Please send me a mail.
Needing:
The poser tube is a buy tube of me. Is not by the material. You can buy it
here.
Before you begins.......
Open the tubes in PSP.
Material

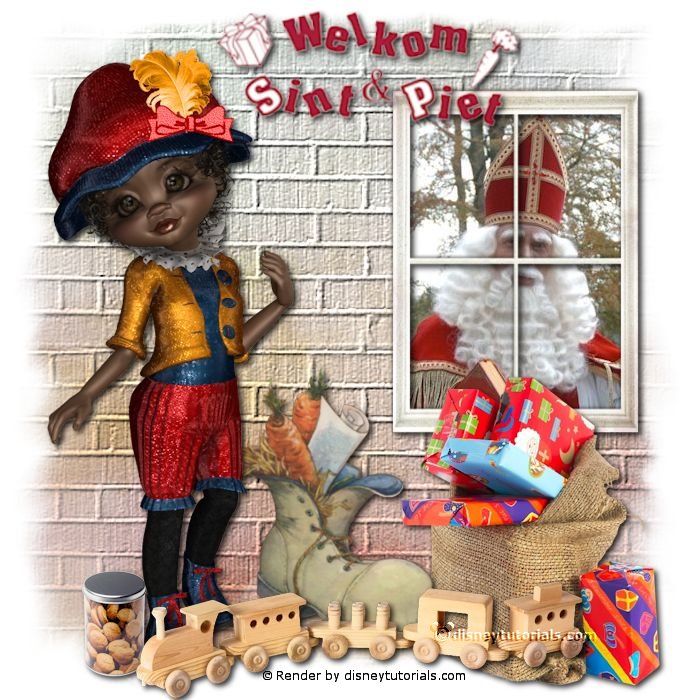
Welkom Sint & Piet

1.
File - open new transparent image 700x700.
Activate the tube background -
edit - copy.
Edit - paste as a new layer on the image.
2.
Activate the tube raam -
edit - copy.
Edit - paste as a new layer on the image.
Activate move tool - place it to the right and up.
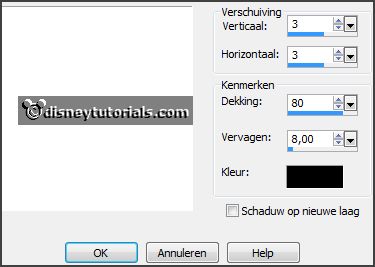
Effects - 3D Effects - drop shadow - with this setting.

3.
Activate the tube sint(28) -
edit - copy.
Edit - paste as a new layer on the image.
Place this on the window.
Layers - arrange - down.
Activate the top layer.
4.
Activate the tube LF-ZakSinterklaas -
edit - copy.
Edit - paste as a new layer on the image.
Place it to the right at the bottom.
Effects - 3D Effects - drop shadow - setting is right.
5.
Activate the tube sint shoe nm tinytube -
edit - copy.
Edit - paste as a new layer on the image.
Place it at the bottom left near the bag.
Effects - 3D Effects - drop shadow - setting is right.
6.
Activate the tube treintje -
edit - copy.
Edit - paste as a new layer on the image.
Place it in the middle at the bottom.
Effects - 3D Effects - drop shadow - setting is right.
7.
Activate the tube pepernoten2 -
edit - copy.
Edit - paste as a new layer on the image.
Place it left at the bottom.
Effects - 3D Effects - drop shadow - setting is right.
Layers - arrange - down.
8.
Activate the poser tube -
edit - copy.
Edit - paste as a new layer on the image.
Place it left at the bottom.
Effects - 3D Effects - drop shadow - setting is right.
Activate the top layer.
9.
Activate the tube p_m003841 -
edit - copy.
Edit - paste as a new layer on the image.
Place it in the middle at the top.
Effects - 3D Effects - drop shadow - setting is right.
10.
Layers - new raster layer - set your watermark into the image.
Layers - merge - merge all visible layers.
File - export - PNG Optimizer.
Ready is the tag
I hope you like this tutorial.
greetings Emmy
Thank you Nelly for testing.