|

This
Tutorial is copyrighted to the Tutorial Writer, © Emmy Kruyswijk.
This Tutorial may not be forwarded, shared or otherwise placed on any Web Site
or group without written
permission from
Emmy Kruyswijk.
Please respect my work and don't change the file names.
Do you want to link my lessons?
Please send
me a mail.
Needing:
The beautiful poser tube is from Leilana.
The tube should I not share. Her tubes you
can find
here.
I have used parts of the
scrapkit from Creepy Night of
Carolina.
Before you begins.......
Open the tubes in PSP.
Material

Creepy Night

1.
File - open new transparent image 700x700.
Set the foreground color on white and the background color on black.
Activate the tube rand -
edit - copy.
Edit - paste as a new layer on the image.
2.
Activate the magic wand - select in the middle.
Layers- new raster layer.
Fill the selection with the background color.
Layers - arrange - down.
Layers- new raster layer.
3.
Activate paper4 - edit - copy.
Edit - paste in selection.
Selections - select none.
Set the opacity to 28.
Layers - merge - merge down.
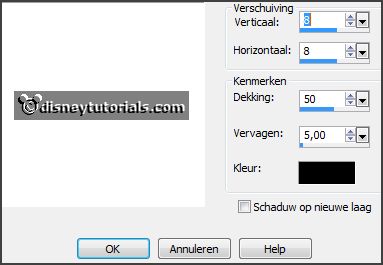
Effects - 3D Effects - drop shadow - with this setting.

Activate the top layer.
Layers - merge - merge down.
4.
Activate the tube Element25 -
edit - copy.
Edit - paste as a new layer on the image.
Activate move tool - move this to the left.
Layers - duplicate.
Image - mirror.
Layers - merge - merge down.
5.
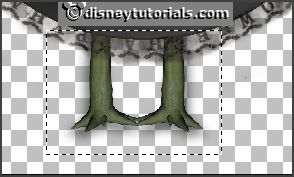
Activate selections tool - rectangle - and make a selection - as below .

Click at the delete key.
Selections - select none.
Effects - 3D Effects - drop shadow - setting is right.
Layers - arrange - down
6.
Activate the top layer.
Activate the tube Element31 -
edit - copy.
Edit - paste as a new layer on the image.
Place it to the left side - see example.
Effects - 3D Effects - drop shadow - setting is right.
7.
Activate the tube Element14 -
edit - copy.
Edit - paste as a new layer on the image.
Image - resize 85% - all layers not checked.
Place it in the middle a piece on the circle. - see example.
Effects - 3D Effects - drop shadow - setting is right.
8.
Activate the tube Element21 -
edit - copy.
Edit - paste as a new layer on the image.
Place it left on the bottom - see example.
Layers - arrange - down.
Effects - 3D Effects - drop shadow - setting is right.
9.
Activate the top layer.
Activate the tube Element7 -
edit - copy.
Edit - paste as a new layer on the image.
Image - resize 90% - all layers not checked.
Place it left before the man - see example.
Layers - arrange - down - set it under raster 4.
Effects - 3D Effects - drop shadow - setting is right.
Layers - duplicate.
Image - mirror.
Layers - merge - merge down.
10.
Activate the top layer.
Activate the tube Element34 -
edit - copy.
Edit - paste as a new layer on the image.
Image - mirror.
Image - free rotate - with this setting.

Place it at the left side - see example.
Effects - 3D Effects - drop shadow - setting is right.
11.
Activate the tube sl_89 -
edit - copy.
Edit - paste as a new layer on the image.
Place it at the left side on the shovel - see example.
Effects - 3D Effects - drop shadow - setting is right.
12.
Activate the tube Element2 -
edit - copy.
Edit - paste as a new layer on the image.
Place it right at the bottom - see example.
Effects - 3D Effects - drop shadow - setting is right.
13.
Activate the tube Element23 -
edit - copy.
Edit - paste as a new layer on the image.
Place it right at the bottom - see example.
Effects - 3D Effects - drop shadow - setting is right.
14.
Activate the tube Element32 -
edit - copy.
Edit - paste as a new layer on the image.
Place it left at the top - see example.
Effects - 3D Effects - drop shadow - setting is right.
15.
Activate the poser tube -
edit - copy.
Edit - paste as a new layer on the image.
Place it in the middle - see example.
Effects - 3D Effects - drop shadow - setting is right.
16.
Activate the tube Element17 -
edit - copy.
Edit - paste as a new layer on the image.
Place it in the middle at the top - see example.
Effects - 3D Effects - drop shadow - setting is right.
Layers - arrange - send to bottom.
17.
Layers - new raster layer - set your watermark into the image.
Layers - merge - merge all visible layers.
File - export - PNG Optimizer.
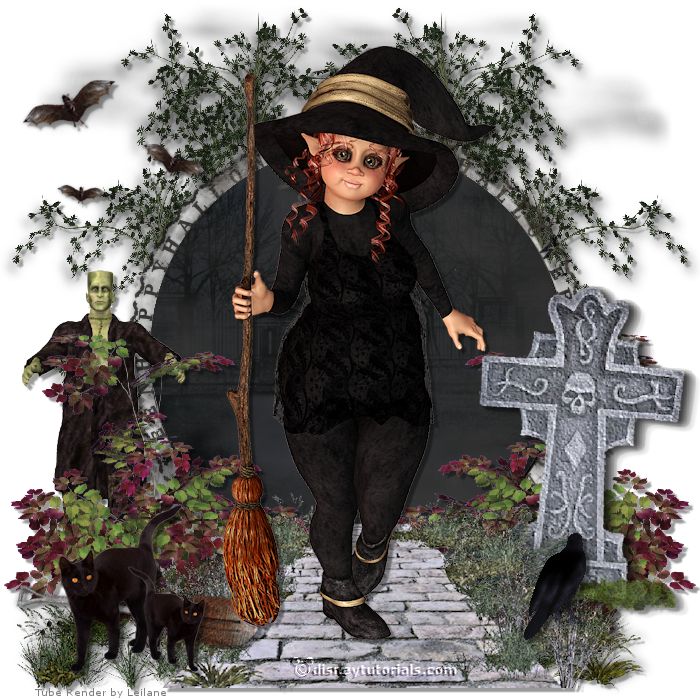
Ready is the tag
I hope you like this tutorial.
greetings Emmy
Thank you Nelly for testing.


tutorial written
14-11-2014 |