This
Tutorial is copyrighted to the Tutorial Writer, © Emmy Kruyswijk.
This Tutorial may not be forwarded, shared or otherwise placed on any Web Site
or group without written
permission from Emmy Kruyswijk.
Please respect my work and from others, don't change the file names.
Do you want to link my lessons?
Please send me a mail.
Needing:
I use parts of different scrapkits.
The poser tube is a buy tube of me. Is not by the material. You can buy it
here.
Before you begins.......
Open the tubes in PSP.
Material

2017

1.
File - open new transparent image 700x700.
Set the foreground color to #a99055 and the background color to #f0ece3.
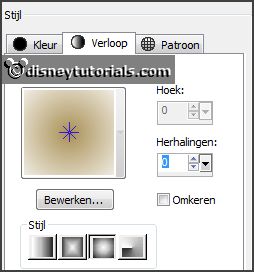
Make from the foreground a gradient sunburst - with this setting.

2.
Activate the tube dydyge_el66 -
edit - copy.
Edit - paste as a new layer on the image.
Select with the magic wand in the middle of the frame.
Selection - modify - expand 2 pixels.
Layers - new raster layer.
3.
Fill the selection with the gradient.
Selections - select none.
Layers - arrange - down.
Activate the top layer.
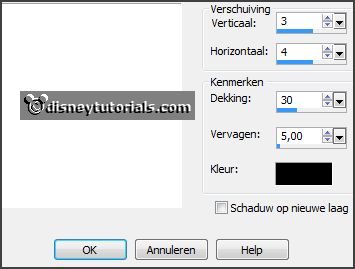
Effects - 3D Effects - drop shadow - with this setting.

4.
Activate the tube dydyge_el28 -
edit - copy.
Edit - paste as a new layer on the image.
Set the opacity of this layer to 18.
5.
Activate the tube dydyge_el56 -
edit - copy.
Edit - paste as a new layer on the image.
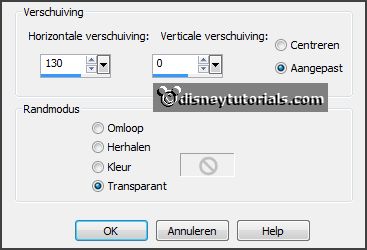
Effects - Image effects - offset - with this setting.

Effects - 3D Effects - drop shadow - setting is right.
6.
Activate the poser tube -
edit - copy.
Edit - paste as a new layer on the image.
Activate move tool - place it at the left side.
Effects - 3D Effects - drop shadow - setting is right.
7.
Activate the tube dydyge_el26 -
edit - copy.
Edit - paste as a new layer on the image.
Place it right at the bottom.
Effects - 3D Effects - drop shadow - setting is right.
8.
Activate the tube dydyge_el04sh -
edit - copy.
Edit - paste as a new layer on the image.
Place it in the middle at the bottom.
Effects - 3D Effects - drop shadow - setting is right.
9.
Activate the tube dydyge_el13 -
edit - copy.
Edit - paste as a new layer on the image.
Image - free rotate - with this setting.

Place it right at the top.
Effects - 3D Effects - drop shadow - setting is right.
10.
Layers - new raster layer - set your watermark into the image.
Layers - merge - merge all visible layers.
File - export - PNG Optimizer.
Ready is the tag
I hope you like this tutorial.
greetings Emmy
Thank you Nelly for testing.