This
Tutorial is copyrighted to the Tutorial Writer, © Emmy Kruyswijk.
This Tutorial may not be forwarded, shared or otherwise placed on any Web Site
or group without written
permission from Emmy Kruyswijk.
Please respect my work and from others, don't change the file names.
Do you want to link my lessons?
Please send me a mail.
Needing:
I use parts of the
scrapkit DBV Valentine Collab from
Design by Vaybs.
The poser tube is a buy tube of me. Is not by the material. You can buy it
here.
Before you begins.......
Open the tubes in PSP.
Material

Be My Valentine

1.
File - open new transparent image 700x700.
Activate the tube DBV Valentine Collab WA (2) -
edit - copy.
Edit - paste as a new layer on the image.
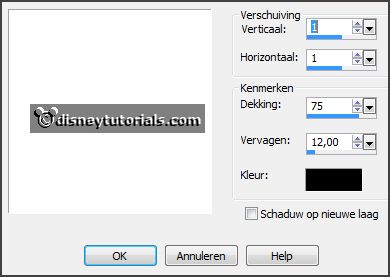
Effects - 3D Effects - drop shadow - with this setting.

2.
Activate the tube DBV Valentine Collab frame (5) -
edit - copy.
Edit - paste as a new layer on the image.
Effects - 3D Effects - drop shadow - setting is right.
Layers - new raster layer.
Select with the magic wand in the middle of the frame.
Set the foreground color to #fbcbc9 and the background color to #a30606.
3.
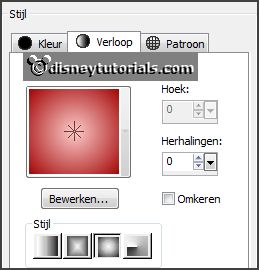
Make from the foreground a gradient sunburst - with this setting.

Fill the selection with the gradient.
Layers - arrange - down.
Selections - select none.
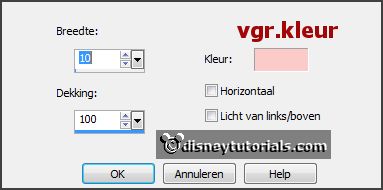
Effects - Texture effects - Blind - with this setting.

4.
Activate the tube DBV Valentine Collab element (51) -
edit - copy.
Edit - paste as a new layer on the image.
Activate move tool - place it right against the border of the
frame.
Set the opacity of this layer to 30.
Activate the top layer
5.
Activate the tube DBV Valentine Collab element (8) -
edit - copy.
Edit - paste as a new layer on the image.
Place it right at the top - see example.
I have removed the letters of raster 1, but that's not necessary.
6.
Activate the tube I_love_you_by_Marzena_elementy6 -
edit - copy.
Edit - paste as a new layer on the image.
Place it right at the bottom.
7.
Activate the poser tube -
edit - copy.
Edit - paste as a new layer on the image.
Place it at the left side.
Effects - 3D Effects - drop shadow - setting is right.
8.
Layers - new raster layer - set your watermark into the image.
Layers - merge - merge all visible layers.
File - export - PNG Optimizer.
Ready is the tag
I hope you like this tutorial.
greetings Emmy
Thank you Nelly for testing.