|

This
Tutorial is copyrighted to the Tutorial Writer, © Emmy Kruyswijk.
This Tutorial may not be forwarded, shared or otherwise placed on any Web Site
or group without written
permission from
Emmy Kruyswijk.
Please respect my work and don't change the file names.
Do you want to link my lessons?
Please send
me a mail.
Needing:
The beautiful poser tube is from Gerda.
The tube should I not share. Her tubes you can
find
here.
I have used parts of the scrapkit from
Eileens
Design.
1 tube made by me.
Before you begins.......
Open the tubes in PSP.
Material

Cheers...2015

1.
File - open new transparent image 700x700.
Activate the tube EileensDesign_CUVol103-11 -
edit - copy.
Edit - paste as a new layer on the image.
Activate move tool - set it at the top.
Layers - duplicate.
Image - flip.
Image - mirror.
Layers - merge - merge down.
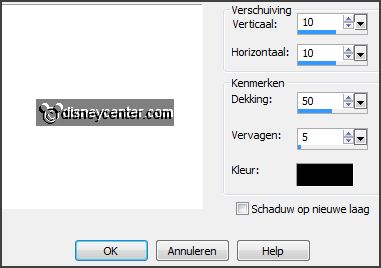
Effects - 3D Effects - drop shadow - with this setting.
2.
Activate the tube deco1 -
edit - copy.
Edit - paste as a new layer on the image.
Image - resize 125% - all layers not checked.
Effects - 3D Effects - drop shadow - setting is right.
3.
Activate the tube Silvester 2012-03 -
edit - copy.
Edit - paste as a new layer on the image.
Place it at the left side- see example.
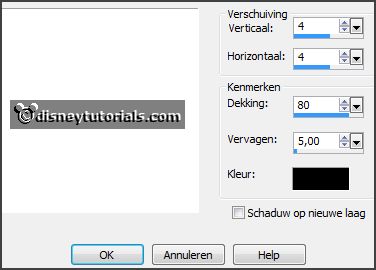
Effects - 3D Effects - drop shadow - with this setting.
4.
Activate the tube EileensDesign_CUVol103-10 -
edit - copy.
Edit - paste as a new layer on the image.
Place it in the middle at the bottom.
Effects - 3D Effects - drop shadow - setting is right.
5.
Activate the tube EileensDesign_CUVol106-1 -
edit - copy.
Edit - paste as a new layer on the image.
Place it in the middle at the bottom near the champagne right.
Effects - 3D Effects - drop shadow - setting is right.
6.
Activate the tube EileensDesign_CUVol110-12 -
edit - copy.
Edit - paste as a new layer on the image.
Image - resize 75% - all layers not checked
Place it at the bottom right - see example.
Effects - 3D Effects - drop shadow - setting is right.
7.
Activate the tube EileensDesign_CUVol107-4 -
edit - copy.
Edit - paste as a new layer on the image.
Image - mirror.
Place it at the right side - see example.
Layers - arrange - down - set it under raster 4.
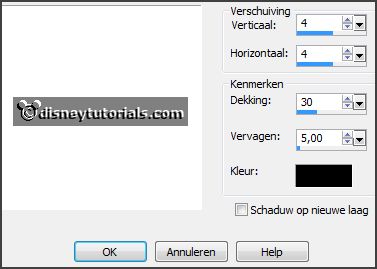
Effects - 3D Effects - drop shadow - with this setting.
8.
Activate the tube 2015 - -
edit - copy.
Edit - paste as a new layer on the image.
Place it in the middle - see example.
9.
Activate the tube EileensDesign_CUVol103-9 -
edit - copy.
Edit - paste as a new layer on the image.
Image - free rotate - with this setting.

Place it at the top right - see example.
Effects - 3D Effects - drop shadow - with this setting.

10.
Layers - new raster layer - set your watermark into the image.
Layers - merge - merge all visible layers.
File - export - PNG Optimizer.
Ready is the tag
I hope you like this tutorial.
greetings Emmy
Thank you Nelly for testing.


tutorial
written
15-11-2014 |