This
Tutorial is copyrighted to the Tutorial Writer, © Emmy Kruyswijk.
This Tutorial may not be forwarded, shared or otherwise placed on any Web Site
or group without written
permission from Emmy Kruyswijk.
Please respect my work and from others, don't change the file names.
Do you want to link my lessons?
Please send me a mail.
Needing:
I use parts of different scrapkits and template.
The poser tube is a buy tube of me. Is not by the material. You can buy it
here.
Before you begins.......
Open de tubes in PSP.
Set the gold(12) in the folder pattern
Material

Template download
here
2018 Prosit

1.
Open the template - shift D - with this we work - delete the original
template.
Image - resize in 700x700 - all layers checked.
Delete copyright and horz.lijnen and vert.lijnen.
Set the foreground on pattern en look gold(12).
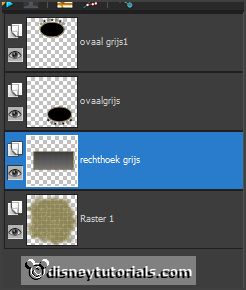
Activate rechthoek grijs.
2.
Open background - copy - paste on the image.
Layers - arrange - down.
3.
Activate ovaalgrijs1 - fill this with the gold pattern.
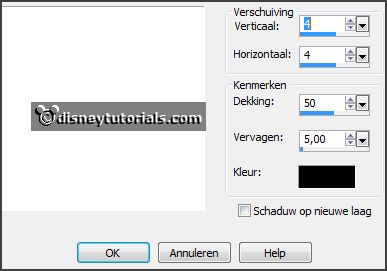
Give a drop shadow - with this setting.

4.
Activate ovaalgrijs - fill this with the gold pattern.
Give the same drop shadow.
5.
Activate rechthoek grijs - fill this with the gold pattern.
Give the same drop shadow.
6.
Activate sterrenlaag1 - fill this alternately with the gold pattern - see
example.
Give the same drop shadow.
7.
Activate sterrenlaag2 - fill this alternately with the gold pattern - see
example.
Give the same drop shadow.
8.
Now we get layers merged.
The first 3 layers are - sterrenlaag1 and oval zwart1 and oval grijs1.
Place sterrenlaan2 under oval grijs1.
The second 3 layers are - sterrenlaag2 and oval zwart and oval grijs.
Now merged the last 2 layers - merge down.
Now you have this.

9.
Move rechthoek grijs to the right.
Move oval grijs1 a little to right.
Move oval grijs a little to left.
10.
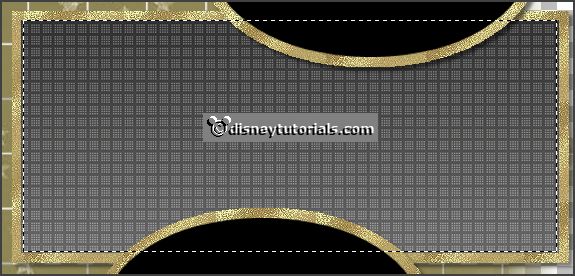
Activate rechthoek grijs and make a selection - as below.

Open GoldCity_MistedbyGini - copy - paste on the image.
Move a little right.
Selection - invert - click at the delete key.
Selection - select none
Activate the top layer.
11.
Open 2018 - copy - paste on the image.
Place it in the top oval.
12.
Open prosit - copy - paste on the image.
Place it in the bottom oval.
13.
Open je poser tube - copy - paste on the image.
Place it left at the bottom.
Give the same drop shadow.
14.
Layers - new raster layer - set your watermark into the image.
Layers - merge - merge all visible layers.
File - export - PNG Optimizer.
Ready is the tag
I hope you like this tutorial.
greetings Emmy
Thank you Ingrid for testing.