This
Tutorial is copyrighted to the Tutorial Writer, © Emmy Kruyswijk.
This Tutorial may not be forwarded, shared or otherwise placed on any Web Site
or group without written
permission from Emmy Kruyswijk.
Please respect my work and from others, don't change the file names.
Do you want to link my lessons?
Please send me a mail.
Needing:
I use parts of different scrapkits.
The poser tubes is are buy tube of me. Is not by the material. You can buy it
here.
If you use my tubes put the copyright on it.
Before you begins.......
Open the tubes in PSP.
Material

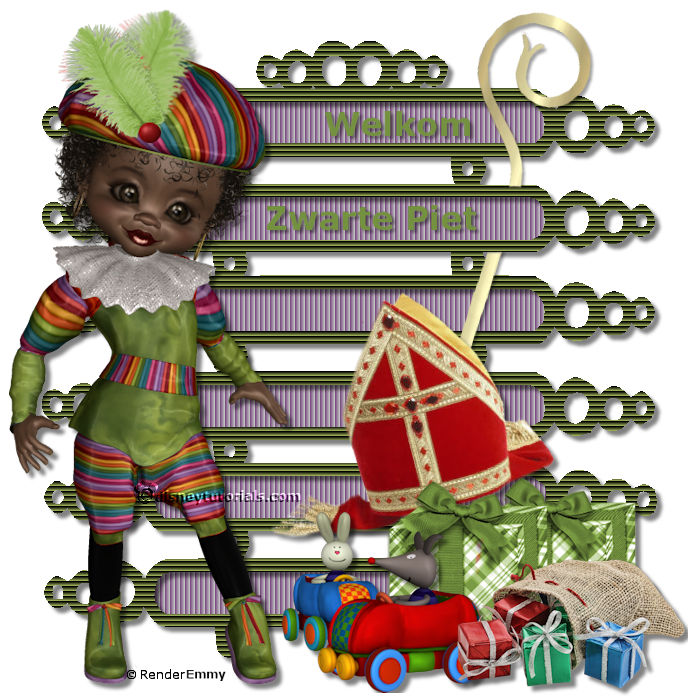
Welkom Zwarte Piet

1.
Open new transparent image 700x700.
Set the foreground color to #96a854 and the background color to #7d5084.
2.
Open Emmyframe - copy - paste on the image.
Select the black border with the magic wand.
Fill the selection with the foreground color.
Selections - select none.
3.
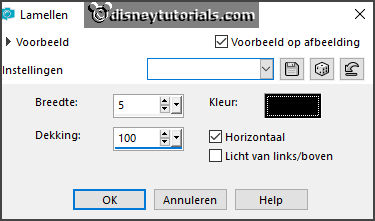
Effects - texture effects - blinds - with this setting.

Select with the magic wand the long rounded rectangles.
Selections - modify - expand 3 pixels.
Layers - new raster layer - fill this with the background color.
Selections - select none.
4.
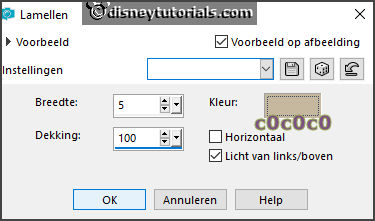
Effects - texture effects - blinds - with this setting.

Layers - arrange - down.
Activate the top layer.
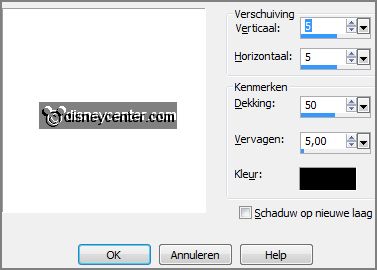
Give a drop shadow - with this setting.

5.
Open 602011_Tubed-by-Sietske - copy - paste on the image.
Place it right at the top - see example.
Erase with the eraser such as in the example.
6.
Open de poser tube - copy - paste on the image.
Place it at the left side.
Give the same drop shadow.
7.
Open Emmy tekst - copy - paste on the image.
Place it at the top - see example.
8.
Open mijter- copy - paste on the image.
Place it at the bottom of the tube 602011 - see example.
Give the same drop shadow.
9.
Open kado- copy - paste on the image.
Place it right at the bottom.
Give the same drop shadow.
10.
Open spielzeug-01- copy - paste on the image.
Place it in the middle at the bottom.
Give the same drop shadow.
11.
Open zak- copy - paste on the image.
Place it right at the bottom.
Give the same drop shadow.
12.
Layers - new raster layer - set your watermark into the image.
Layers - merge - merge all visible layers.
File - export - PNG Optimizer.
Ready is the tag
I hope you like this tutorial.
greetings Emmy
Thank you Ingrid for testing.