|

This
Tutorial is copyrighted to the Tutorial Writer, © Emmy Kruyswijk.
This Tutorial may not be forwarded, shared or otherwise placed on any Web Site
or group without written
permission from
Emmy Kruyswijk.
Please respect my work and don't change the file names.
Do you want to link my lessons?
Please send
me a mail.
Needing:
The beautiful
poser tube is unknown.
I
used parts from the scrapkits Love of
Mago74.
Before you begins.......
Open the tubes in PSP.
Material

Love

1.
File - open new transparent image 700x700.
Activate the tube LOVE_by_Majo74 WA (5) -
edit - copy.
Edit - paste as a new layer on the image.
2.
Activate the tube LOVE_by_Majo74 ramka (3) -
edit - copy.
Edit - paste as a new layer on the image.
Effects - 3D Effects - drop shadow - with this setting.

3.
Activate raster 2.
Activate the tube Kiki_Valentine-2013-01c -
edit - copy.
Edit - paste as a new layer on the image.
Activate move tool - place the head - as below.

Activate the eraser - and erase the part under the frame - see below.
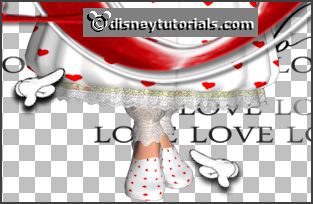
Layers - duplicate.
Layers - arrange - up.
Erase the part on the frame.
Effects - 3D Effects - drop shadow - setting is right.
4.
Activate the tube LOVE_by_Majo74 elem (38) -
edit - copy.
Edit - paste as a new layer on the image.
Place it under the LOVE tube - see example.
Effects - 3D Effects - drop shadow - setting is right.
5.
Activate the tube LOVE_by_Majo74 elem (6) -
edit - copy.
Edit - paste as a new layer on the image.
Place it under the words love love - see example.
Effects - 3D Effects - drop shadow - setting is right.
6.
Activate the tube LOVE_by_Majo74 elem (13) -
edit - copy.
Edit - paste as a new layer on the image.
Place it left at the bottom - see example.
Effects - 3D Effects - drop shadow - setting is right.
7.
Activate the tube LOVE_by_Majo74 elem (34) -
edit - copy.
Edit - paste as a new layer on the image.
Place it right at the top - see example.
Layers - arrange - down - set it under raster 3.
Effects - 3D Effects - drop shadow - setting is right.
8.
Activate the tube LOVE_by_Majo74 elem (15) -
edit - copy.
Edit - paste as a new layer on the image.
Place it right above the letter E - see example. Make sure nothing comes out.
Effects - 3D Effects - drop shadow - setting is right.
9.
Activate the tube LOVE_by_Majo74 elem (16) -
edit - copy.
Edit - paste as a new layer on the image.
Image - free rotate - with this setting.

Effects - Image effects - offset - with this setting.
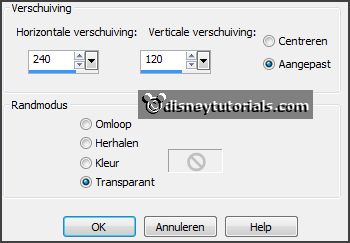
Effects - 3D Effects - drop shadow - setting is right.
10.
Activate the tube LOVE_by_Majo74 elem (56) -
edit - copy.
Edit - paste as a new layer on the image.
Image - resize 75% - all layers not checked.
Place it on the letter E - see example.
Effects - 3D Effects - drop shadow - setting is right.
11.
Layers - new raster layer - set your watermark into the image.
Layers - merge - merge all visible layers.
File - export - PNG Optimizer.
Ready is the tag
I hope you like this tutorial.
greetings Emmy
Thank you Nelly for testing.


tutorial written
23-11-2014 |