This
Tutorial is copyrighted to the Tutorial Writer, © Emmy Kruyswijk.
This Tutorial may not be forwarded, shared or otherwise placed on any Web Site
or group without written
permission from Emmy Kruyswijk.
Please respect my work and from others, don't change the file names.
Do you want to link my lessons?
Please send me a mail.
Needing:
I use parts of different scrapkits.
The poser tube is from me. My site you can find
here.
If you
use my tubes put than the copyright render at the image.
Before you begins.......
Open the tubes in PSP.
Material

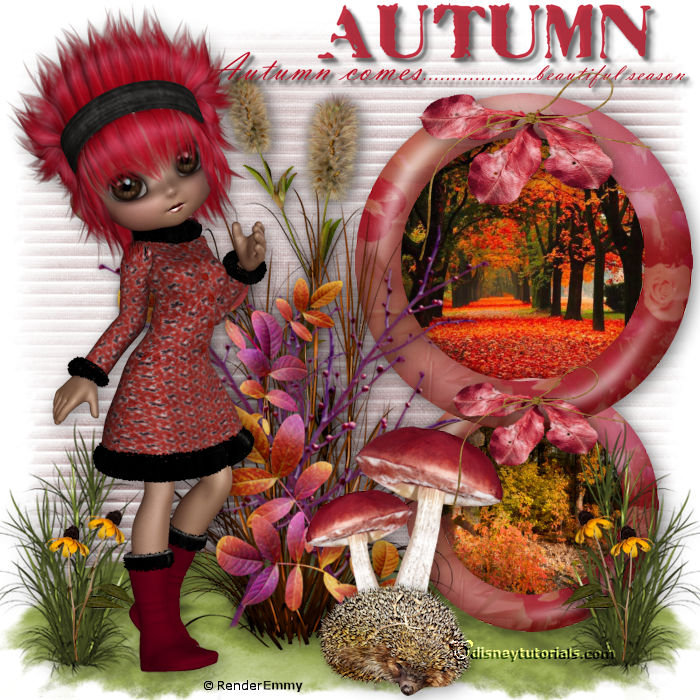
Autumn Comes

1.
Open new transparent image 700x700.
Open mask - copy - paste on the image.
2.
Open element 143 - copy - paste on the image.
Place it left at the bottom.
Layers - duplicate - image - mirror.
Layers - merge - merge down.
3.
Open ringen - copy - paste on the image.
Place it to the right.
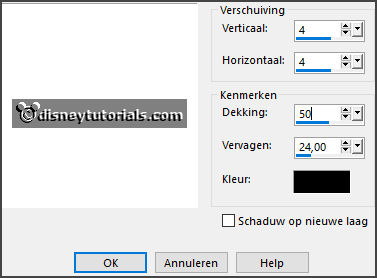
Give a drop shadow - with this setting.

4.
Open herfst1 - copy - paste on the image.
Place it on the top ring (circle).
Layers - arrange - down.
5.
Open herfst2 - copy - paste on the image.
Place it on the lower ring (circle).
6.
Activate the top layer.
Open cluster - copy - paste on the image.
Place it in the middle at the bottom.
Give the same drop shadow.
7.
Open ele2 - copy - paste on the image.
Place it in the middle at the bottom.
Give the same drop shadow.
Layers - arrange - down.
8.
Activate the top layer.
Open Delph_forestfruits_el16 - copy - paste on the image.
Place it right at the top.
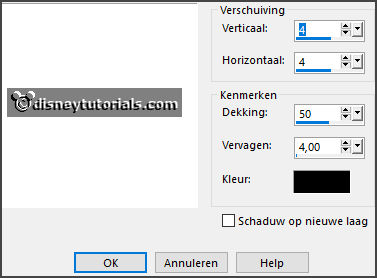
Give a drop shadow - with this setting.

Repeat the drop shadow - settings are right.
9.
Open paddenstoelen - copy - paste on the image.
Place it in the middle at the top - see image.
Give a drop shadow - with this setting.

10.
Open Renadesign_forestfruits_el10 - copy - paste on the image.
Place in the middle at the bottom.
Give the same drop shadow.
11.
Open Element 95 - copy - paste on the image.
Place it left at the bottom.
Give the same drop shadow.
Layers - duplicate - image - mirror.
12.
Open Element 72 - copy - paste on the image.
Place it left at the bottom.
Give the same drop shadow.
Layers - duplicate - image - mirror.
13.
Open Le petit scrap (56)- copy - paste on the image.
Place it at the upper ring (circle) at the top.
Give the same drop shadow.
Layers - duplicate.
Image - resize format 75% - all layers not checked.
Place it at the upper ring (circle) at the bottom.
14.
Open de poser tube- copy - paste on the image.
Place it at the left side.
Give the same drop shadow.
15.
Layers - new raster layer - set your watermark into the image.
Layers - merge - merge all visible layers.
File - export - PNG Optimizer.
Ready is the tag
I hope you like this tutorial.
greetings Emmy
Thank you Ingrid for testing.