|

This
Tutorial is copyrighted to the Tutorial Writer, © Emmy Kruyswijk.
This Tutorial may not be forwarded, shared or otherwise placed on any Web Site
or group without written
permission from
Emmy Kruyswijk.
Please respect my work and don't change the file names.
Do you want to link my lessons?
Please send
me a mail.
Needing:
The beautiful poser tube is Gerda and should not be
shared. Her site can be found
here
If you want to use this tube, you
need to download the tube from her site..
I
used parts from the scrapkits Mardi Gras of
Carolina.
Before you begins.......
Open the tubes in PSP.
Material

Mardi Gras

1.
File - open new transparent image 700x700.
Set the foreground color at white and the background color at #6a3584.
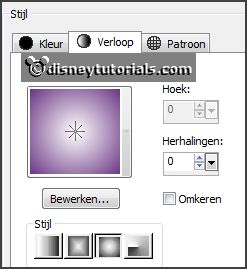
Make from the foreground a gradient
sunburst - with this setting.
2.
Activate the achtergrond -
edit - copy.
Edit - paste as a new layer on the image.
Image - resize 115% - all layers not checked.
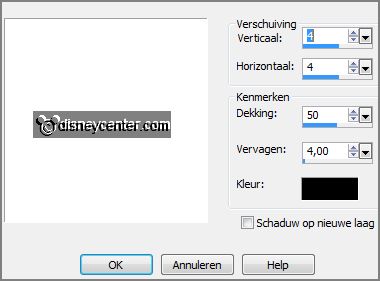
Effects - 3D Effects - drop shadow - with this setting.
3.
Activate the tube element16 -
edit - copy.
Edit - paste as a new layer on the image.
Image - free rotate - with this setting.

Activate move tool - move a little to the right.
Effects - 3D Effects - drop shadow - setting is right.
4.
Activate the magic wand - select in the middle of the frame - see below.
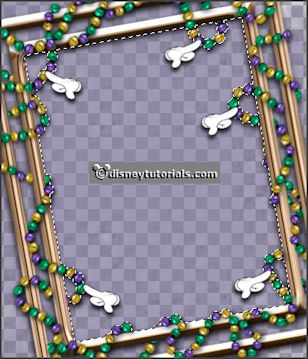
Selections - modify - expand 5 pixels.
Layers - new raster layers.
Fill the selection with the gradient.
Selections - select none.
Layers - arrange - down.
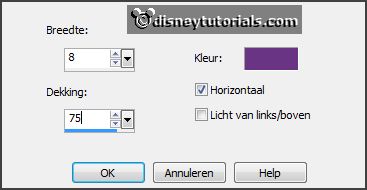
Effects - Texture effects - Blinds - with this setting.
Selections - select none.
5.
Activate raster 4.
Activate the posertube -
edit - copy.
Edit - paste as a new layer on the image.
Effects - Image effects - offset - with this setting.
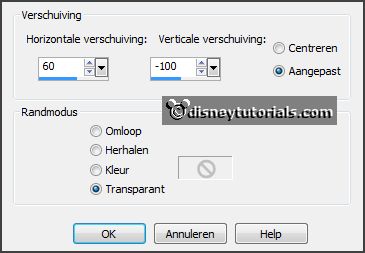
Activate the eraser - and erase the part under the frame.
Layers duplicated.
Layers - arrange - up.
Erase the part on the frame.
Effects - 3D Effects - drop shadow - setting is right.
6.
Activate the tube element15 -
edit - copy.
Edit - paste as a new layer on the image.
Place it left at the bottom - see example.
Effects - 3D Effects - drop shadow - setting is right.
7.
Activate the tube element22 -
edit - copy.
Edit - paste as a new layer on the image.
Place it left at the bottom - near the coins - see example.
Effects - 3D Effects - drop shadow - setting is right.
8.
Activate the tube element25 -
edit - copy.
Edit - paste as a new layer on the image.
Image - mirror.
Place it right at the bottom - see example.
Effects - 3D Effects - drop shadow - setting is right.
9.
Activate the tube element20 -
edit - copy.
Edit - paste as a new layer on the image.
Place it in the middle at the bottom - see example.
Effects - 3D Effects - drop shadow - setting is right.
10.
Activate the tube element5 -
edit - copy.
Edit - paste as a new layer on the image.
Place it left at the top - see example.
Effects - 3D Effects - drop shadow - setting is right.
Layers - arrange - down - set it under raster 3.
Erase the part up and between the frame - see example.
Activate the top layer.
11.
Layers - new raster layer - set your watermark into the image.
Layers - merge - merge all visible layers.
File - export - PNG Optimizer.
Ready is the tag
I hope you like this tutorial.
greetings Emmy
Thank you Nelly for testing.
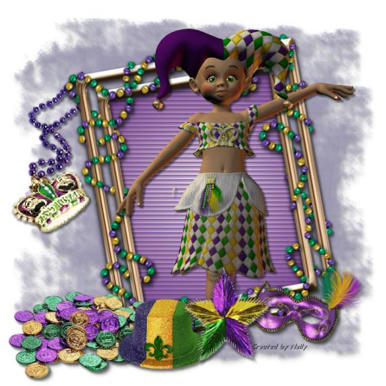

tutorial written
22-11-2014 |