This
Tutorial is copyrighted to the Tutorial Writer, © Emmy Kruyswijk.
This Tutorial may not be forwarded, shared or otherwise placed on any Web Site
or group without written
permission from Emmy Kruyswijk.
Please respect my work and from others, don't change the file names.
Do you want to link my lessons?
Please send me a mail.
Needing:
I use parts of different scrapkits.
The poser tube is a buy tube of me. Is not by the material. You can buy it
here.
The template separate to download, stay under the material.
Before you begins.......
Open the tubes in PSP
Material

Template download here
Luck of the Irish

1.
Open the template St.Patricks.
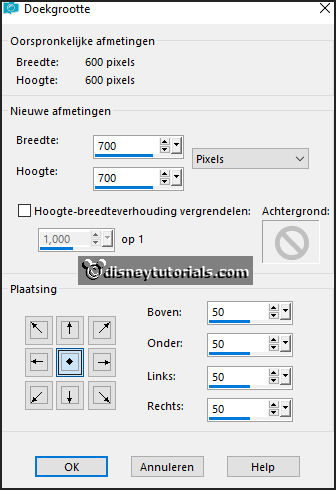
Image - canvas size - with this setting.

Delete the copyright.
Delete raster 3, 4, 5, 8, 11 en 12.
Place raster 10 right to the bottom.
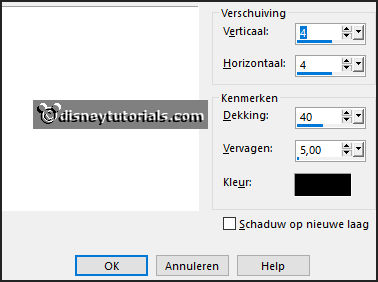
Give a drop shadow - with this setting.

Make the vector layer active.
2.
Open background - copy - paste on the image.
Active raster 2.
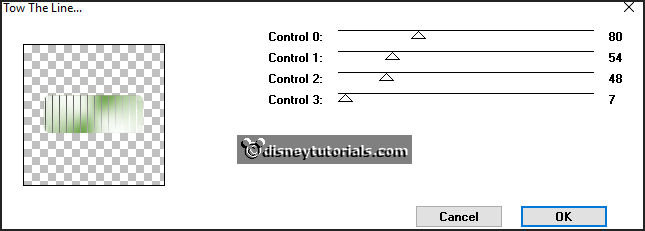
Effects - plug-ins - Tramages - Tow The Line - with this setting.

3.
Open koren - copy - paste on the image.
Layers - arrange - down - under raster1.
Give the same drop shadow.
Make raster 1 active - Give the same drop shadow.
Make raster 6 active - Give the same drop shadow.
Make raster 9 active.
4.
Open 32 - copy - paste on the image.
Place it under in the square.
Give the same drop shadow.
Make the top layer active.
5.
Open Element_20 - copy - paste on the image.
Place it on the clover.
Give the same drop shadow.
6.
Open Elem1 - copy - paste on the image.
Place it in the middle at the bottom.
Give the same drop shadow.
7.
Open wordart - copy - paste on the image.
Place it in the middle at the top.
8.
Open de poser tube - copy - paste on the image.
Place it at the left side.
Give the same drop shadow.
9.
Layers - new raster layer - set your watermark into the image.
Layers - merge - merge all visible layers.
File - export - PNG Optimizer.
Ready is the tag
I hope you like this tutorial.
greetings Emmy