This
Tutorial is copyrighted to the Tutorial Writer, © Emmy Kruyswijk.
This Tutorial may not be forwarded, shared or otherwise placed on any Web Site
or group without written
permission from Emmy Kruyswijk.
Please respect my work and from others, don't change the file names.
Do you want to link my lessons?
Please send me a mail.
Needing:
I use parts of different scrapkits.
The poser tube is a buy tube of me. Is not by the material. You can buy it
here.
Before you begins.......
Open the tubes in PSP
Material

Your Smile makes my Heart Bounce...

1.
Open new transparent image 750x750.
Open mask – copy - paste on the image.
Open Achtergrond03 - copy - paste on the image.
2.
Open book - copy - paste on the image.
Place it a little to the right.
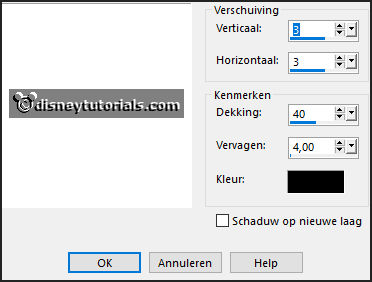
Give a drop shadow - with this setting.

3.
Open je poser tube - copy - paste on the image.
Place it at the left side.
Give the same drop shadow.
4.
Open harten - copy - paste on the image.
Place it to the right - above the book.
Give the same drop shadow.
5.
Open kl.hartje - copy - paste on the image.
Place it under the middle heart.
Give the same drop shadow.
6.
Open strik - copy - paste on the image.
Place it under the book in the middle.
Give the same drop shadow.
7.
Open roos - copy - paste on the image.
Place it left in the first heart.
Give the same drop shadow.
Layers – duplicate.
Image - mirror.
Place it in the last heart.
8.
Open boekenroos - copy - paste on the image.
Place it right at the bottom – see example.
Give the same drop shadow.
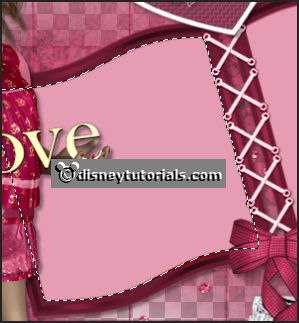
Select with the magic want on the left page of the book.

Layers - new raster layer.
9.
Open Achtergrond-Frame01 - copy - paste in the selection.
Selection – select none.
Set the blend mode on Luminance legacy.
10.
Open CelinoasDesigns_FullOfLove_El_01 - copy - paste on the image.
Place it right under the.
Set the blend mode on Luminance legacy and the opacity to 50.
11.
Open 006_yoursmile - copy - paste on the image.
Place it in the middle at the bottom.
Give the same drop shadow.
Activate the top layer.
12.
Layers - new raster layer - set your watermark into the image.
Layers - merge - merge all visible layers.
File - export - PNG Optimizer.
Ready is the tag
I hope you like this tutorial.
greetings Emmy