
This
Tutorial is copyrighted to the Tutorial Writer, © Emmy Kruyswijk.
This Tutorial may not be forwarded, shared or otherwise placed on any Web Site
or group without written
permission from Emmy Kruyswijk.
Please respect my work and from others, don't change the file names.
Do you want to link my lessons?
Please send me a mail.
Needing:
I use parts of different scrapkits.
The poser tube is a buy tube of me. Is not by the material. You can buy it
here.
Before you begins.......
Open the tubes in PSP
Material

Sint en Piet wie kent hen niet....
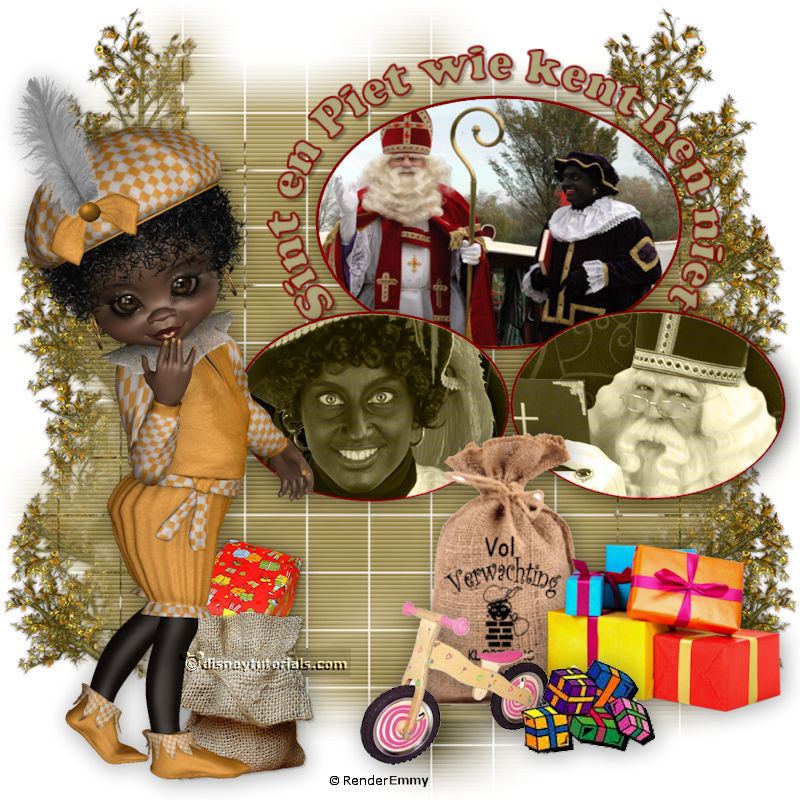
1.
Open new transparent image 800x800
Open mask-Emmy – copy - paste on the image.
2.
Open sintenpiet - copy - paste on the image.
Effects - Image effects – offset – with this setting.
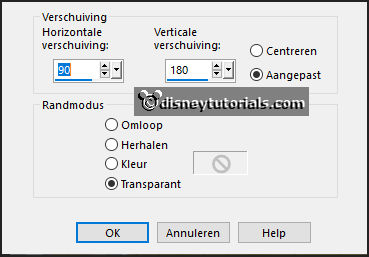
3.
Open kl.ovaal - copy - paste on the image.
Effects - Image effects – offset – with this setting.
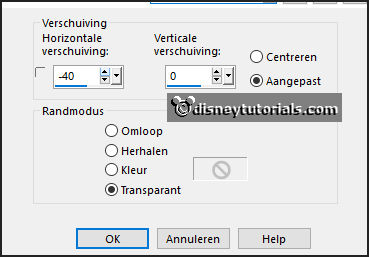
Selection – select all - selection float – selection defloat.
4.
Open huis_strooigoed - copy - paste on the image.
Move the head in the image.
Selection – invert – click on the delete key.
Select none.
Set the blend mode on Luminance (Legacy).
5.
Make raster 3 active.
Layers – duplicate.
Effects - Image effects – offset – with this setting.
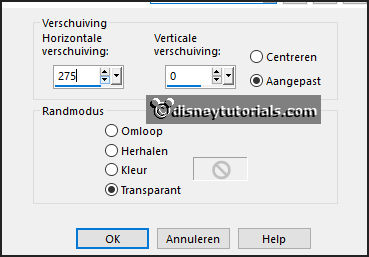
Selection – select all - selection float – selection defloat.
6.
Open huis_boek - copy - paste on the image.
Move the head in the image.
Selection – invert – click on the delete key.
Select none.
Set the blend mode on Luminance (Legacy).
7.
Open WA-Emmy - copy - paste on the image.
Place it above the big ovaal.
8.
Open je poser tube - copy - paste on the image.
Place it at the left side.
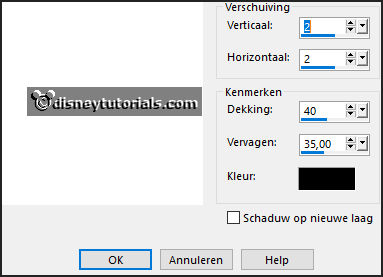
Effects – 3D effects – drop shadow – with this setting.
9.
Open 85-1 - copy - paste on the image.
Place it in the middle at the bottom – see example.
Give the same drop shadow.
10.
Open kadootjes - copy - paste on the image.
Place it right at the bottom – see example.
Give the same drop shadow.
11.
Open loopfietsje - copy - paste on the image.
Place it in the middle at the bottom – see example.
Give the same drop shadow.
12.
Open kado’s - copy - paste on the image.
Place it in the middle at the bottom – see example.
Give the same drop shadow.
13.
Layers - new raster layer - set your watermark into the image.
Layers - merge - merge all visible layers.
File - export - PNG Optimizer.
Ready is the tag
I hope you like this tutorial.
greetings Emmy