This
Tutorial is copyrighted to the Tutorial Writer, © Emmy Kruyswijk.
This Tutorial may not be forwarded, shared or otherwise placed on any Web Site
or group without written
permission from Emmy Kruyswijk.
Please respect my work and from others, don't change the file names.
Do you want to link my lessons?
Please send me a mail.
Needing:
I use parts of different scrapkits.
The poser tube is a buy tube of me. Is not by the material. You can buy it
here.
Before you begins.......
Open the tubes in PSP
Material

5 december....

1.
Open new transparent image 800x800.
Open Regina-Maskerlaag – copy - paste on the image.
2.
Open Emmyframe – copy - paste on the image.
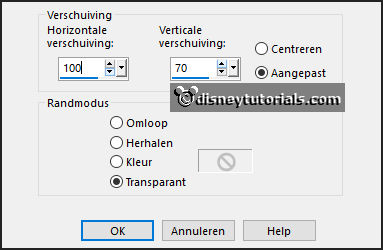
Effects - Image effects – offset – with this setting.

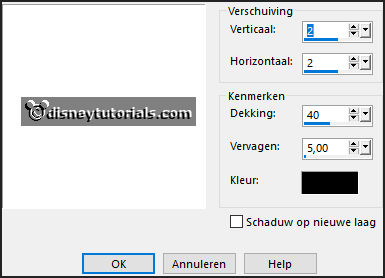
Effects – 3D effects – drop shadow – with this setting.

3.
Open bgr-frame – copy - paste on the image.
Place it on the frame.
Layers – arrange – down.
Activate the top layer.
4.
Open sint - copy - paste on the image.
Place it on the frame – see example.
Give the same drop shadow.
Layers – duplicate.
Place it under raster 2.
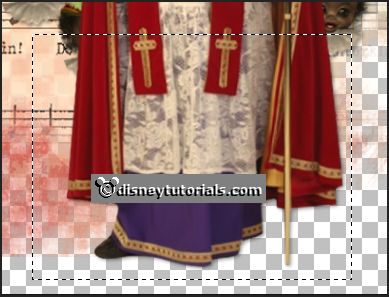
Go to selection tool – rectangle – and make a selection – as below.

Click on the delete key.
Keep selection and make the top layer active.
Click on the delete key.
Select none.
Erase with the eraser the pietjes(frame) clean – see example.
5.
Open saskias_tubed_¬doos01 - copy - paste on the image.
Place it in the middle at the bottom.
Give the same drop shadow.
6.
Open zak - copy - paste on the image.
Place it right at the bottom.
Give the same drop shadow.
7.
Open pepernoten - copy - paste on the image.
Place it in the middle at the bottom.
Give the same drop shadow.
8.
Open treintje - copy - paste on the image.
Place it in the middle at the bottom.
Give the same drop shadow.
9.
Open WA-Emmy - copy - paste on the image.
Place it in the middle at the top.
10.
Open speculaaspop - copy - paste on the image.
Place it left of the pepernoten.
Give the same drop shadow.
11.
Open de poser tube - copy - paste on the image.
Place it at the left side.
Give the same drop shadow.
12.
Layers - new raster layer - set your watermark into the image.
Layers - merge - merge all visible layers.
File - export - PNG Optimizer.
Ready is the tag
I hope you like this tutorial.
greetings Emmy