This
Tutorial is copyrighted to the Tutorial Writer, © Emmy Kruyswijk.
This Tutorial may not be forwarded, shared or otherwise placed on any Web Site
or group without written
permission from Emmy Kruyswijk.
Please respect my work and from others, don't change the file names.
Do you want to link my lessons?
Please send me a mail.
Needing:
I use parts of different scrapkits.
The poser tube is a buy tube of me. Is not by the material. You can buy it
here.
Before you begins.......
Open the tubes in PSP
Material

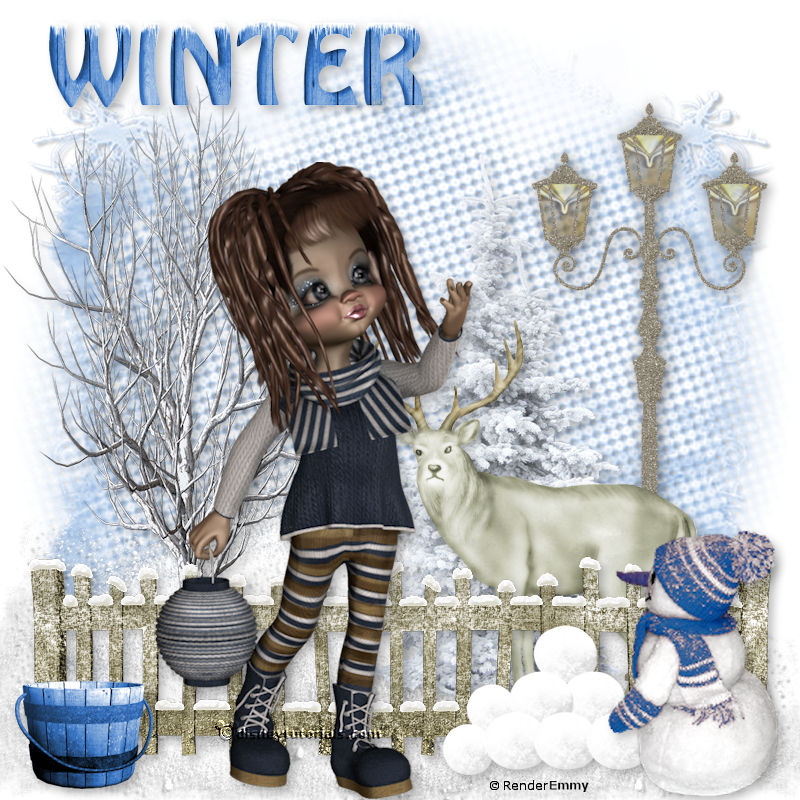
Winter

1.
Open new transparent image 800x800.
Open masker – copy - paste on the image.
2.
Open snow – copy - paste on the image.
Place it down.
3.
Open lantaarn – copy - paste on the image.
Place it at the right side.
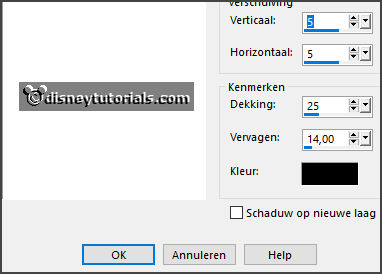
Effects – 3D effects – drop shadow – with this setting.

4.
Open Cloud-GI-ChristmasTimeSampler – copy - paste on the image.
Place it right at the top.
Layers – duplicate – image – mirror.
Layers – merge – merge down.
Layers – arrange - down.
5.
Open HPD_CIMH_18 – copy - paste on the image.
Place it at the left side.
Give the same drop shadow.
6.
Open ial_as_sf_tree1 – copy - paste on the image.
Place it left of the lantern.
Give the same drop shadow.
7.
Open ial_as_sf_deer – copy - paste on the image.
Place it before the tree and the lantern.
Give the same drop shadow.
8.
Open Fence-GI-ChristmasTimeSampler – copy - paste on the image.
Place it down.
Give the same drop shadow.
9.
Open graveflakes_florju_element(2) – copy - paste on the image.
Place it right at the bottom.
Give the same drop shadow.
10.
Open snowman – copy - paste on the image.
Place it right at the bottom.
Give the same drop shadow.
11.
Open showerofsnow_element_florju(43) – copy - paste on the image.
Place it left at the bottom.
Give the same drop shadow.
12.
Open je poser tube – copy - paste on the image.
Place it left at the bottom a little in the middle.
Give the same drop shadow.
13.
Open Bucket – copy - paste on the image.
Place it left at the bottom.
Give the same drop shadow.
14.
Layers - new raster layer - set your watermark into the image.
Layers - merge - merge all visible layers.
File - export - PNG Optimizer.
Ready is the tag
I hope you like this tutorial.
greetings Emmy