
This
Tutorial is copyrighted to the Tutorial Writer, © Emmy Kruyswijk.
This Tutorial may not be forwarded, shared or otherwise placed on any Web Site
or group without written
permission from Emmy Kruyswijk.
Please respect my work and from others, don't change the file names.
Do you want to link my lessons?
Please send me a mail.
Needing:
I use parts of different scrapkits.
The poser tube is a buy tube of me. Is not by the material. You can buy it
here.
Before you begins.......
Open the tubes in PSP
Open de tubes in PSP
Material

Santa please stop here!

1.
Open new transparent image 800x800.
Set the foreground on #c67679
and the background on white.
2.
Open mask – copy - paste on the image.
3.
Open lantaarnpaal - copy - paste on the image.
Layers – duplicate – image - mirror.
4.
Open 40 - copy - paste on the image.
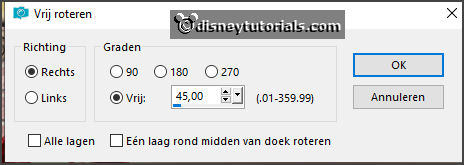
Image – free rotate – with this setting.
Layers – new raster layer.
Click with the magic wand in the middle of the frame.
Selections – modify – expand 7 pixels.
5.
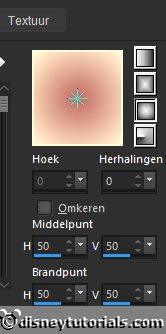
Make from the foreground a gradient sunburst – with this setting.
Fill the selection with the gradient.
Layers – arrange – down.
Selection – select none.
6.
Open 43 - copy - paste on the image.
Place this in the middle at the top.
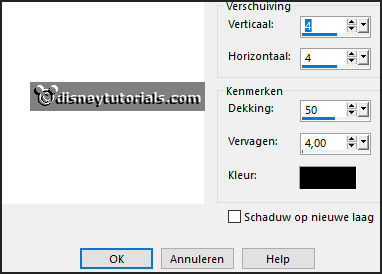
Effects – 3D Effects – drop shadow – with this setting.
7.
Open 107 - copy - paste on the image.
Place it right at the bottom – see example.
Give the same drop shadow.
8.
Open 118 - copy - paste on the image.
Place this in the middle at the bottom.
Give the same drop shadow.
9.
Open 100 - copy - paste on the image.
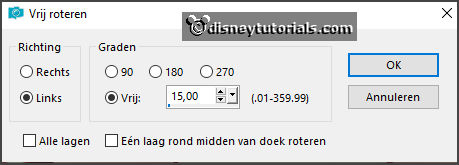
Image – free rotate – with this setting.
Place it left at the bottom - see example.
Give the same drop shadow.
10.
Open 109 - copy - paste on the image.
Place it right on the letter - see example.
Give the same drop shadow.
Make raster 3 active.
11.
Open je poser tube - copy - paste on the image.
Give the same drop shadow.
Layers - duplicate – layers – arrange - up.
Erase with the eraser that part away of the poser tube – see example
12.
Open WA - copy - paste on the image.
Place it right at the bottom.
13.
Layers - new raster layer - set your watermark into the image.
Layers - merge - merge all visible layers.
File - export - PNG Optimizer.
Ready is the tag
I hope you like this tutorial.
greetings Emmy