
This
Tutorial is copyrighted to the Tutorial Writer, © Emmy Kruyswijk.
This Tutorial may not be forwarded, shared or otherwise placed on any Web Site
or group without written
permission from Emmy Kruyswijk.
Please respect my work and from others, don't change the file names.
Do you want to link my lessons?
Please send me a mail.
Needing:
I use parts of different scrapkits and the internet.
The poser tube is a buy tube of me. Is not by the material. You can buy it
here.
Before you begins.......
Open the tubes in PSP
Open de tubes in PSP
Material

Christmas Time

1.
Open new transparent image 650x500
2.
Set the foreground op #f42b2c and the background to #20461a.
Make of the foreground a gradient sunburst– with this setting.
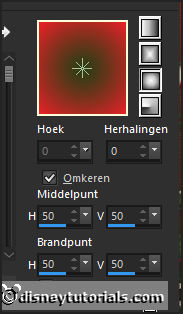
3.
Image - add border – symmetric not checked – color foreground - with this
setting.
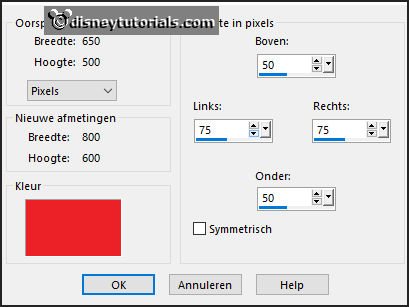
Effects – image effect – seamless repeat – standard.
Effects – Edge Effects – accentuate.
4.
Image - add border – symmetric not checked – color background - with this
setting.
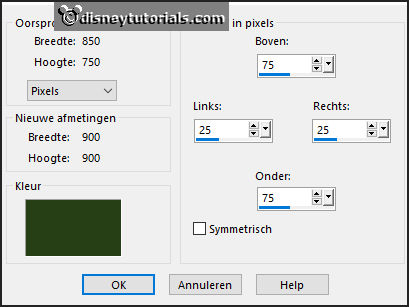
Effects – image effect – seamless repeat – standard.
Effects – Edge Effects – accentuate.
5.
Open cluster – copy - paste on the image.
Place it left at the bottom – see example.
6.
Open klok – copy - paste on the image.
Place it left and a little up en – see example.
Effects – 3D Effects – drop shadow – with this setting.
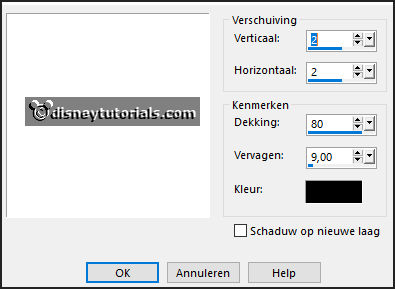
Layers - arrange down.
Stay at this layer.
7.
Open kerstboom – copy - paste on the image.
Place it a little to right and a little up – see example.
Give the same drop shadow.
8.
Open WA-Emmy – copy - paste on the image.
Place it in the middle at the top - see example.
9.
Open je poser tube – copy - paste on the image.
Place it at the right side - see example.
10.
Image - add border – symmetric checked – color white – 25 pixels.
Click with the magic wand in the white border.
Change the gradient to radial – with this setting.
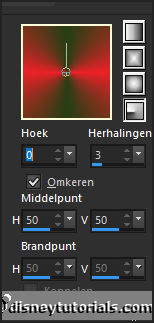
Fill the selection with the gradient.
Adjust – blur – Gaussian blur op 10.
Selections – select none.
Effects – plug-inns - Fotoframe – with this setting.
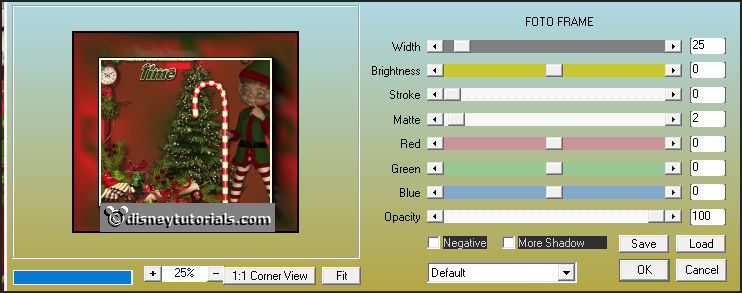
11.
Layers - new raster layer - set your watermark into the image.
Layers - merge - merge all layers.
File - export - JPEG Optimizer.
Ready is the tag
I hope you like this tutorial.
greetings Emmy