1.
File - open new transparent image 700x700.
Activate the tube frame 14 -
edit - copy.
Edit - paste as a new layer on the image.
2.
Activate the tube slro5 -
edit - copy.
Edit - paste as a new layer on the image.
Activate move tool - place it at the top in the middle of the
frame. Be sure that is stays in the middle.
Layers - arrange - move down.
Layers - duplicate.
Image - flip.
Activate the top layer.
Layers - merge - merge down - and 1 more time.
3.
Edit - paste as a new layer on the image ( stays still in memory).
Image - free rotate - with this setting.

Place it at the left side in the middle.
Layers - arrange - move down.
Layers - duplicate.
Image - mirror.
Activate the top layer.
Layers - merge - merge down - and 1 more time.
4.
Image - resize 75% - all layers not checked.
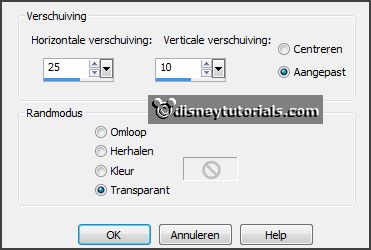
Effects - Image effects - offset - with this setting.

Activate the magic wand - with setting below - select in the middle of the frame.

Selections - modify - expand 7 pixels.
5.
Layers - new raster layer.
Activate the paper p2 - edit - copy.
Edit - paste in selection.
Selections - select none.
Layers - arrange - move down.
6.
Activate the tube slg5 -
edit - copy.
Edit - paste as a new layer on the image.
Place it a little to the right- so that it stays in the middle of the frame.
Set the blend mode to Luminance (legacy) and the opacity to 55
Activate the top layer.
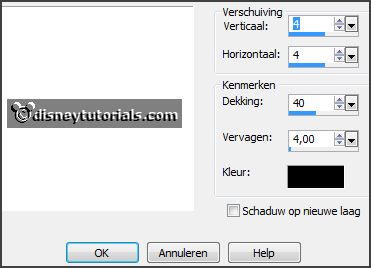
Effects - 3D Effects - drop shadow -
with this setting.

7.
Activate the tube sl20 -
edit - copy.
Edit - paste as a new layer on the image.
Place it left to the top - see example.
Effects - 3D Effects - drop shadow - setting is right.
8.
Activate the tube sl39 -
edit - copy.
Edit - paste as a new layer on the image.
Image - free rotate - with this setting.

Place it right at the top - see example.
Effects - 3D Effects - drop shadow - setting is right.
9.
Activate the tube sls5 -
edit - copy.
Edit - paste as a new layer on the image.
Place it on the sign left - see example.
Layers - duplicate.
Place it right on the sign.
Layers - merge - merge down.
Effects - 3D Effects - drop shadow - setting is right.
10.
Activate the tube sl35 -
edit - copy.
Edit - paste as a new layer on the image.
Place it at the right side - see example.
Effects - 3D Effects - drop shadow - setting is right.
11.
Activate the tube sl16 -
edit - copy.
Edit - paste as a new layer on the image.
Place it at the left side at the bottom - see example.
Effects - 3D Effects - drop shadow - setting is right.
12.
Activate the tube sl27 -
edit - copy.
Edit - paste as a new layer on the image.
Image - resize 75% - all layers not checked.
Place it in the middle at the bottom - see example.
Effects - 3D Effects - drop shadow - setting is right.
13.
Activate the tube sl9 -
edit - copy.
Edit - paste as a new layer on the image.
Place it at the left side at the bottom - see example.
Effects - 3D Effects - drop shadow - setting is right.
14.
Activate the tube slr10 -
edit - copy.
Edit - paste as a new layer on the image.
Place it at the right side at the bottom - see example.
Effects - 3D Effects - drop shadow - setting is right.
15.
Activate the tube slr11 -
edit - copy.
Edit - paste as a new layer on the image.
Place it at the right side at the bottom above the other - see example.
Effects - 3D Effects - drop shadow - setting is right.
16.
Activate the tube sl1 -
edit - copy.
Edit - paste as a new layer on the image.
Place it almost in the middle at the bottom - see example.
Effects - 3D Effects - drop shadow - setting is right.
17.
Activate the tube sl2 -
edit - copy.
Edit - paste as a new layer on the image.
Image - mirror.
Place it right at the bottom - see example.
Effects - 3D Effects - drop shadow - setting is right.
18.
Activate raster 1.
Activate the poser tube steampunk -
edit - copy.
Edit - paste as a new layer on the image.
Place it left in the frame - see example.
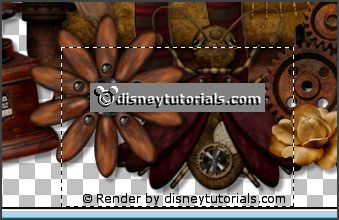
Activate selection tool - rectangle - and make a selection - as below - click at
the delete key.

Selections - select none.
Effects - 3D Effects - drop shadow - setting is right.