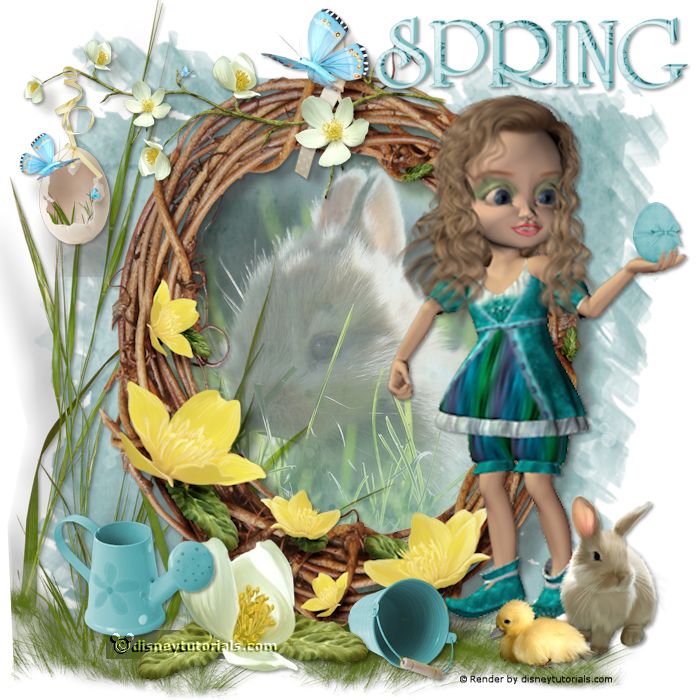
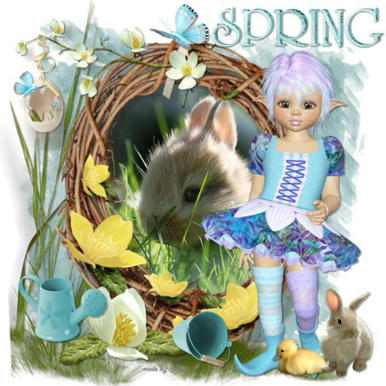
1.
File - open new transparent image 700x700.
Activate Emmy-mask -
edit - copy.
Edit - paste as a new layer on the image.
2.
Activate the tube sussieM Here Comes the Spring CE6 -
edit - copy.
Edit - paste as a new layer on the image.
Activate move tool - place it to the left.
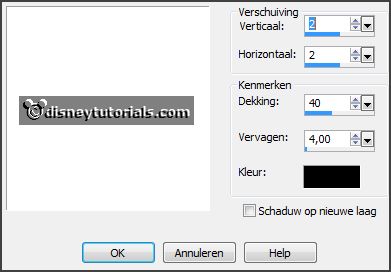
Effects - 3D Effects - drop shadow - with this setting.
3.
Activate the tube sussieM Here Comes the Spring EP65sh -
edit - copy.
Edit - paste as a new layer on the image.
Activate selection tool - ellipse - and make a selection - as below.
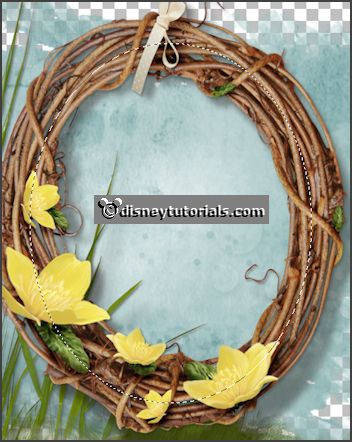
4.
Activate the tube merydesign_animeaux120 - groupe raster 2 -
edit - copy.
Edit - paste as a new layer on the image.
Move it - as you like it.
Selections - invert - click on the delete key.
Selections - select none.
Layers - arrange - down.
Set the opacity of this layer to 50.
5.
Activate the top layer.
Activate the tube sussieM Here Comes the Spring CE1 -
edit - copy.
Edit - paste as a new layer on the image.
Place it at the top in the middle of the frame - see example.
Effects - 3D Effects - drop shadow -
setting is right.
Erase the last piece of the flower stalk.
6.
Activate the tube sussieM Here Comes the Spring EP60 -
edit - copy.
Edit - paste as a new layer on the image.
Place it at the top in the middle of the frame - see example.
Effects - 3D Effects - drop shadow -
setting is right.
7.
Activate the tube sussieM Here Comes the Spring Free5 -
edit - copy.
Edit - paste as a new layer on the image.
Place it right at the top - see example.
Effects - 3D Effects - drop shadow -
setting is right.
8.
Activate the tube poserkiki3 -
edit - copy.
Edit - paste as a new layer on the image.
Place it at the right side - see example.
Effects - 3D Effects - drop shadow -
setting is right.
9.
Activate the tube sussieM Here Comes the Spring Free3 -
edit - copy.
Edit - paste as a new layer on the image.
Place it right at the bottom - see example.
Effects - 3D Effects - drop shadow -
setting is right.
10.
Activate the tube sussieM Here Comes the Spring EP17 -
edit - copy.
Edit - paste as a new layer on the image.
Place it lest at the bottom near the rabbit.
Effects - 3D Effects - drop shadow -
setting is right.
11.
Activate the tube sussieM Here Comes the Spring EP44 -
edit - copy.
Edit - paste as a new layer on the image.
Place it in the middle at the bottom - see example.
Effects - 3D Effects - drop shadow -
setting is right.
12.
Activate the tube sussieM Here Comes the Spring EP6a -
edit - copy.
Edit - paste as a new layer on the image.
Place it at the bottom - see example.
Effects - 3D Effects - drop shadow -
setting is right.
13.
Activate the tube sussieM Here Comes the Spring EP45 -
edit - copy.
Edit - paste as a new layer on the image.
Place it left at the bottom - see example.
Effects - 3D Effects - drop shadow -
setting is right.