1.
File - open new transparent image 700x700.
Set the foreground color to #d9a3c0 and the background color to white.
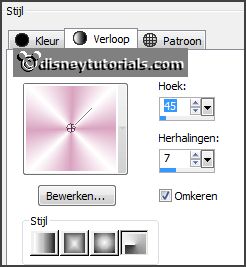
Make from the foreground a gradient radial - with this setting.
2.
Activate the tube cajoline_kissme_16 -
edit - copy.
Edit - paste as a new layer on the image.
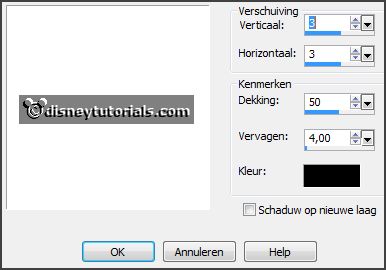
Effects - 3D Effects - drop shadow - with this setting.
Activate free hand selection tool -
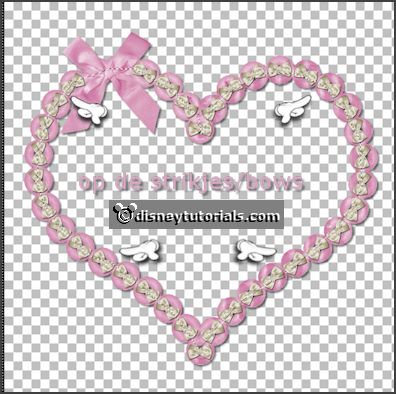
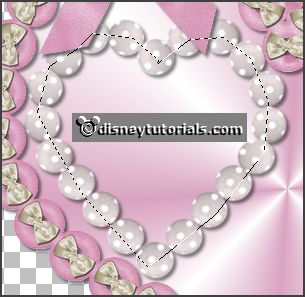
from point to point - and make a selection - as below.
3.
Layers - new raster layers.
Fill the selection with the gradient.
Selections - select none.
Layers - arrange - down.
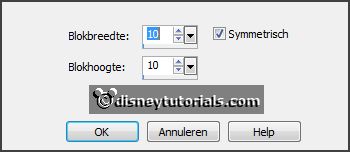
Effects - Distortion effects - Pixelate - with this setting.
Effects -Edge effects - enhance more.
Repeat -
Edge effects - now enhance.
4.
Activate the tube cajoline_perlesdamour_addon_el8 -
edit - copy.
Edit - paste as a new layer on the image.
Image - free rotate -
with this setting.

Activate move tool - place it left at the top in the heart - see example.
Effects - 3D Effects - drop shadow -
setting is right.
Activate free hand selection tool - from point to point - and make a selection -
as below.
5.
Layers - new raster layers.
Fill the selection with the foreground color.
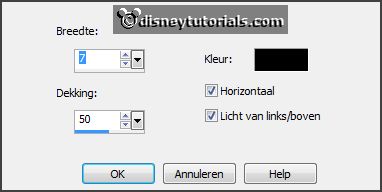
Effects - Texture effects - blinds -
with this setting.
Selections - select none.
Layers - arrange - down.
6.
Activate the top layer.
Activate the tube DBV Valentine Collab element (10) -
edit - copy.
Edit - paste as a new layer on the image.
Place it in the middle of the little heart.
Effects - 3D Effects - drop shadow -
setting is right.
7.
Activate the poser tube kids4clown -
edit - copy.
Edit - paste as a new layer on the image.
Place it a little to the right -
see example.
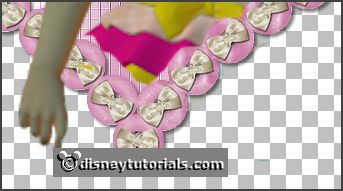
Activate the eraser - and erase the part of the dress - see below.
Effects - 3D Effects - drop shadow -
setting is right.
8.
Activate the tube K.G.SweetHeart024 -
edit - copy.
Edit - paste as a new layer on the image.
Place it right under the arm - see example.
Effects - 3D Effects - drop shadow -
setting is right.
Layers - duplicate.
Place it right at the bottom -
see example.
9.
Activate the tube soloveyou_florju_elmt(21) -
edit - copy.
Edit - paste as a new layer on the image.
Place it in the middle at the bottom -
see example.
Effects - 3D Effects - drop shadow -
setting is right.
10.
Activate the tube martad_jasmine_el(10) -
edit - copy.
Edit - paste as a new layer on the image.
Place it right at the bottom -
see example.
Effects - 3D Effects - drop shadow -
setting is right.
11.
Activate the tube element 43 -
edit - copy.
Edit - paste as a new layer on the image.
Place it right at the bottom -
see example.
Effects - 3D Effects - drop shadow -
setting is right.
Layers - duplicate.
Image - free rotate - setting is right.
Place it down -
see example.
Layers - arrange - down - set it under copy of raster 7.
Layers - merge - merge down.
Erase the part of the stem, what you can see.
Activate the top layer.
12.
Activate the tube soloveyou_florju_elmt(83) -
edit - copy.
Edit - paste as a new layer on the image.
Place it left at the bottom -
see example.
Effects - 3D Effects - drop shadow -
setting is right.
Layers - arrange - down - set it under raster 6.
13.
Activate the top layer.
Activate the tube martad_jasmine_el (11) -
edit - copy.
Edit - paste as a new layer on the image.
Place it left at the bottom -
see example.
Effects - 3D Effects - drop shadow -
setting is right.
14.
Activate the tube cajoline_kissme_10-
edit - copy.
Edit - paste as a new layer on the image.
Place it right at the top -
see example.
Effects - 3D Effects - drop shadow -
setting is right.