1.
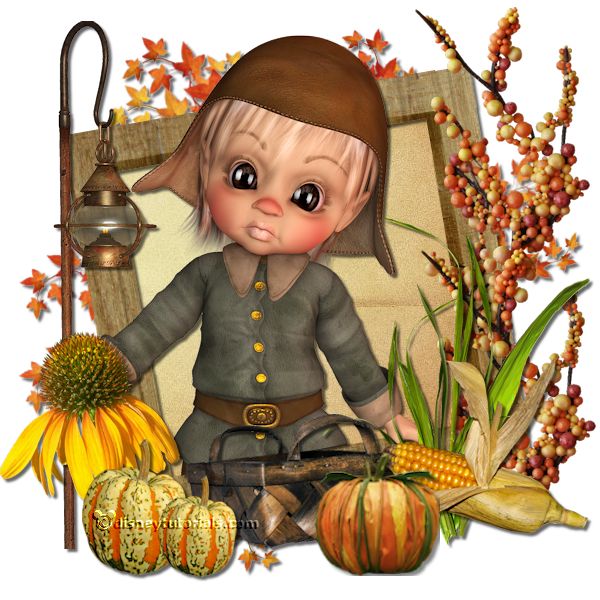
File - open new transparent image 600x600.
Activate the tube Element12 - edit - copy.
Edit - paste as a new layer on the image.
Effects - 3D Effects - drop shadow - with this setting.
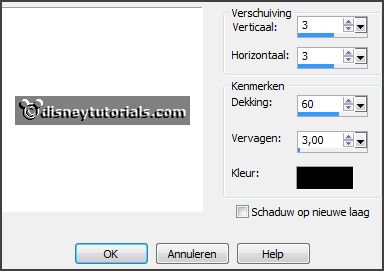
2.
Activate the tube Element26 -
edit - copy.
Edit - paste as a new layer on the image.
Image - free rotate -
with this setting.
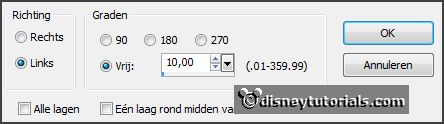
Select with the magic wand in the middle of the frame.
Selections - modify - expand 10 pixels.
3.
Activate the paper3 -
edit - copy.
Edit - paste as a new layer on the image.
Selections - invert - click at the delete key.
Selections - select none.
Layers - arrange - move down.
Activate the top layer.
Effects - 3D Effects - drop shadow - setting is right.
4.
Activate raster 3.
Activate the tube fairytubes53 -
edit - copy.
Edit - paste as a new layer on the image.
Image - mirror.
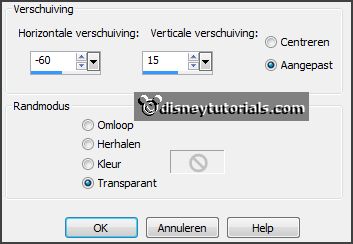
Effects - Image effects - offset -
with this setting.
5.
Activate selections tool - rectangle - and make a selection - as below.

Click at the delete key.
Selections - select none.
Layers - duplicate.
Layers - arrange - up.
Activate free hand selection tool - from point to point - and make a selection -
as below.
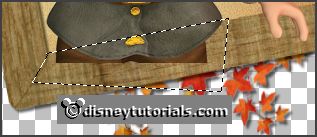
Click at the delete key.
Selections - select none
Effects - 3D Effects - drop shadow - setting is right.
6.
Activate the tube Element7 -
edit - copy.
Edit - paste as a new layer on the image.
Place this right at the top - see example.
Layers - duplicate.
Activate move tool - set it down - so it is 1 branch.
Layers - merge - merge down.
Effects - 3D Effects - drop shadow - setting is right.
7.
Activate the tube Element25 -
edit - copy.
Edit - paste as a new layer on the image.
Place this right at the bottom -
see example.
Effects - 3D Effects - drop shadow - setting is right.
8.
Activate the tube Element15 -
edit - copy.
Edit - paste as a new layer on the image.
Place this before the grass.
Effects - 3D Effects - drop shadow - setting is right.
Activate raster5 (branche) - and erase the part away, which comes under the corn.
9.
Activate the tube Element38 -
edit - copy.
Edit - paste as a new layer on the image.
Image - mirror.
Place this in the middle at the bottom.
Layers- arrange - down.
Effects - 3D Effects - drop shadow - setting is right.
10.
Activate the tube Element36 -
edit - copy.
Edit - paste as a new layer on the image.
Image - mirror.
Place this at the left hand -
see example.
Effects - 3D Effects - drop shadow - setting is right.
11.
Activate the tube Element23 -
edit - copy.
Edit - paste as a new layer on the image.
Place this before the sunflowers - see example.
Effects - 3D Effects - drop shadow - setting is right.
Layers - duplicate.
Image - resize 75% - all layers not checked.
Place this near the other one.
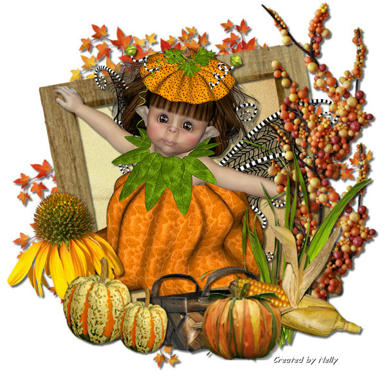
12.
Activate the tube pompoen -
edit - copy.
Edit - paste as a new layer on the image.
Place it before the corn on the cob and the basket - see example.
13.