1.
File - open new transparent image
700x700.
Set the foreground to # c0c0c0.
2.
Activate the
tube florju_paradise_wa(5) -
edit - copy.
Edit - paste as a new layer on the image.
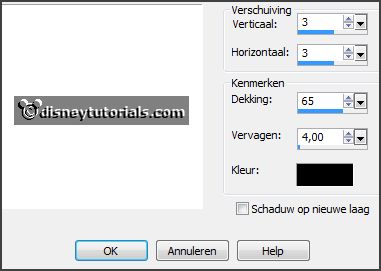
Effects - 3D Effects - drop shadow - with this setting.
3.
Activate the
tube florju_paradise_elmt(100) -
edit - copy.
Edit - paste as a new layer on the image.
Activate move tool - place it right on the text.
Effects - 3D Effects - drop shadow - setting is right.
4.
Activate the
tube florju_paradise_elmt(19) -
edit - copy.
Edit - paste as a new layer on the image.
Place it left at the bottom.
Effects - 3D Effects - drop shadow - setting is right.
5.
Activate the
tube florju_paradise_elmt(29) -
edit - copy.
Edit - paste as a new layer on the image.
Place it at the left side - see example.
Effects - 3D Effects - drop shadow - setting is right.
6.
Activate the
tube florju_paradise_elmt(21) -
edit - copy.
Edit - paste as a new layer on the image.
Place it in the middle at the bottom
-
see example.
Effects - 3D Effects - drop shadow - setting is right.
7.
Activate the
tube florju_paradise_elmt(24) -
edit - copy.
Edit - paste as a new layer on the image.
Place it in the middle at the bottom -
see example.
Effects - 3D Effects - drop shadow - setting is right.
Layers - duplicate.
Image - resize 75% - all layers not checked.
Place it left at the branches.
8.
Activate the
eraser and erase the piece of the umbrella (raster4).
Activate raster 2.
Activate selection tool - circle - and make a selection - as below.
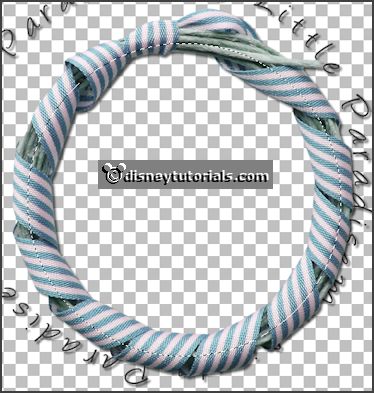
Layers - new raster layer.
Fill the selection with the foreground color.
Layers - arrange - down.
Selections - select none.
9.
Activate the
tube paradise -
edit - copy.
Edit - paste as a new layer on the image.
Place it a little down.
Erase what's comes under the frame.
Activate the
top layer.
10.
Activate the
tube florju_paradise_elmt(79) -
edit - copy.
Edit - paste as a new layer on the image.
Place it in the middle at the top-
see example.
Effects - 3D Effects - drop shadow - setting is right.
Layers - arrange - down - set it under raster 4.
Activate the
top layer.
11.
Activate the
tube florju_paradise_elmt(82) -
edit - copy.
Edit - paste as a new layer on the image.
Place it in the middle at the top - right on the sign -
see example.
Effects - 3D Effects - drop shadow - setting is right.
12.
Activate the
tube florju_paradise_elmt(27) -
edit - copy.
Edit - paste as a new layer on the image.
Place it right at the bottom -
see example.
Effects - 3D Effects - drop shadow - setting is right.
13.
Activate the
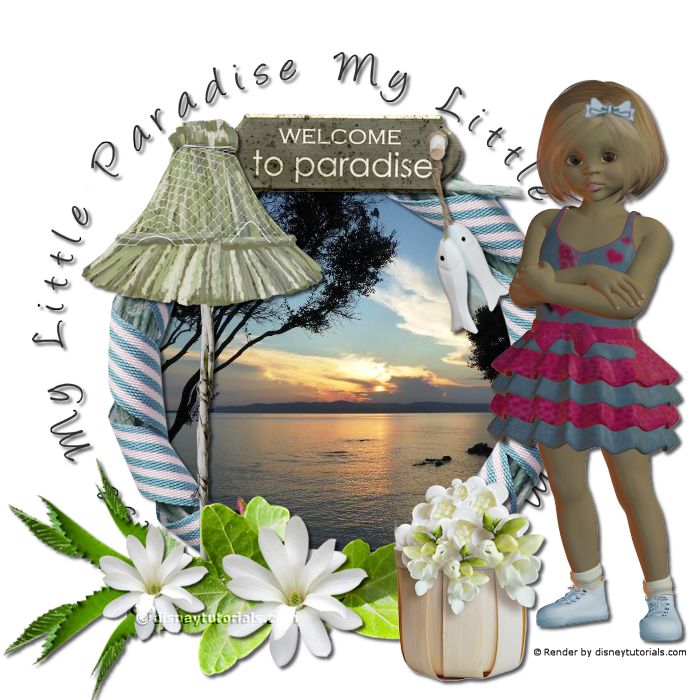
poser tube kids4-13 -
edit - copy.
Edit - paste as a new layer on the image.
Place it at the right side.
Effects - 3D Effects - drop shadow - setting is right.