1.
File - open new transparent image
700x700.
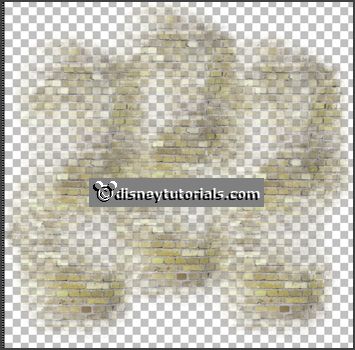
Activate the tube 1al_pp_sf_brickwall -
edit - copy.
Edit - paste as a new layer on the image.
Activate move tool - place it at the left side.
Layers - duplicate.
Place it in the middle and a little up.
Layers - duplicate.
Place it at the right side.
So must it be - see below.

Layers - merge - merge down and 1 more time.
2.
Activate the tube 1al_pp_sf_lantern -
edit - copy.
Edit - paste as a new layer on the image.
Place it at the left side.
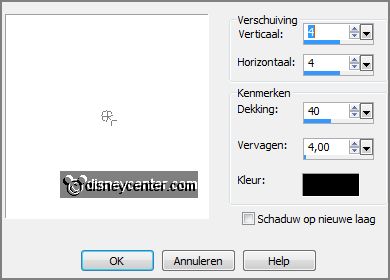
Effects - 3D Effects - drop shadow - with this setting.

3.
Activate the tube 1al_pp_sf_tree1 -
edit - copy.
Edit - paste as a new layer on the image.
Place it at the left side - near the lantern.
Effects - 3D Effects - drop shadow - setting is right.
4.
Activate the tube 1al_pp_sf_tree2 -
edit - copy.
Edit - paste as a new layer on the image.
Place it at the left side - near the other.
Effects - 3D Effects - drop shadow - setting is right.
Layers - arrange - down.
5.
Activate the tube 1al_pp_sf_telephonebooth -
edit - copy.
Edit - paste as a new layer on the image.
Place it at the left side - near the tree.
Effects - 3D Effects - drop shadow - setting is right.
Layers - arrange - down.
Activate the top layer.
6.
Activate the tube 1al_pp_sf_flowerpot -
edit - copy.
Edit - paste as a new layer on the image.
Place it at the left side - for the telephonebooth.
Effects - 3D Effects - drop shadow - setting is right.
7.
Activate the tube 1al_pp_sf_streetsign -
edit - copy.
Edit - paste as a new layer on the image.
Place it right at the top.
Effects - 3D Effects - drop shadow - setting is right.
8.
Activate the tube 1al_pp_sf_tiedtrees -
edit - copy.
Edit - paste as a new layer on the image.
Place it right at the bottom.
Effects - 3D Effects - drop shadow - setting is right.
9.
Activate the tube 1al_pp_sf_menuboard -
edit - copy.
Edit - paste as a new layer on the image.
Place it right at the bottom - for the tree - see example.
Effects - 3D Effects - drop shadow - setting is right.
10.
Activate the tube 1al_pp_sf_windowflowers -
edit - copy.
Edit - paste as a new layer on the image.
Place it right at the bottom - for the other tree - see example.
Effects - 3D Effects - drop shadow - setting is right.
11.
Activate the poser tube kids4-73 - -
edit - copy.
Edit - paste as a new layer on the image.
Place it in the middle at the bottom.
Effects - 3D Effects - drop shadow - setting is right.