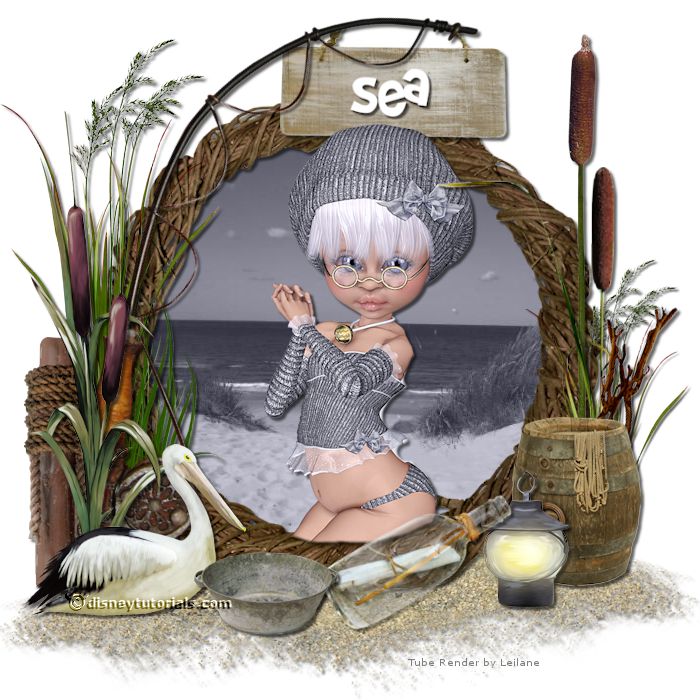
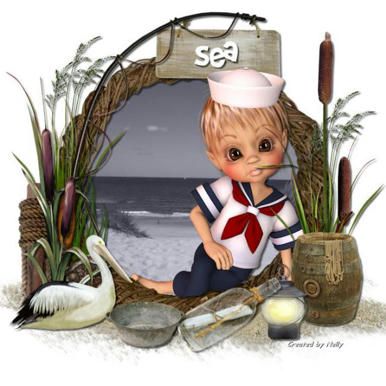
1.
File - open new transparent image 700x700.
Set the foreground color to white and the background color to #9b9ba9.
Activate the tube florju_afterthesummer_elements (109) -
edit - copy.
Edit - paste as a new layer on the image.
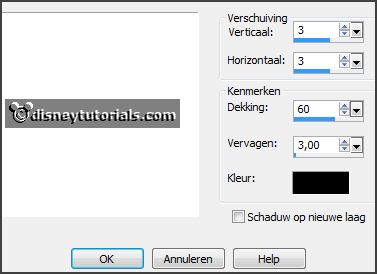
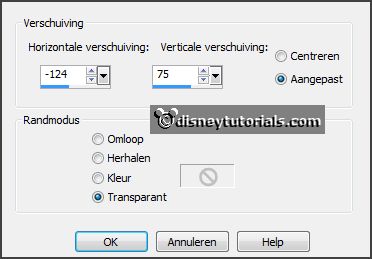
Effects - 3D Effects - drop shadow - with this setting.
2.
Activate the tube florju_afterthesummer_elements (126) -
edit - copy.
Edit - paste as a new layer on the image.
Place it a little down.
Layers - duplicate.
Image - mirror.
Image - flip.
Slide a little until one whole.
Layers - merge - merge down.
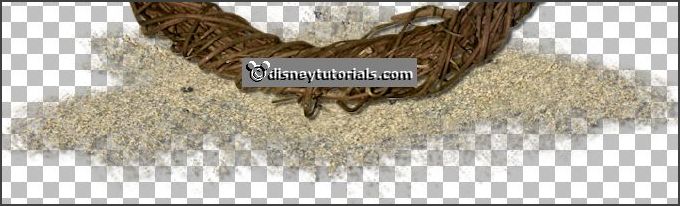
Layers - arrange - down. So it must look.
Effects - 3D Effects - drop shadow - setting is right.
3.
Activate selection tool - circle - and make a selection - as below.
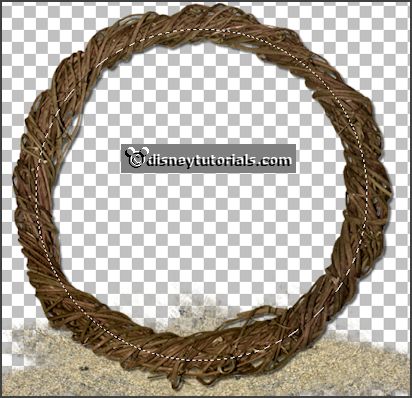
Layers - new raster layer.
Fill the selection with the background color.
Let selection stay.
4.
Activate the image zee -
edit - copy.
Edit - paste as a new layer on the image.
Selection - invert - click at the delete key.
Selections - select none.
Set the opacity of this layer to Luminance (Legacy).
5.
Activate the tube fairytubes74 -
edit - copy.
Edit - paste as a new layer on the image.
Activate move tool - move a little to the right.
Activate selection tool - rectangle - and make a selection - as below - click at
the delete key.
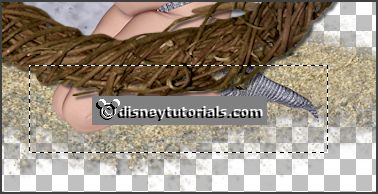
Selections - select none.
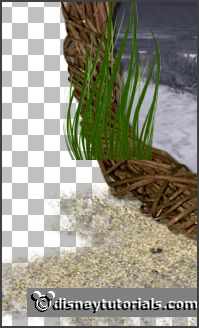
6.
Layers - duplicate.
Layers - arrange - up.
Activate the eraser and erase what's up the frame.
Effects - 3D Effects - drop shadow - setting is right.
7.
Activate the tube florju_afterthesummer_elements (70) -
edit - copy.
Edit - paste as a new layer on the image.
Place it to the left - see below.
Effects - 3D Effects - drop shadow - setting is right.
8.
Activate the tube florju_afterthesummer_elements (33) -
edit - copy.
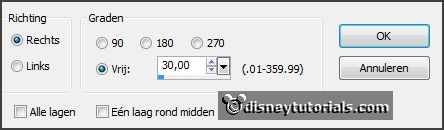
Edit - paste as a new layer on the image.
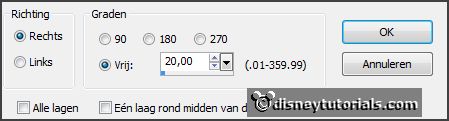
Image - free rotate -
with this setting.
Effects - Image effects - offset -
with this setting.
Effects - 3D Effects - drop shadow - setting is right.
9.
Activate the tube florju_afterthesummer_elements (99) -
edit - copy.
Edit - paste as a new layer on the image.
Place it to the left and up - see example.
Effects - 3D Effects - drop shadow - setting is right.
Layers - arrange - down.
Layers - duplicate.
Place it on the sand right.
Activate the top layer.
10.
Activate the tube florju_afterthesummer_elements (72) -
edit - copy.
Edit - paste as a new layer on the image.
Place it next to the fishing rod -
see example.
Effects - 3D Effects - drop shadow - setting is right.
11.
Activate the tube florju_afterthesummer_elements (1) -
edit - copy.
Edit - paste as a new layer on the image.
Place it for the fishing rod -
see example.
Effects - 3D Effects - drop shadow - setting is right.
12.
Activate the tube florju_afterthesummer_elements (83) -
edit - copy.
Edit - paste as a new layer on the image.
Place it left at the bottom -
see example.
Effects - 3D Effects - drop shadow - setting is right.
13.
Activate the tube florju_afterthesummer_elements (51) -
edit - copy.
Edit - paste as a new layer on the image.
Place it on the fishing rod at the top -
see example.
Effects - 3D Effects - drop shadow - setting is right.
Layers - arrange - down - under raster copy of raster 6.
Activate the top layer.
14.
Activate the tube florju_afterthesummer_elements (35) -
edit - copy.
Edit - paste as a new layer on the image.
Place it to the right side -
see example.
Effects - 3D Effects - drop shadow - setting is right.
15.
Activate the tube florju_afterthesummer_elements (26) -
edit - copy.
Edit - paste as a new layer on the image.
Place it to the right side - near the other -
see example.
Effects - 3D Effects - drop shadow - setting is right.
16.
Activate the tube florju_afterthesummer_elements (53) -
edit - copy.
Edit - paste as a new layer on the image.
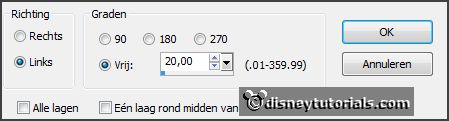
Image - free rotate -
with this setting.
Place it to the right side - for the other -
see example.
Effects - 3D Effects - drop shadow - setting is right.
17.
Activate the tube florju_afterthesummer_elements (111) -
edit - copy.
Edit - paste as a new layer on the image.
Place it at the right side at the bottom -
see example.
Effects - 3D Effects - drop shadow - setting is right.
18.
Activate the tube florju_afterthesummer_elements (127) -
edit - copy.
Edit - paste as a new layer on the image.
Place it left of the tub at the bottom -
see example.
Effects - 3D Effects - drop shadow - setting is right.
19.
Activate the tube florju_afterthesummer_elements (5) -
edit - copy.
Edit - paste as a new layer on the image.
Image - free rotate -
with this setting.
Place it left at the lamp at the bottom -
see example.
Effects - 3D Effects - drop shadow - setting is right.
20.
Activate the tube florju_afterthesummer_elements (117) -
edit - copy.
Edit - paste as a new layer on the image.
Place it in the middle at the bottom -
see example.
Effects - 3D Effects - drop shadow - setting is right.
21.
Layers - new raster layer - set your watermark into the image.
Layers - merge - merge all visible layers.