1.
File - open new transparent image
700x700.
Activate the
tube emka_itg_element105 -
edit - copy.
Edit - paste as a new layer on the image.
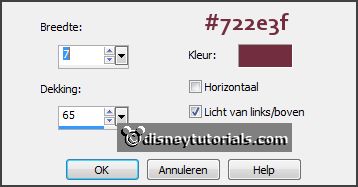
Image - free rotate - with this setting.

2.
Layers - duplicate.
Image -resize 50% - all layers not checked.
Activate move tool - place it left at the top - see example.
Layers - duplicate.
Image - mirror.
Layers - merge - merge down.
3.
Activate the
magic wand - select in the middle of the upper frames.
Selections - modify - expand 20 pixels.
Layers - new raster layer.
Set the foreground color to #cc96a5.
Fill the selection with the foreground color.
Effects - Texture effects - Blinds - with this setting.

Selections - select none.
Layers - arrange - down.
4.
Activate raster 1.
Select with the magic wand in the middle of the big frame.
Selections - modify - expand 20 pixels.
Layers - new raster layers.
Fill the selection with the foreground color.
Effects - Texture effects - Blinds - setting is right.
Selections - select none.
Layers - arrange - down.
Layers - merge - merge all visible layers.
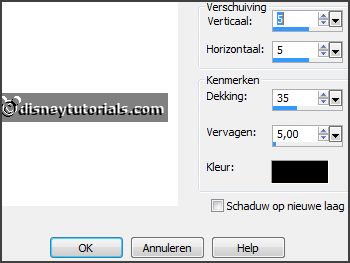
Effects - 3D Effects - drop shadow - with this setting.

5.
Activate the
tube emka_itg_element03 -
edit - copy.
Edit - paste as a new layer on the image.
Image - free rotate - with this setting.
Place it right at the bottom -
see example.
Effects - 3D Effects - drop shadow - setting is right.
Layers - arrange - down.
Layers - duplicate.
Image - mirror.
6.
Activate the
tube emka_itg_element02 -
edit - copy.
Edit - paste as a new layer on the image.
Place it left at the bottom -
see example.
Effects - 3D Effects - drop shadow - setting is right.
Layers - duplicate.
Image - mirror.
7.
Activate the
tube emka_itg_element07 -
edit - copy.
Edit - paste as a new layer on the image.
Place it in the middle at the top -
see example.
Effects - 3D Effects - drop shadow - setting is right.
8.
Activate the
tube emka_itg_element27 -
edit - copy.
Edit - paste as a new layer on the image.
Place it at the left side -
see example.
Effects - 3D Effects - drop shadow - setting is right.
Layers - duplicate.
Place it in the middle at the top -
see example.
Layers - duplicate.
Image - mirror.
Place it at the right side -
see example.
9.
Activate the
poser tube -
edit - copy.
Edit - paste as a new layer on the image.
place it on the swing-
see example.
Effects - 3D Effects - drop shadow - setting is right.
10.
Activate the
tube emka_itg_element116 -
edit - copy.
Edit - paste as a new layer on the image.
Place it in the middle at the bottom-
see example.
Effects - 3D Effects - drop shadow - setting is right.