1.
File - open new transparent image
700x700.
Activate the tube AD_Sunny_Garden (32) -
edit - copy.
Edit - paste as a new layer on the image.
2.
Layers - new raster layer.
Set the foreground color on #c4ced8.
Activate the magic wand and select the inside squares.
Selections - modify - expand 5 pixels.
Fill the selection with the foreground color.
Selections - select none.
Layers - arrange - down.
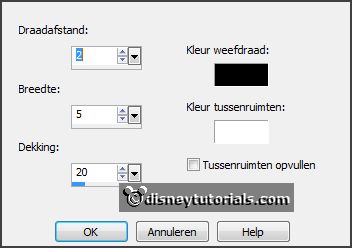
Effects - Texture effects - weave - with this setting.
3.
Activate the tube AD_Sunny_Garden (60) -
edit - copy.
Edit - paste as a new layer on the image.
Activate move tool - place this at the top.
Activate the top layer.
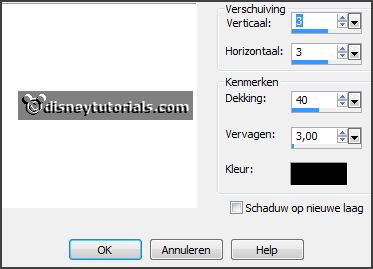
Effects - 3D Effects - drop shadow - with this setting.
4.
Activate the tube AD_Sunny_Garden (50) -
edit - copy.
Edit - paste as a new layer on the image.
Effects - 3D Effects - drop shadow -
setting is right.
5.
Activate the tube AD_Sunny_Garden (31) -
edit - copy.
Edit - paste as a new layer on the image.
Place it left at the bottom.
Effects - 3D Effects - drop shadow -
setting is right.
6.
Activate the tube AD_Sunny_Garden (18) -
edit - copy.
Edit - paste as a new layer on the image.
Place it right at the bottom.
Effects - 3D Effects - drop shadow -
setting is right.
7.
Activate the tube AD_Sunny_Garden (6) -
edit - copy.
Edit - paste as a new layer on the image.
Place it right at the bottom.
Effects - 3D Effects - drop shadow -
setting is right.
8.
Activate the tube AD_Sunny_Garden (12) -
edit - copy.
Edit - paste as a new layer on the image.
Image - mirror.
Place it right at the bottom.
Effects - 3D Effects - drop shadow -
setting is right.
9.
Activate the poser tube -
edit - copy.
Edit - paste as a new layer on the image.
Place it in the middle at the bottom.
Effects - 3D Effects - drop shadow -
setting is right.
10.
Activate the tube word-art-ESunnygarden -
edit - copy.
Edit - paste as a new layer on the image.
Place it in the middle of the left blue square.