Open your tube and template in PSP.
Red Lady

Foreground color #c00000 and background color white
1.
Open new transparent image 600x600 - fill this with white.
Copy masker and paste as a new layer.
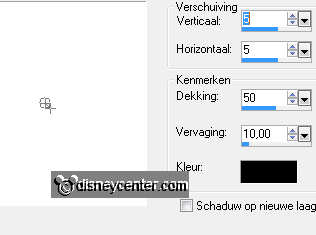
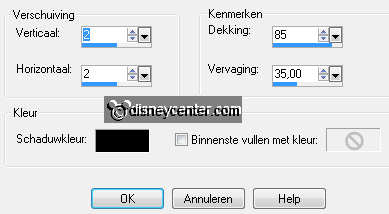
Effects - 3D Effects - drop shadow - with this setting.
Copy cirkel and paste as a new layer.
Copy randcirkel and paste as a new layer.
Layers - merge - merge down.
2.
Select the black cirkel
Copy Daisy Duck 10 and paste as a new layer.
Image - resize format 130% - all layers not checked.
Watch that her face is in the square.
Selections - invert - click at the delete key.
Set the opacity of this layer at 25.
Layers - merge - merge down.
Give the same drop shadow as in point 1.
3.
Copy the cirkelrand and paste as a new layer.
Give the same drop shadow as in point 1.
Copy vert.lijnen and paste as a new layer.
Give the same drop shadow as in point 1.
4.
Copy horz.lijnen and paste as a new layer.
Give the same drop shadow as in point 1.
Layers - merge - merge down.
5.
Copy vierkantjes and paste as a new layer.
Copt zwarte vierkantjes and paste as a new layer.
Copy nietjes and paste as a new layer.
Layers - merge - merge down - and 2 more times.
6.
Place this at the top in the middle.
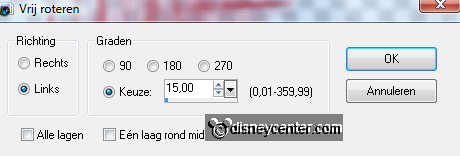
Image - free rotate - 15 left.
Give the same drop shadow as in point 1.
7.
Select the first black square.
Go to your tube Daisy Duck10 - Image - resize 50% - all layers checked.
Copy the tube - and paste as a new layer. - selections - invert - click at the
delete key. see example.
Selections - select none.
8.
Select the third black square.
Go back to your tube - image - mirror.
Image - free rotate 15 left - and one more time 15 left.
Copy the tube - and paste as a new layer - selections - invert
Look if he stays right - click at the delete key.
Selections - select none.
9.
Select the second black square.
Go back to your tube - free rotate 15 left - and one more time 15
left.
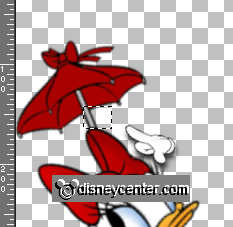
Copy the tube - and paste as a new layer.. Now the umbrella - selections -
invert.
Look if he stays right - click at the delete key.
Selections - select none.
10.
Make the tube active.
Go to selection tool - selection - rectangle and select the handle of the
umbrella.
Try not to get too much red there, otherwise you have to gone erasers.
Copy that piece and paste as a new layer - under the umbrella.
Layers - merge - merge down.
11.
Go back to the tube - then keep pressing Undo last command - until the
tube back to 50%.
Copy the tube - and paste as a new layer - image - resize 85% - all layers not
checked.
Place this right at the bottom.
Duplicate this layer - Stay at the original tube layer.
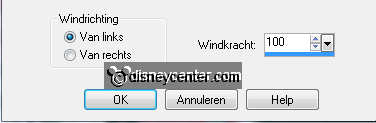
Effects - Distortion Effects - wind - with this setting.
Effects - Texture effects - Mosaic Antique - with this setting.

Give the copy layer the same drop shadow as in point 1.
12.
Copy word-art and paste as a new layer.
Give the same drop shadow as in point 1.
Place this left at the bottom or anywhere that you will like it
13.
Layers - merge - merge all.
Image - add border 2 - color #c00000
Image - add border 25 - color white.
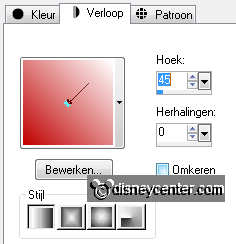
Select the white border and fill this with gradient linear.
14.
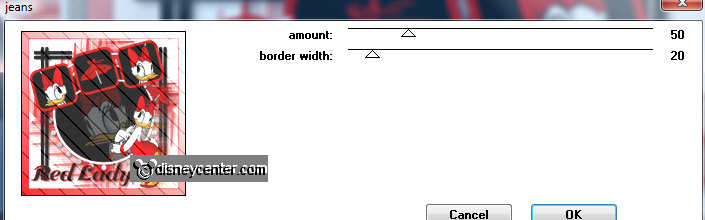
Effects - Penta.com - Jeans - with this setting.
Promote selection to layer - Selections - select none.
Image - flip - set the opacity of this copy layer at 50 - set the blend mode on
darker.
Layers - merge - merge down.
15.
New raster layer - put your watermark into the image.
Image - add border 2 - color #c00000
Selections - select all - selections - modify 27.
Effects- 3D Effects - cutout - with this setting
Give the same drop shadow as in point 1.
Repeat this, but now with -5.
16.
Image - resize 85% - all layers checked.
File - export - JPEG optimizer.
Ready is the tag
I hope you like this tutorial.
greetings Emmy

Tutorial written
14-08-2011
