
This
Tutorial is copyrighted to the Tutorial Writer, © Emmy Kruyswijk 2010.
This Tutorial
may
not be forwarded, shared or otherwise placed on any Web Site or group without written
permission from
Emmy Kruyswijk
Do you want to link my lessons?
Please send
me a mail.
Materials:
Download
here
1
Disney tubes,
scrapkit from
Dimensions -
download here, font Brush Script MT.
filter:
Penta.com - Dot cross.
Alien Skin Eye Candy 5 - Nature - Fire Download
here
Put the plug-ins in the folder plug-ins.
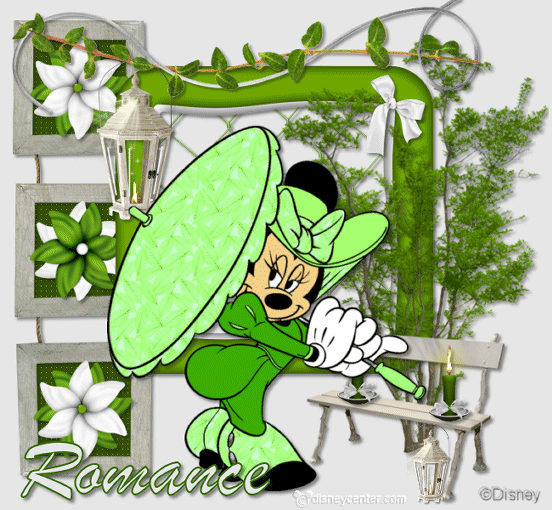
Romance
.
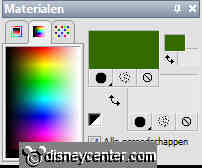
Foreground color #e7e7e7 and
background color #4d7500
1. Open new image 650x600.
2. Fill this with the foreground color.
3. Copy the tube Vives_design_FC_Fence7 and paste as a new layer.
4. Effects - 3D Effects - drop shadow with this setting.

5. Copy the tube SD NTG Frame1 and paste as a new layer.
6. Give the same drop shadow as in point 4.
7. Select inside the 3 frames
8. Selections - modify - expand 10
9. New raster layer - fill this with color #355100
10. Selections - select none.
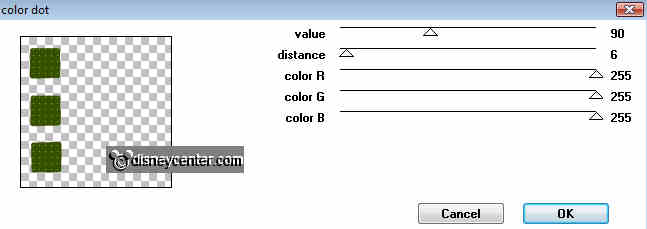
11. Effects - Penta.com - color dot with this setting.
12. Layers - arrange - move down.
13. Stay at raster 4.
14. Copy the tube SD NTG FLOWER 1 and paste as a new layer.
15. Give the same drop shadow as in point 4. Place this in the
middle frame.
16. Copy the tube SD NTG FLOWER 2 and paste as a new layer.
17. Give the same drop shadow as in point 4. Place this in the lower frame.
18. Duplicate this layer and place it in the upper frame.
19. Copy the tube SD NTG Frame2 and paste as a new layer.
20. Give the same drop shadow as in point 4.
21. Stay at raster 3.
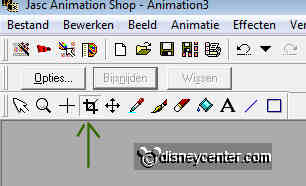
22. Go to selection tool - selection - rectangle.
23. Select everything what comes below the green frame. see here
below.
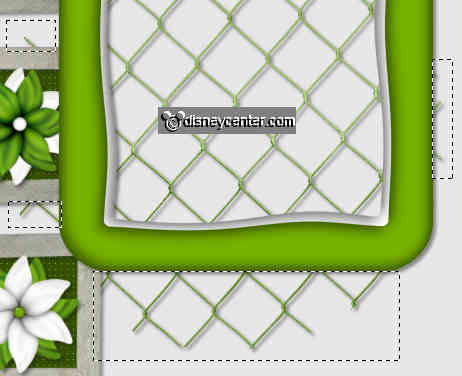
24. Click on the delete key of your keyboard.
25. Selections - select none. If it's right, then the excess is
away.
26. Copy the tube SD NTG Tree and paste as a new layer.
27. Give the same drop shadow as in point 4.
28. Place this right at the bottom.
29. Copy the tube SD NTG Leaves and paste as a new layer.
30. Give the same drop shadow as in point 4. Place this on the grey frame.
31. Copy the tube SD NTG Bench and paste a new layer.
32. Give the same drop shadow as in point 4. Place this for the
tree.
33. Copy the tube SD NTG Lantern and paste as a new layer.
34. Give the same drop shadow as in point 4.
35. Place it exactly on the green frame on the left. See example
above.
36. Make your image larger by clicking on the zoom in.

37. Go to selection tool - freehand selection - and select the flame.
38. Duplicate this layer 2 more times.
39. Lock the 2 copy layers and stay at the first layer.
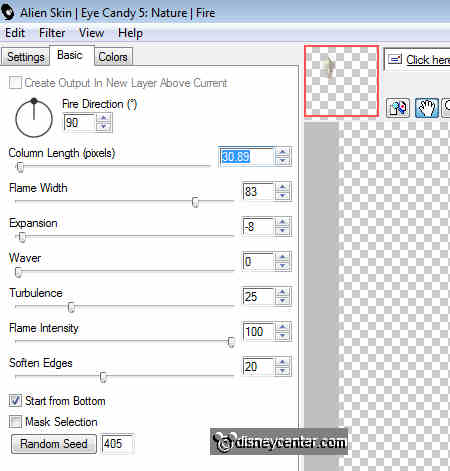
40. Effects - Alien Skin Eye Candy 5 - Nature - Fire with this
setting.
41. Lock this layer and stay on the first copy layer and unlock this
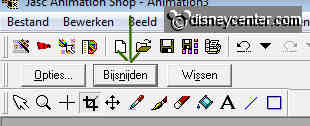
layer.
42. Repeat point 40 - same setting - only click on the random seed.
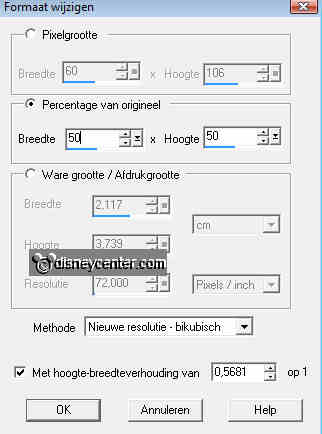
43. Lock this layer and stay on the second copy layer and
unlock this layer.
44. Repeat point 40 - same setting - only click on the random seed.
45. Selections - select none.
46. Lock all layer, except the 2 layers of the lantern. Stay
at 1 of the 3 layers.
47. File - save as - PSP animatie shop - give name lantern. We use
that later in animation shop.
47a. Unlock all layers
48. Copy thee tube SD NTG BOW 3 and paste as a new layer.
49. Give the same drop shadow as in point 4.
50. Place this on the green frame in the right upper corner.
51. Copy the tube Minnie007 and paste as a new layer.
52. Give the same drop shadow as in point 4.
53. Place this in the middle below.
54. Copy the tube SD NTG CANDLE and paste as a new layer.
55. Give the same drop shadow as in point 4.
56. Repeat the points 36 t/m 45.
57. Copy the tube SD NTG CANDLE again and paste as a new layer.
58. Place this at the other side of the bench.
59. Layers - arrange - move down. Pull this below layer13 -
thee Disney tube layer.
60. Go to text tool - font Brush Script MT - size
100.

61. Turn foreground and background color.
62. Write Romance and place this left at the bottom or where
you like it.
63. Put your watermark into the image.
64. Lock the 2 copy layers
of the lantern and candle.
65. Stay at the bottom layer.
66. Edit - Copy merged.
67. Open animation shop - paste as a new animation.
68. Back in PSP - lock the layers of the lantern and candle and open
the first copy layers from the lantern en candle.
69. Edit - Copy merged.
70. Back in animation shop - paste after current frame. (Always make
sure your last frame is selected)
71. Back in PSP - lock the first copy layers of the lantern and
candle and open the second copy layers of the lantern and candle.
72. Edit - Copy merged.
73. Back in animation shop - paste after current frame.
74. Open the animation lantern (that you save as ....) - go to crop.
see below.
75. And draw a rectangle as close as possible to the lantern. Click
at crop.
76. Animation - Resize of animation with this setting.
77. Click on the lantern - edit - select all - edit - copy
78. Click on the image - edit - select all.
79. Click inside the image - paste into selected frame -
place it right below the candle at the foot of the bench.
80. Animation - Resize 85%.
81. File - save as - give name - click 3 times at next and than
finish.
Ready is the tag
I hope you like this tutorial.
greetings Emmy,

Tutorial written
10-08-2010
