Foreground color #c00000 and background color white
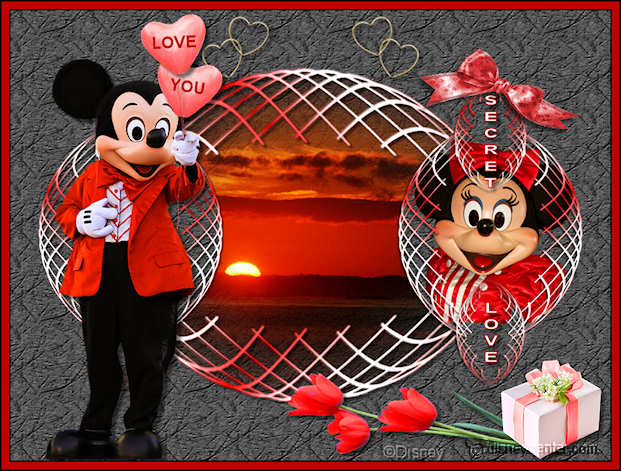
1.
Open new transparent image 1000x600
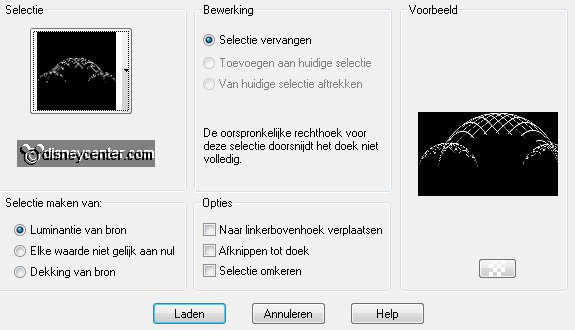
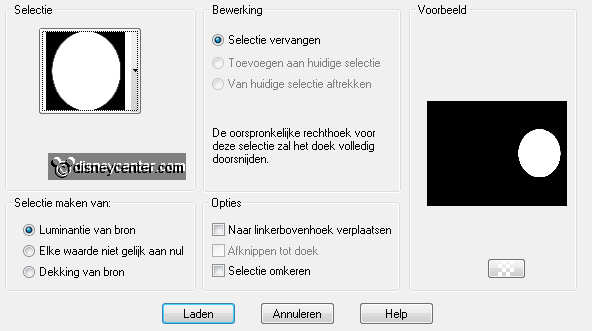
Selections - Load/Save selection - load selection from disk -
look sel139_aliciar - with this setting.
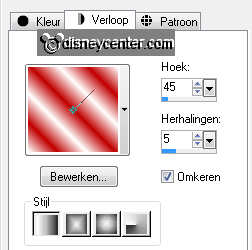
Fill this with gradient linear - with this setting.
Selections - select none.
2.
Effects - User Defined Filter - Filter matrix - with this
setting.
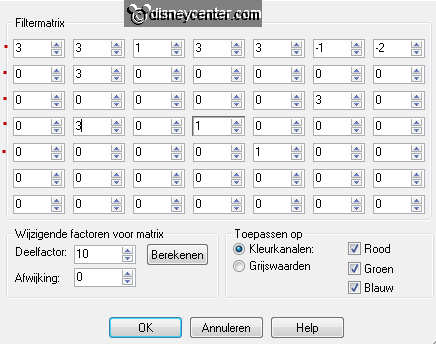
State red dot at the rows that you need to fill out.
Duplicate this layer - image - flip.
Layers - merge - merge down.
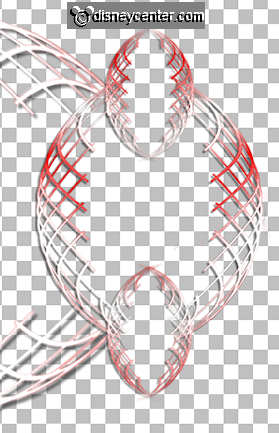
3.
Effects - 3D Effects - drop shadow - with this setting.
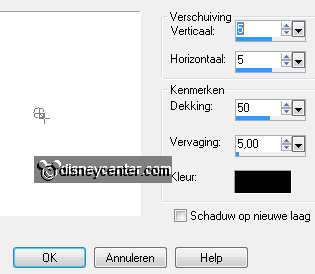
Image - resize 75% - all layers checked.
Go to eraser tool - size at 16 - and delete the section below on
both sides.
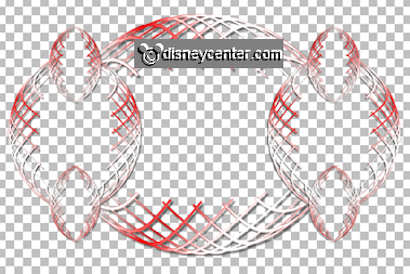
4.
Do shift + D to copy the image.
Go further with 1 and put the other aside - image - rotate right.
Image - resize 55% - all layers checked.
5.
Open new transparent image 800x600.
Copy the little image and paste as a new layer on the image.
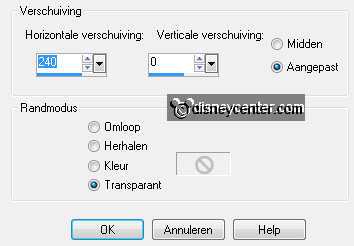
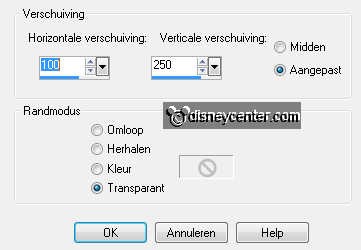
Effects - Image Effects - Offset - with this setting.
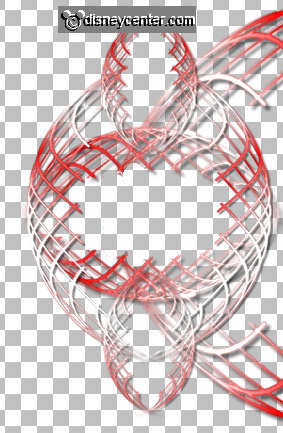
Duplicate this layer - image - mirror.
6.
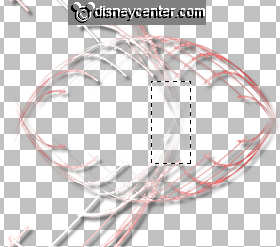
Copy the horizontal image and paste as a new layer on the image.
Layers - arrange - move down 2 times.
Now very careful!
7.
Make raster 3 active and erase all in and out side the image -
see below.
Repeat this to the other side.
Now you can see another 2 pieces in the inner plane - erase this
-but stay at the same raster.
Now you must have this below.
8.
Stay at the top layer.
Layers - merge - merge down - and one more time.
Make the bottom layer active - fill this with #606060.
Effects - Filter Unlimited 2.0 - Paper Textures - Japanese Paper -
with this setting.
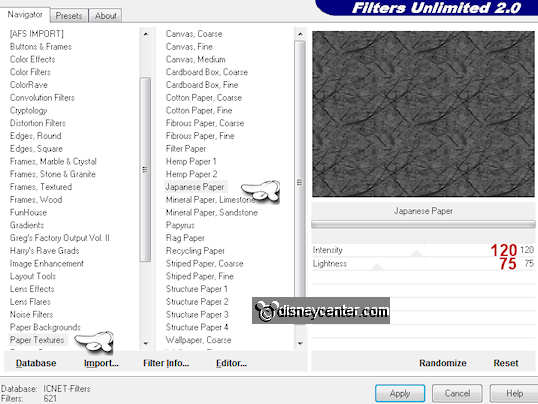
Effects - FM Tile Tools - Blend Emboss - default setting.
9.
Stay at this layer.
Copy romanticbgr and paste as a new layer on the image.
Now we go erase again. The setting of the eraser tool stays good.
Erase the part what is in the vert. image at both sides. Also the
top and bottom if there is anything to see.
see below if it is ready.
Duplicate this layer - set the Blend Mode at Soft Light.
10.
Make the top layer active.
Copy microod and paste as a new layer on the image.
Image - mirror.
Place this at the left side on the vert. image.
Give the same drop shadow as in point 3.
11.
Selections - Load/Save selections - Load selection from disk -
look emmylove - with this setting.
Copy minnie and paste as a new layer on the image.
Place this on the selection.
Selections - invert - click on the delete key.
Selection - select none.
Layers - arrange - move down 2 times.
12.
Make the top layer active.
Go to text tool - with this setting.


Write - SECRET - convert to raster layer - and place this in the vert. image at the top.
A little play with the arrows work upwards and make wider, so that
fits in the picture.
Give the same drop shadow as in point 3.
Write LOVE - convert to raster layer - and place at the bottom in the vert. image - see example.
Give the same drop shadow as in point3.
13.
Copy bow and paste as a new layer on the image.
Image - mirror - image - resize 75% - all layers not checked.
Give the same drop shadow as in point 3.
Place this at the top of the right vert. image - see example.
14.
Copy tulpen and paste as a new layer on the image.
Image - free rotate - right 10.
Give the same drop shadow as in point 3.
Place this at the bottom right.
15.
Copy harten and paste as a new layer on the image.
Effects - Image Effects - Offset - with this setting.
Duplicate this layer - image - mirror.
Layers - merge - merge down.
16.
Copy hart ballon and paste as a new layer on the image.
Duplicate this layer - image - mirror.
Place them both in the right hand of Mickey -see example.
17.
Go to text tool - set direction back to horizontal - other setting stays good. Lock the foreground color
and the background color at #c00000.
Write LOVE for the top balloon and write YOU for the balloon below
-
convert to raster layer
Now delete the thread of the balloon of the hand . see below.

Give the balloons the same drop shadow as in point 3.
18.
Make top layer active.
Copy giftbox and paste as a new layer on the image.
Place this at the bottom right on the tulips.
Give the same drop shadow as in point 3.
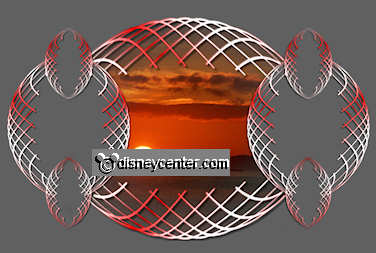
19.
Image - add border - symmetric 2 pixels - color black.
Image - add border - symmetric 10 pixels - foreground color.
Image - add border - symmetric 2 pixels - color black.
Image - resize 75% - all layers checked.
New raster layer - put your watermark into the image.
File - export - JPEG optimizer.