1.
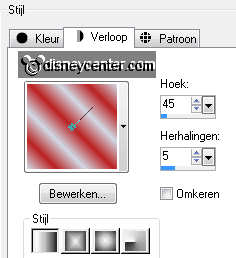
Set in the material palette the foreground color at #d0d9e5 and
the background color at #bb2222.
Make here a foreground gradient linear - with this settings.
2.
Open new transparent image 650x250.
Activate Flood Fill tool – fill the image with the gradient.
3.
Layers - Duplicate.
Image – mirror.
4.
Layers – Properties - opacity of this layer at 50.
Layers – merge – merge down.
5.
Make mmmisted active – edit – copy.
Edit – paste as a new layer on the image.
6.
Activate Move Tool and move the tube to the right side,
so half of your image is covered.
Layers – Properties - opacity of this layer at 20.
7.
Layers – merge – merge all
Selections – select none.
8.
Layers – new raster layer.
Activate Flood Fill Tool – fill the selection with the background
color.
9.
Selections – modify – contract 5.
Layers – new raster layer.
10.
Activate Flood Fill Tool – fill the selection with the
foreground color.
Selections – modify – contract 5.
11.
Layers – new raster layer.
Activate Flood Fill Tool – fill the selection with the background
color.
12.
Selections – modify – contract 5.
Click at the delete key.
13.
Make raster 2 active and click at the delete key.
Make raster 1 active and click at the delete key.
14.
Lock the bottom layer – by clicking at the eye in the layer
palette.
Make the top layer active.
Layers – merge – merge all visible.
15.
Selections – invert.
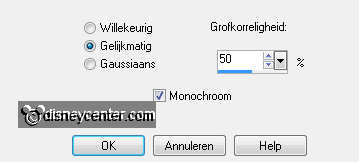
Adjust – add/remove noise.
Add noise – with this settings.
16.
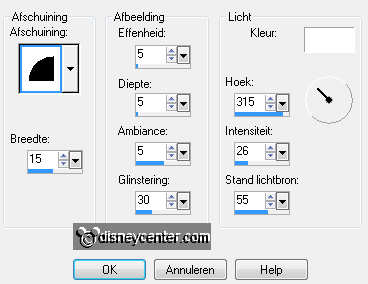
Effects – 3D Effects – Inner Bevel – with this settings.
Selections – select none.
Open the bottom layer.
17.
Activate the tube (Mickey or own) – edit - copy.
Edit – paste as a new layer on the image.
18.
Move the tube to the left links.
Layers - arrange – move down.
19.
Stay at this layer.
Activate tube schildersezel – edit – copy.
Edit – paste as a new layer on the image.
20.
Move the tube against the bottom and a little to the left. See
example.
Layers - arrange – move down.
21.
Make raster 1 active (tube layer)
Layers – merge – merge down.
22.
Layers – new raster layer.
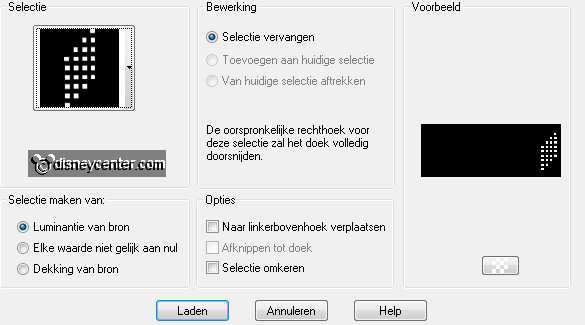
Selections- load/save selection – Load selection from disk.
Look emmyforum2 – with this settings.
23.
Activate Flood Fill tool – fill the selection with the
foreground color.
Selections – modify – contract 1.
24.
Fill the selection with the background color.
Selections – select none.
Effects – 3D Effects – drop shadow – with this settings.

25.
Activate text tool – with this settings.

Write with a capital - the 1st letter of your name.
Layers – convert to raster layer.
26.
Write the rest of your name - change the size in 48 - others
stay right.
Place this in the capital.
Layers – convert to raster layer.
27.
Layers – merge – merge down.
Place this between the painting's easel and the selection cubes -
see example.
28.
Make the bottom layer active .
Edit – copy.
29.
Open Animation shop.
In AS – edit – paste as a new animation.
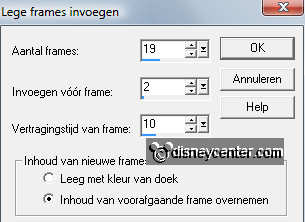
30.
Animation – Insert frames – empty frames – with this settings.
Edit – select all.
31.
Open animation smtwinks – delete the first frame.
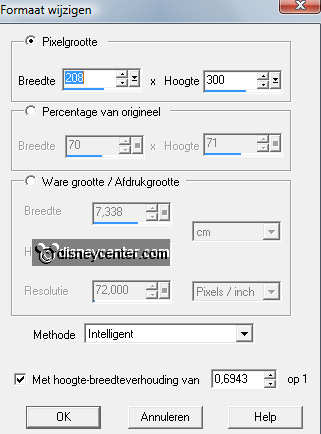
Animation - resize format animation
Edit – select all.
Edit – copy.
32.
Edit – paste into selected frame.
Edit – paste into selected frame.
Edit – paste into selected frame.
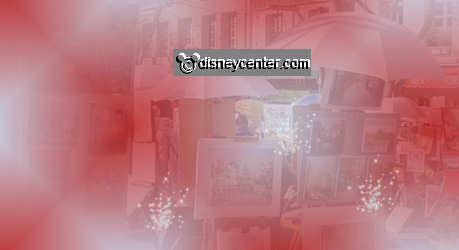
Place this as below.
33.
Back in PSP.
Lock the bottom layer – by clicking at the eye in the layer palette.
Make 1 of the other layers active
Edit – copy merged.
34.
Back in AS – edit – paste as a new animation.
Animatie – insert frames – empty frames – with this settings.
35.
Edit – select all.
Edit – copy.
36.
Edit – paste into selected frame.
Place it on the created background with animation.
37.
File – save as – give name – click 3 times at next and
than at finish.
Minimize the animation smtwinks, that we used layer for the avatar.

Now we make the avatar.
1.
Open new transparent image 130x130.
Activate Flood Fill tool – fill the image with the gradient.
2.
Layers - Duplicate.
Image – mirror.
3.
Layers – Properties - opacity of this layer at 50.
Layers – merge – merge down.
4.
Activate the tube (Mickey or your own) – edit – copy.
Edit – paste as a new layer on the image.
Image – resize 50% - all layers not checked.
5.
Activate text tool – with this settings.

Write the capital - the first letter of your name.
Layers – convert to raster layer.
6.
Place this right at the top - see example.
Effects - 3D Effects – drop shadow – settings are right.
7.
Make the bottom layer active.
Selections – select all.
Layers - new raster layer.
8.
Activate Flood Fill Tool – fill the selection with the background
color.
Selections – modify – contract 2.
Layers – new raster layer.
9.
Fill the selection with the foreground color.
Selections – modify – contract 2.
Layers – new raster layer.
10.
Fill the selection with the foreground color.
Selections – modify – contract 2.
Click at the delete key.
11.
Make raster 2 active - click at the delete key.
Make raster 1 active - click at the delete key.
12.
Make the top layer active.
Layers – merge – merge down – 1 more time.
13.
Selections – invert.
Adjust – add/remove noise.
Add noise – with this settings.
14.
Effects – 3D Effects – Inner Bevel – with this settings.
Selections – select none.
15.
Make the bottom layer active.
Edit – copy.
16.
In animation shop – edit – paste as a new animation.
Animation – Insert frames – empty frames – with this settings.
Edit – select all.
17.
Activate animation smtwinks.
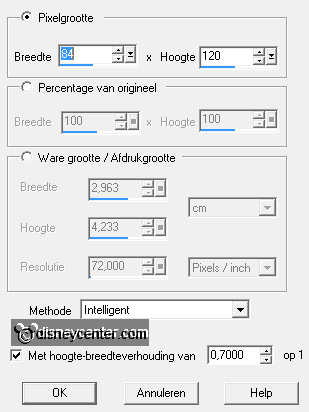
Animation – resize format animation – with this settings.
Edit – copy.
18.
Edit – paste into selected frame.
Place this in the left upper corner.
19.
Edit – paste into selected frame.
Place this at the bottom right.
20.
Back in PSP.
Lock the bottom layer – by clicking at the eye in the layer palette.
21.
Make the top layer active.
Edit – copy merge.
22.
In AS – edit – paste as a new animation.
Animation – Insert frames – empty frames – with this settings.
Edit – select all.
23.
Edit – copy.
Edit – paste into selected frame.
File – save as – give name – click 3 times at next and
than at finish.
Ready is the tag
I hope you like this tutorial.
greetings Emmy
Tested by Cobie