Foreground color #630b21 and background color black.
1.
Open new transparent image 700x550.
Fill this with the foreground color.
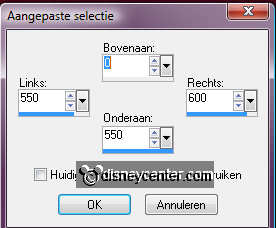
Go to selection tool - Custom selection - with this setting.

2.
New raster layer - fill this with the gold pattern - angle 0 - scale 100.
Selections - modify - contract 3.
Fill this with black.
Selections - select none.
3.
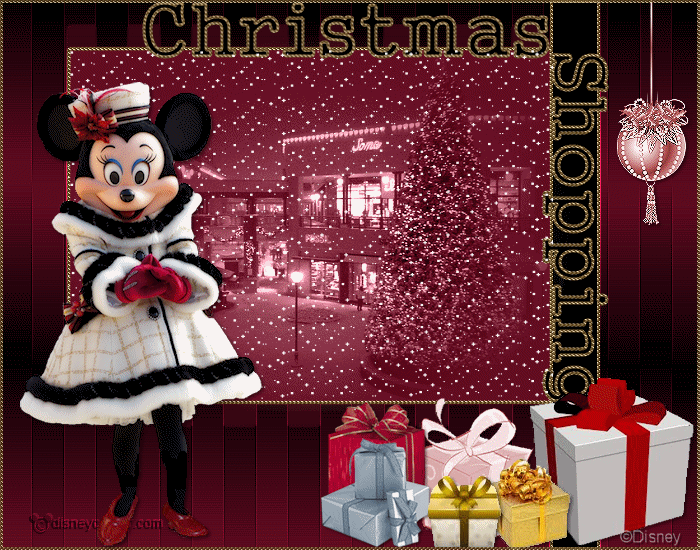
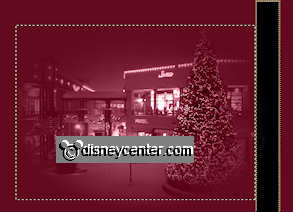
Copy misted shopping and paste as a new layer on the image.
Move this a little to left, so that the black bar remains empty.
Put the Blend Mode of this layer at luminance (Legacy).
4.
Go to selection tool - selection - rectangle.
Pull a rectangle 485x355 about the misted shopping.
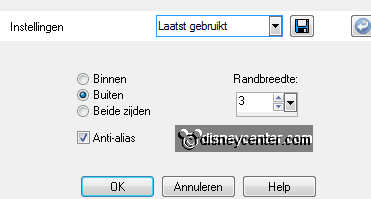
Selections - modify - select selection borders.
New raster layer.
Fill this with the gold pattern - same setting as in point 2.
Selections - select none.
5.
Make raster 1 active - select with the magic wand about the
rectangle - also near the black bar.

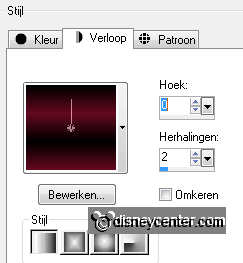
New raster layer - Fill this with gradient linear - with this
setting.
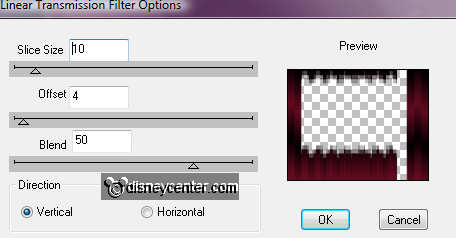
Effects - dsb flux - Linear Transmission - with this setting.
Effects - Edge Effects - enhance more.
6.
Copy kado2 and paste as a new layer on the image.
Place this right of the black bar at the bottom.
Effects - 3D Effects - drop shadow - with this setting.

7.
Copy Kerstbal and paste as a new layer on the image.
Place this right at the top.
Give the same drop shadow as in point 6.
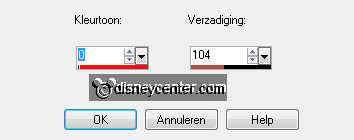
Adjust - Hue and Saturation - Colorize - with this setting.
8.
Copy kado1 and paste as a new layer on the image.
Place this left of the black bar at the bottom.
Give the same drop shadow as in point 6.
9.
Copy MarnytKerstgift and paste as a new layer on the image.
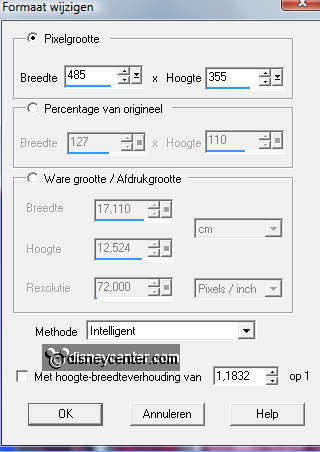
Image - resize 75% - all layers not checked.
Place this near the pink gift.
Give the same drop shadow as in point 6.
10.
Copy kado and paste as a new layer on the image.
Place this for the pink gift.
Give the same drop shadow as in point 6.
11.
Copy kado3 and paste as a new layer on the image.
Place this for the pink gift.
Give the same drop shadow as in point 6.
12.
Copy word-art christmas and paste as a new layer on the image.
Place this at the top in the middle.
Copy word-art shopping and paste as a new layer on the image.
Place this at the black bar. see example.
13.
New raster layer - put your watermark into the image.
Selections - select all - selections - modify - contract 3.
Selections - invert - fill this with the gold pattern - settings are
right.
Layers - merge - merge all.
14.
Open the tube minniekerst and give the same drop shadow as in
point 6.
Copy the tube - open animation shop - paste as a new animation.
Copy the image - paste in AS - as a new animation.
15.
Edit - duplicate selected - go through till you have 10 frames.
Do this also with the minniekerst tube.
Edit - select all - by both (image and tube).
16.
Open sneeuwchrissy - animation - resize format of animation -
with this setting.
Maintain aspect ratio of NOT checked
Edit - select all - copy.
click in the image - paste into selected frames - make sure that
fits.
Copy minniekerst - click in the image - paste into selected frames.
Place this left at the bottom.
17.
File - save as - give name - click 3 times at next and than at
finish.