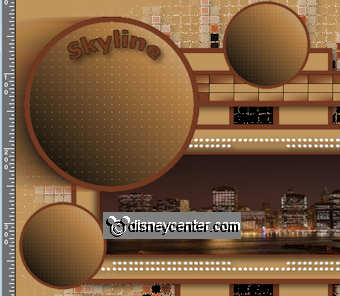
Skyline New York

foreground color #bf945d and background color #743b22
1.
Open new transparent image 640x550
Fill this with the foreground color.
Copy masker and paste as a new layer.
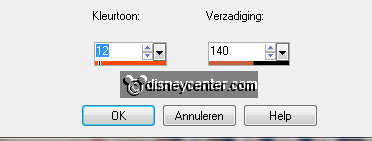
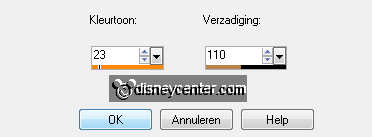
Adjust - Hue and Saturation - colorize with this setting.
2.
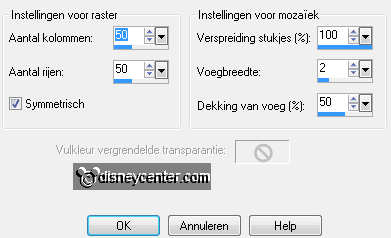
Effect - texture effect - Mosaic Antique with this setting.
Effects - Edge Effects - enhance.
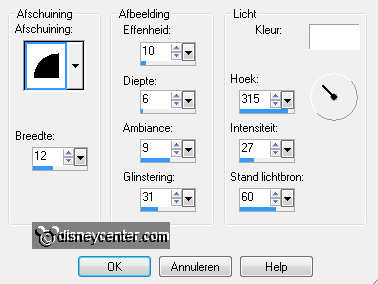
Effects - 3D Effects - drop shadow with this setting.

3.
Lock raster 2.
Copy vert.rechthoek and paste as a new layer.
Select this black rectangles - and fill this with the background color.
Selections - select none.
Copy vert.rechthoek1 and paste as a new layer.
Select the rectangles - and fill this with the foreground color.
Selections - select none.
4.
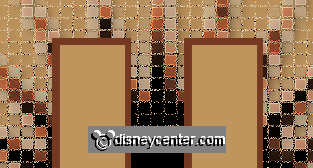
Place the vert.rechthoek 1 exactly on the other, see below.
Layers - merge - merge down.
Give the same drop shadow as in point 2.
Copy rechthoek and paste as a new layer.
Select the rectangle and fill this with the background color.
Selections - select none.
5.
Copy rechthoek1 and paste as a new layer.
Select the rectangle - and fill this with the foreground color.
Layers - merge - merge down.
Selections - select none.
Give the same drop shadow as in point 2.
6.
Copy rand and paste as a new layer.
Effects - Edge Effects - enhance.
Give the same drop shadow as in point 2.
7.
Copy rechthoek2 and paste as a new layer.
Select the rectangle and fill this with the background color.
Selections - select none.
Copy rechthoek3 and paste as a new layer.
Select the rectangle
Copy skyline_preview and past in selection. Minimize this, we use this later.
Selections - select none.
8.
Layers - merge - merge down.
Give the same drop shadow as in point 2.
Repeat the drop shadow with -4.
9.
Copy rechthoek4 and paste as a new layer.
Select the rectangle and fill this with the background color.
Selections - select none.
Copy rechthoek5 and paste as a new layer.
Select the rectangle and fill this with the foreground color.
10.
Place this in the middle of the other rectangle.
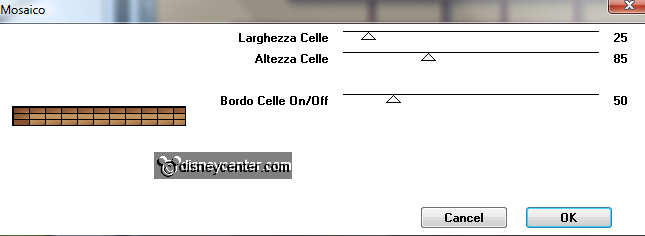
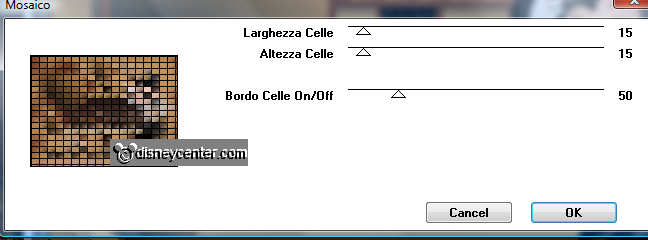
Effects - It@lion Editors Effects - Mosaico with this setting.
Selections - select none.
Layers - merge - merge down.
11.
Copy cirkel1 and paste as a new layer.
Select the circle and fill this with the background color.
Selections - select none.
Copy cirkel2 and paste as a new layer.
Adjust - Hue and Saturation - colorize with this setting.
12.
Layers - merge - merge down.
Place this left in the upper corner.
Duplicate this layer - stay at raster 8.
Effects - Distortion Effects - wind right 100.
Open raster 2.
13.
Copy word-art skyline and paste as a new layer.
Place this in the top of the circle.
Selections - select all - selections - float - selections - defloat.
Fill this with the background color.
Selections - select none.
Give the same drop shadow as in point 2.
14.
Make the copy of raster 7 active.
Duplicate this layer - image - resize 50% - all layers not checked.
Duplicate the little circle.
place them near and under the big circle - see below.
15.
Copt micsmoking and paste as a new layer - image - mirror.
Place this right at the bottom.
Give the same drop shadow as in point 2.
16.
Copy New York and paste as a new layer.
Place this left at the bottom.
Duplicate this layer - image - resize 50% - all layers not checked.
Copy skyline_preview and paste in selection.
Selections - select none.
Give the same drop shadow as in point 2.
17.
New raster layer - put your watermark into the image.
Layers - merge - merge all.
Image - add border 1 - background color.
18.
Image - add border - symmetric not checked.
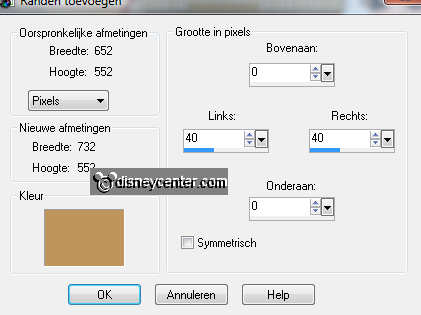
Select the borders - fill this with gradient radial.

Effects - It@lion Editors Effects - Mosaico with this setting.
Effects - FM Tile Tools - Blend Emboss - default setting.
Effects - 3D Effects - Inner Bevel with this setting.
Selections - select none.
19.
Image - resize 85% - all layers checked.
File - export - JPEG Optimizer.
Ready is the tag
I hope you like this tutorial.
greetings Emmy
Tutorial written
24-08-2011

