Effects – Edge effects – enhance.
Selections - select none.
Effects – 3D Effects – Inner Bevel – with this setting.
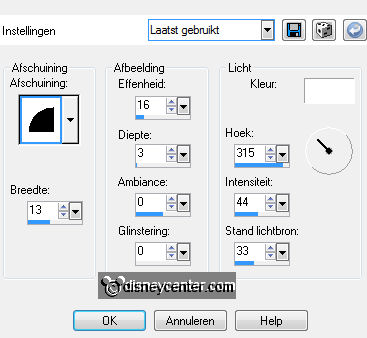
12.
Activate text tool – with this setting.

Write with capital letters CASTLE – convert to raster layer.
Effects – 3D Effects – drop shadow – with this setting.
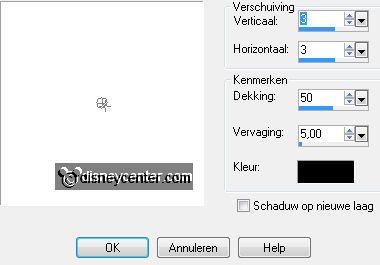
Move the text with
the text tool at the hexagon in the middle - see example.
13.
Activate de tube sneezy – edit – copy.
Edit – paste as a new layer on the image.
Move the tube to the right side with the move tool – see example.
Layers – arrange – move down.
14.
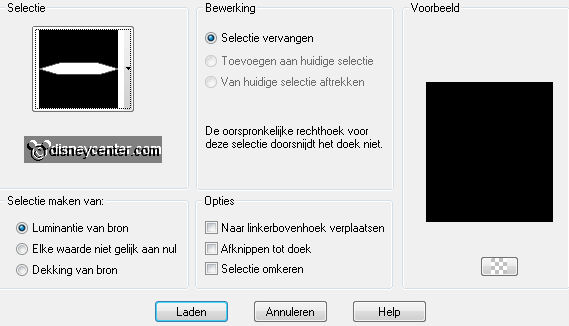
Activate selection tool – selection type rectangle – and make a selection as
below.
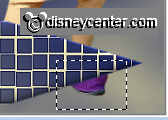
Click on the
delete key of the keyboard.
Selections – select none.
15.
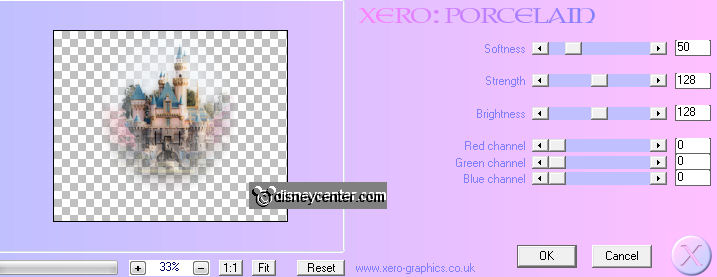
Effects – plug-ins – Xero –Porcelain – settings are right – click
OK.
Effects - 3D Effects – drop shadow – settings are right.
16.
Activate the top layer.
Activate the tube snowwhite&prince – edit - copy.
Edit – paste as a new layer on the image.
17.
Effects – plug-ins – Xero –Porcelain – settings are right – click OK.
Effects - 3D Effects – drop shadow – settings are right.
18.
Activate text tool – settings are right.
And write Snowwhite – convert to raster layer.
Move this with the move tool left at the top.
Effects - 3D Effects – drop shadow – settings are right.
19.
Image – add border – symmetric 2 pixels – background color.
Image – add border – symmetric 35 pixels – foreground color.
20.
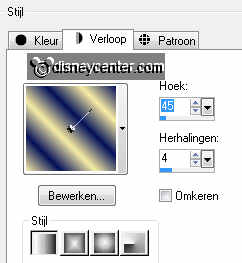
Activate the magic wand – with this setting – and select the border.

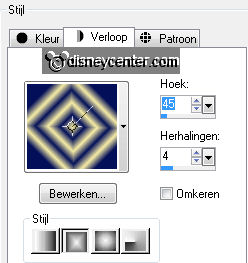
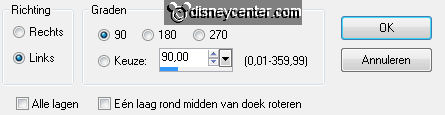
Fill with the flood fill tool the border with gradient linear – with this setting.
21.
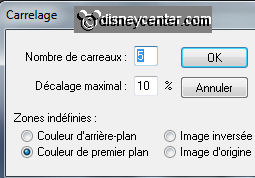
Effects – plug-ins – Oliver’s Filters – Toile d’Araignée – with this
setting - click OK.
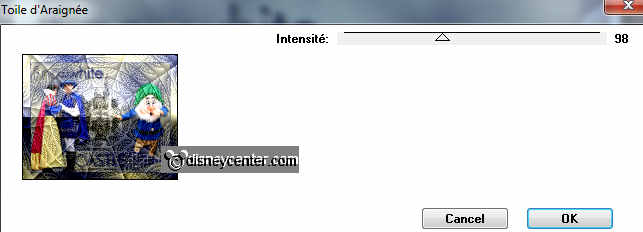
Selections – select none.
22.
Image – add border – symmetric 2 pixels – background color.
Effects – plug-ins – AAA Frames – Foto Frame - with this setting – click OK.
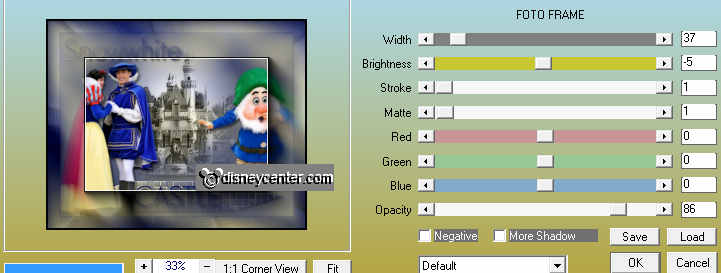
23.
Image – add border – symmetric 25 pixels – foreground color.
Activate the magic wand – with this setting – and select the border.
24.
Layers – new raster layer.
Fill with the flood fill tool the border with gradient linear – settings are
right.
Effects – plug-ins – Oliver’s Filters – Toile d’Araignée – settings are right –
click OK.
Selections – select none.
25.
Image – add border – symmetric 2 pixels – background color.
Effects – plug-ins – AAA Frames – Foto Frame – width op 27 – other settings are
right - click OK.
Image – add border – symmetric 2 pixels – background color.
26.
Image – resize – 80% - all layers checked.
Layers – new raster layer – set your watermark into the image.
27.
Layers – merge – merge all.
Edit – copy.
28.
Open Animation Shop – edit – paste as a new animation.
Edit – duplicate selection.
Edit - select all.
29.
Open animation glitter – Edit - select all.
Edit - copy.
30.
Edit – paste into selected frame of the image.
Repeat this just so often you like it and where you like it.
31.
File – save as – give name – click 3 times at next and than at finish.
Ready is the tag
I hope you like this tutorial.
greetings Emmy
Tested by Cobie.

Tutorial written 18-04-2012