Snowy Christmas
Foreground color at black and background color at #5e0000
1.
Open new transparent image 400x300.
Fill this with the background color.
Layers - Load/save mask - Load mask from disk.
2.
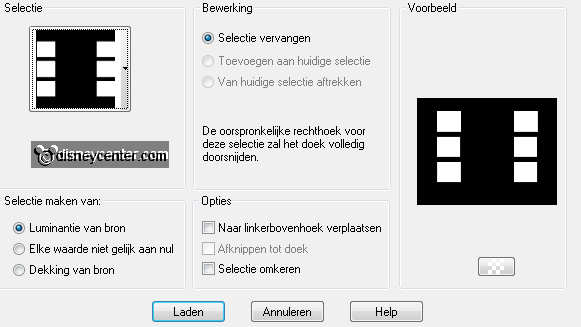
Look mask - sdtMask167 - with this setting.
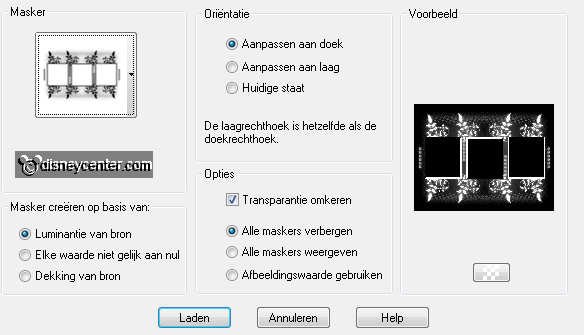
Delete the black mask layer - see below.
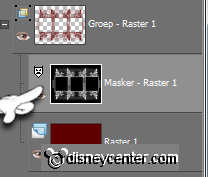
Layers - merge - merge group.
Minimize this image. we use that later.
3.
Open new transparent image 650x500.
Fill this with the foreground color.
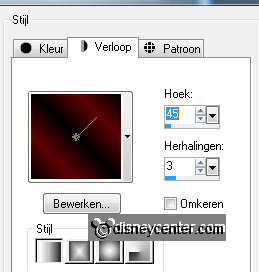
New raster layer - fill this with gradient linear- with this setting.
4.
Adjust - Blur - Gaussian Blur at 15.
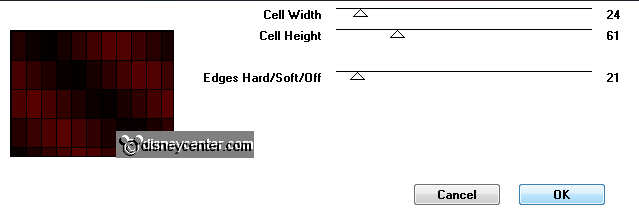
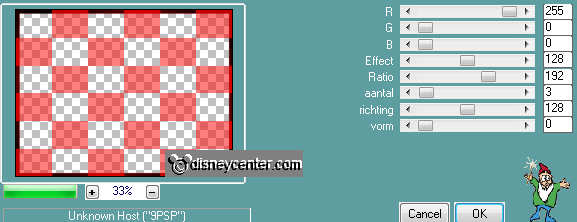
Effects - Filter Factory Gallery V - Plain Mosaic 2 - with this
setting.
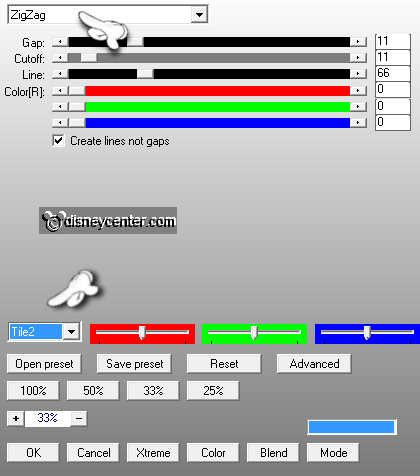
Effects - AP - Lines - Silverlining - with this setting.
5.
Duplicate this layer - put the blend mode at Screen,
Put the opacity of this layer at 65.
Layers - merge - merge down.
Put the opacity back tor 60.
6.
Maximize the mask image - copy - and paste as a new layer on the
image.
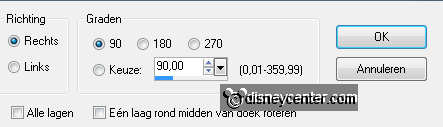
Image - free rotate - with this setting.
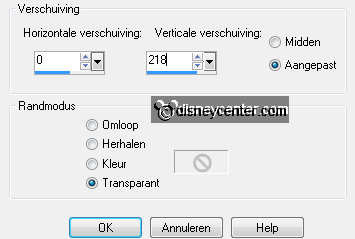
Effects - Image Effects - Offset - with this setting.

Effects - Edge Effects - enhance.
7.
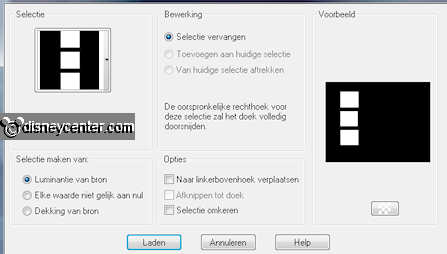
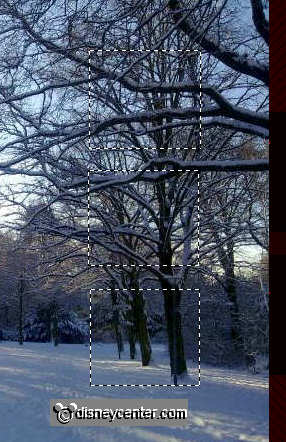
Selections - Load/save selection - load selection from disk -
look Emmykerst - with this setting.
Selections - modify - expand 1.
New raster layer - fill this with the foreground color.
Layers - merge - merge down.
8.
Copy sneeuwbomen and paste as a new layer on the image.
Move it to the left, until you find it good.
9.
Selections - modify - click at the delete key.
Selections - select none.
Put the Blend Mode of this layer at luminance (Legacy)
Layers - merge - merge down.
Duplicate this layer - image - mirror.
10.
Selections - select all - selections - modify - contract
10
Selections - invert - new raster layer.
Fill this with the gradient from point 3.
Effects - PSP Forum - Sanny's blokjes - with this setting.
11.
Selections - select none.
Effects - Edge Effects - enhance.
Repeat Edge Effects - enhance.
12.
Lock raster 3 and copy of raster 3. (the mask layers)
Stay at the top layer - Layers - merge - merge all visible.
Layers - arrange - move 2 times down.
Stay at the top layer - Layers - merge - merge down.
13.
Copy mmkerst1 and paste as a new layer on the image.
Place this in the middle against the border.
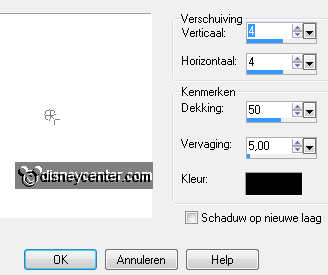
Effects - 3D Effects - drop shadow - with this setting.
New raster layer - put your watermark into the image.
14.
Copy word-art Snowy Christmas and paste as a new layer on the
image.
Effects - Image Effects - Offset - with this setting.
Effects - Penta.com - Color Dot - with this setting.
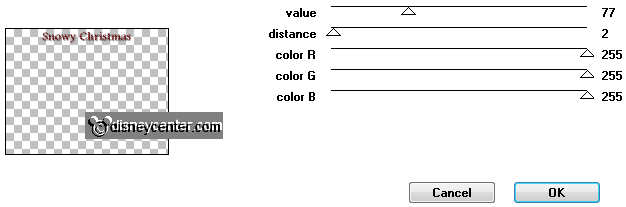
Effects - Edge Effects - enhance.
15.
Lock raster 1. (mmkerst1) and make raster 4 active
Selections - load/save selections - load selections from disk -
look Emmtkerst1 - with this setting.
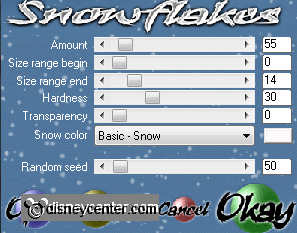
Effects - VDL (Adrenaline) - Snowflakes - with this setting.
Selections - select none.
16.
Open raster 1 the tube layer - edit - copy merged.
Open animation shop - paste as a new animation.
Back in PSP - Click 3 times at the arrow Undo Last Command.
Repeat VDL - Snowflakes - now with random seed at 30.
Selections - select none.
17.
Open raster 1 the tube layer - edit - copy merged.
Open animation shop - paste after active frame.
Back in PSP - Click 3 times at the arrow Undo Last Command.
Repeat VDL - Snowflakes - nu met random seed at 10.
Selections - select none.
18.
Open raster 1 the tube layer - edit - copy merged.
Open animation shop - paste after active frame.
File - save as - give name - click 3 times at next and than at
finish.


